Timelines and Keyvalues
The timeline and keyvalues are at the core of working with Flow. In this guide, we'll go through the basics of working with the timeline, keyvalues and the different things you can do with them.
The easing window is covered in the Easing Curve Window guide.
What are timelines and keyvalues?
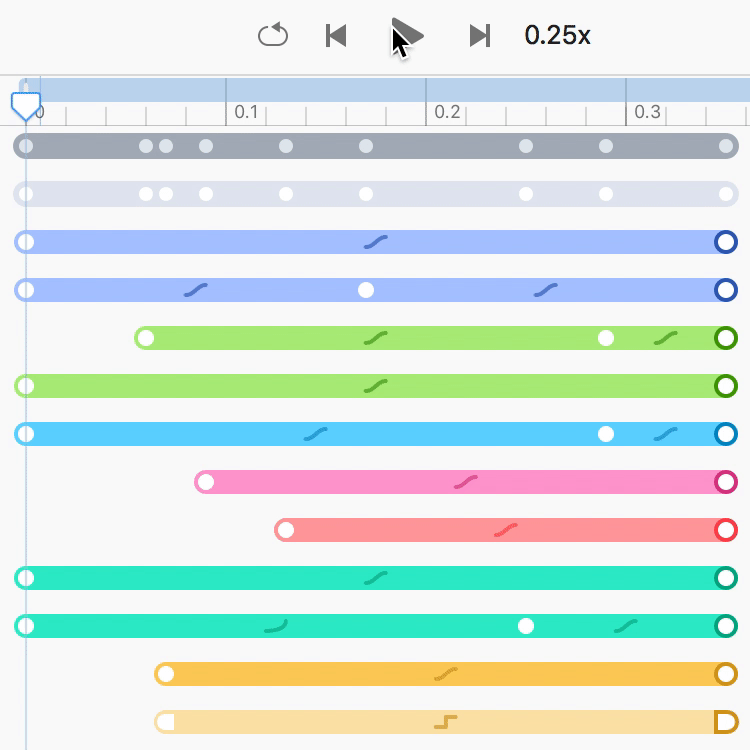
In Flow, a timeline contains tracks and keyvalues that let you craft your animations.
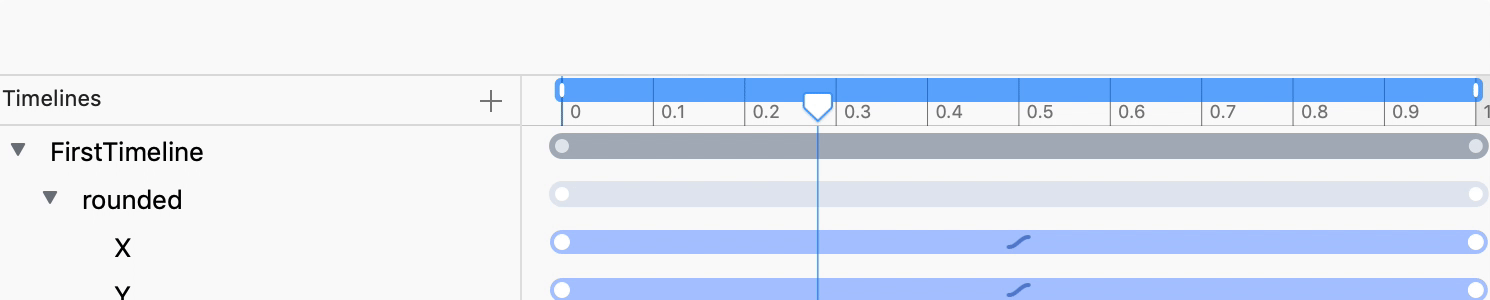
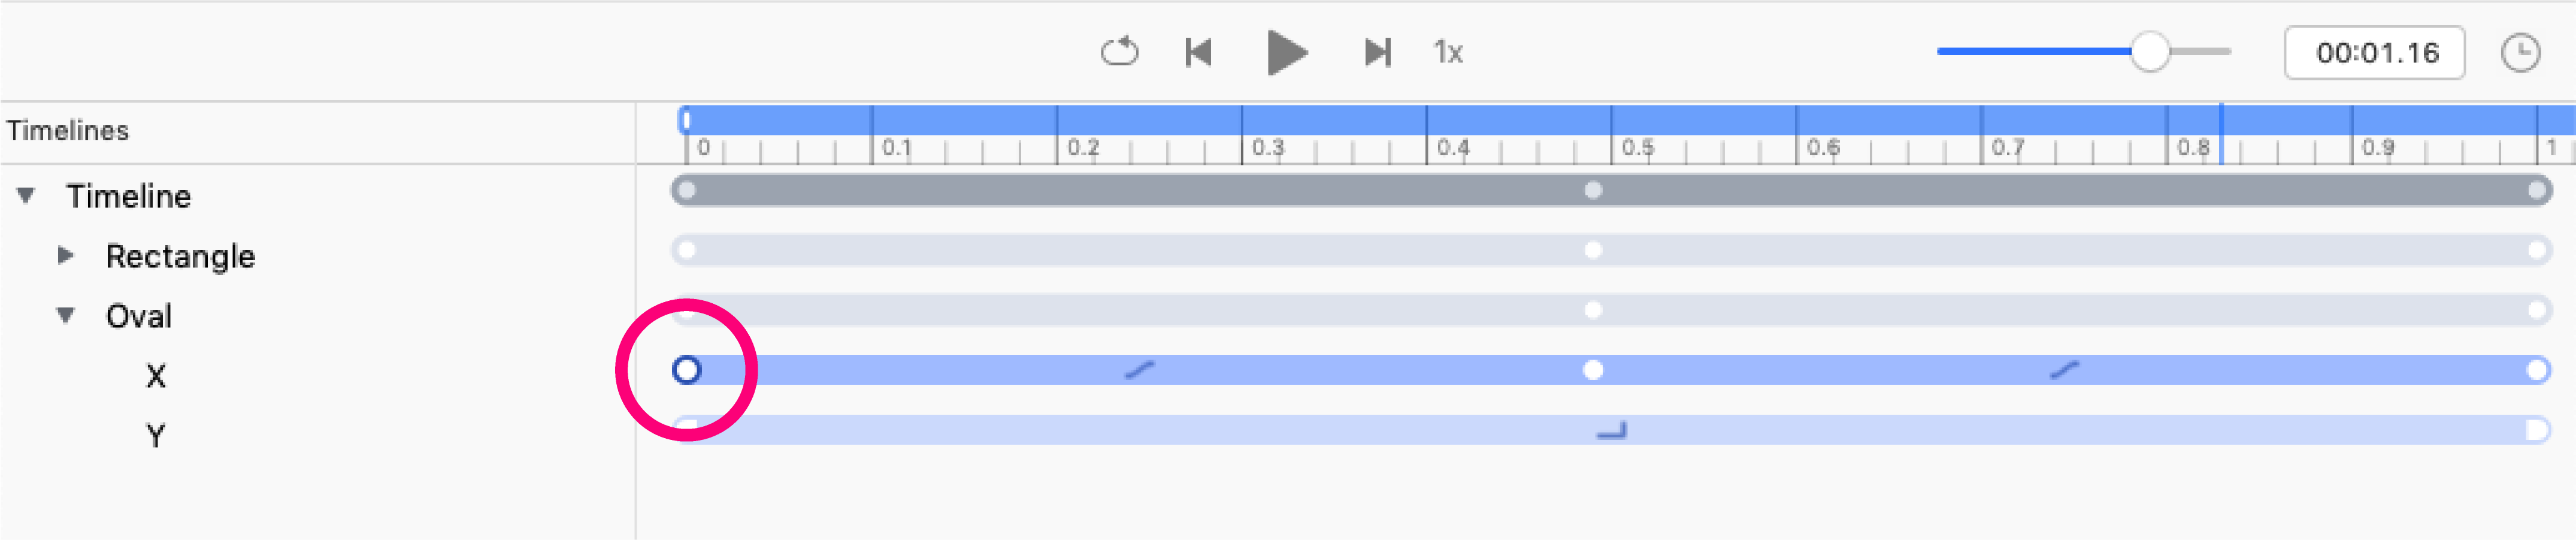
A keyvalue indicates the value of a property at a point in time. Keyvalues are generally indicated by a circle on the timeline, but for more information see Keyvalues: basic controls.
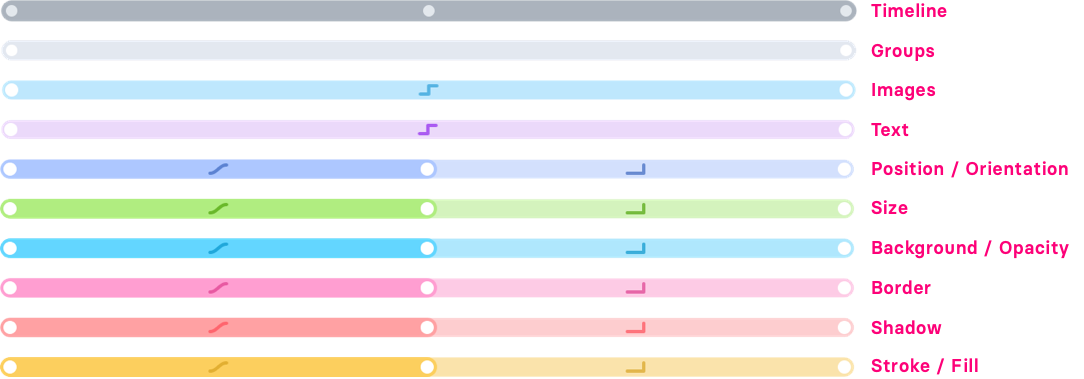
A track is a representation of changes in keyvalues for single property, and its visual style repesents the animations between those keyvalues.
The main things to keep in mind:
- Timelines act more like layers or groups for animatable objects (and properties) that are on the Stage.
- Each object that appears in the timeline, whether an image or vector shape, has its own set of animatable properties.
- Keyvalues are associated with the animation of a specific property.
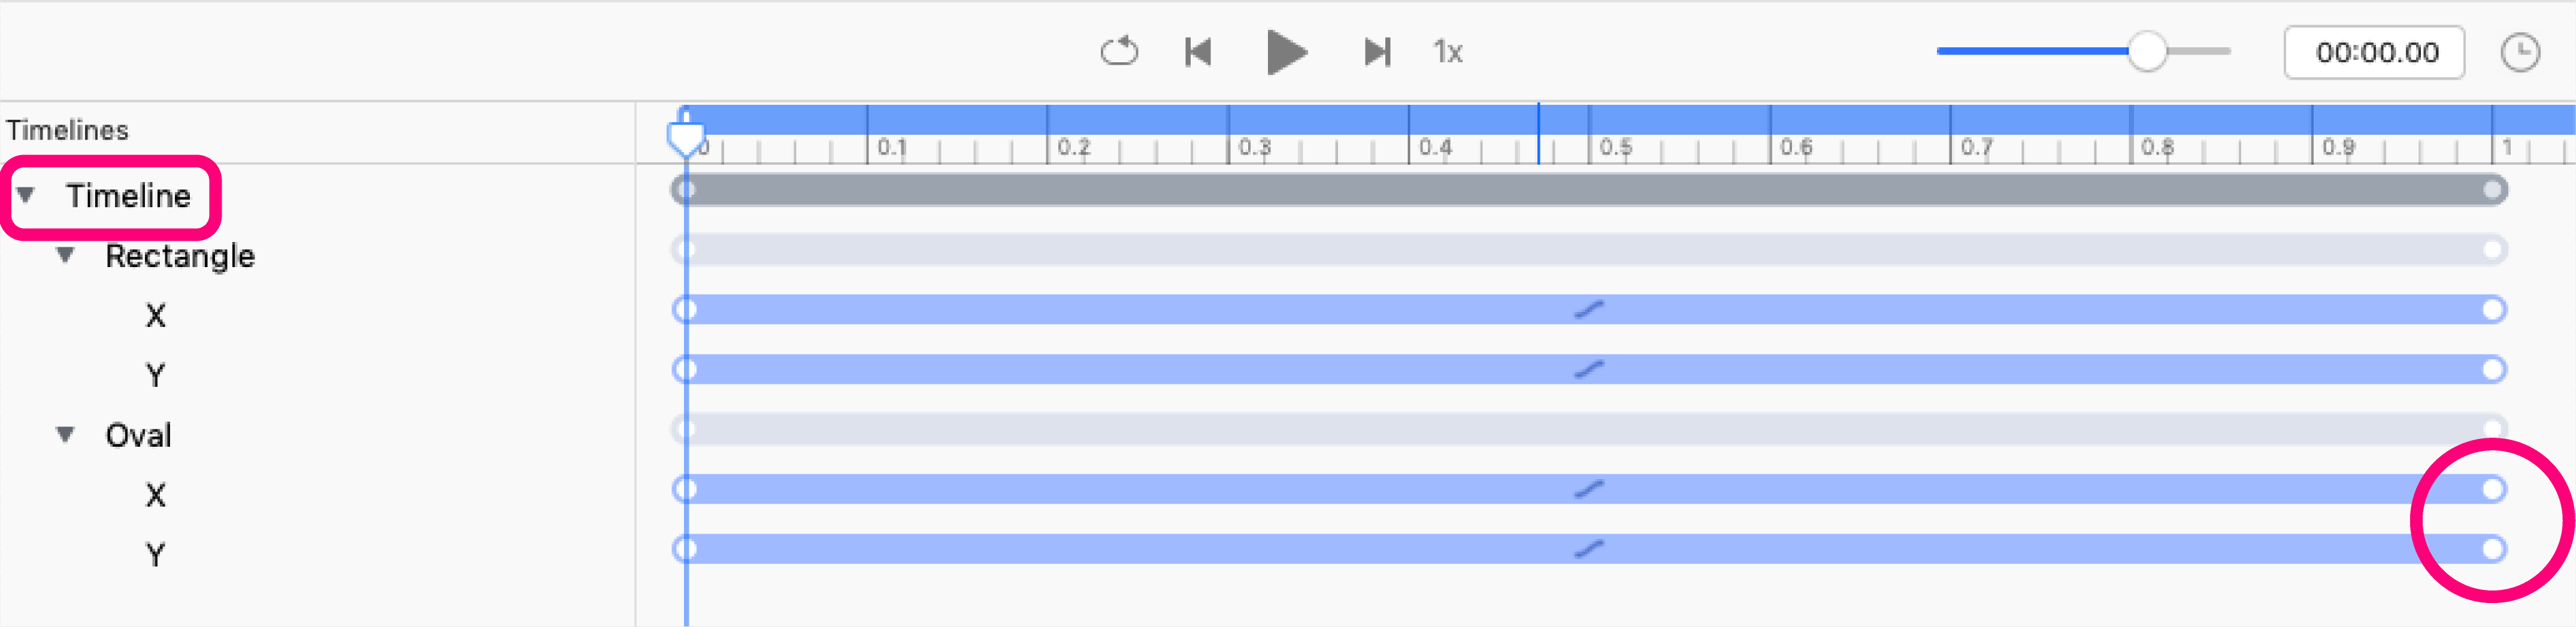
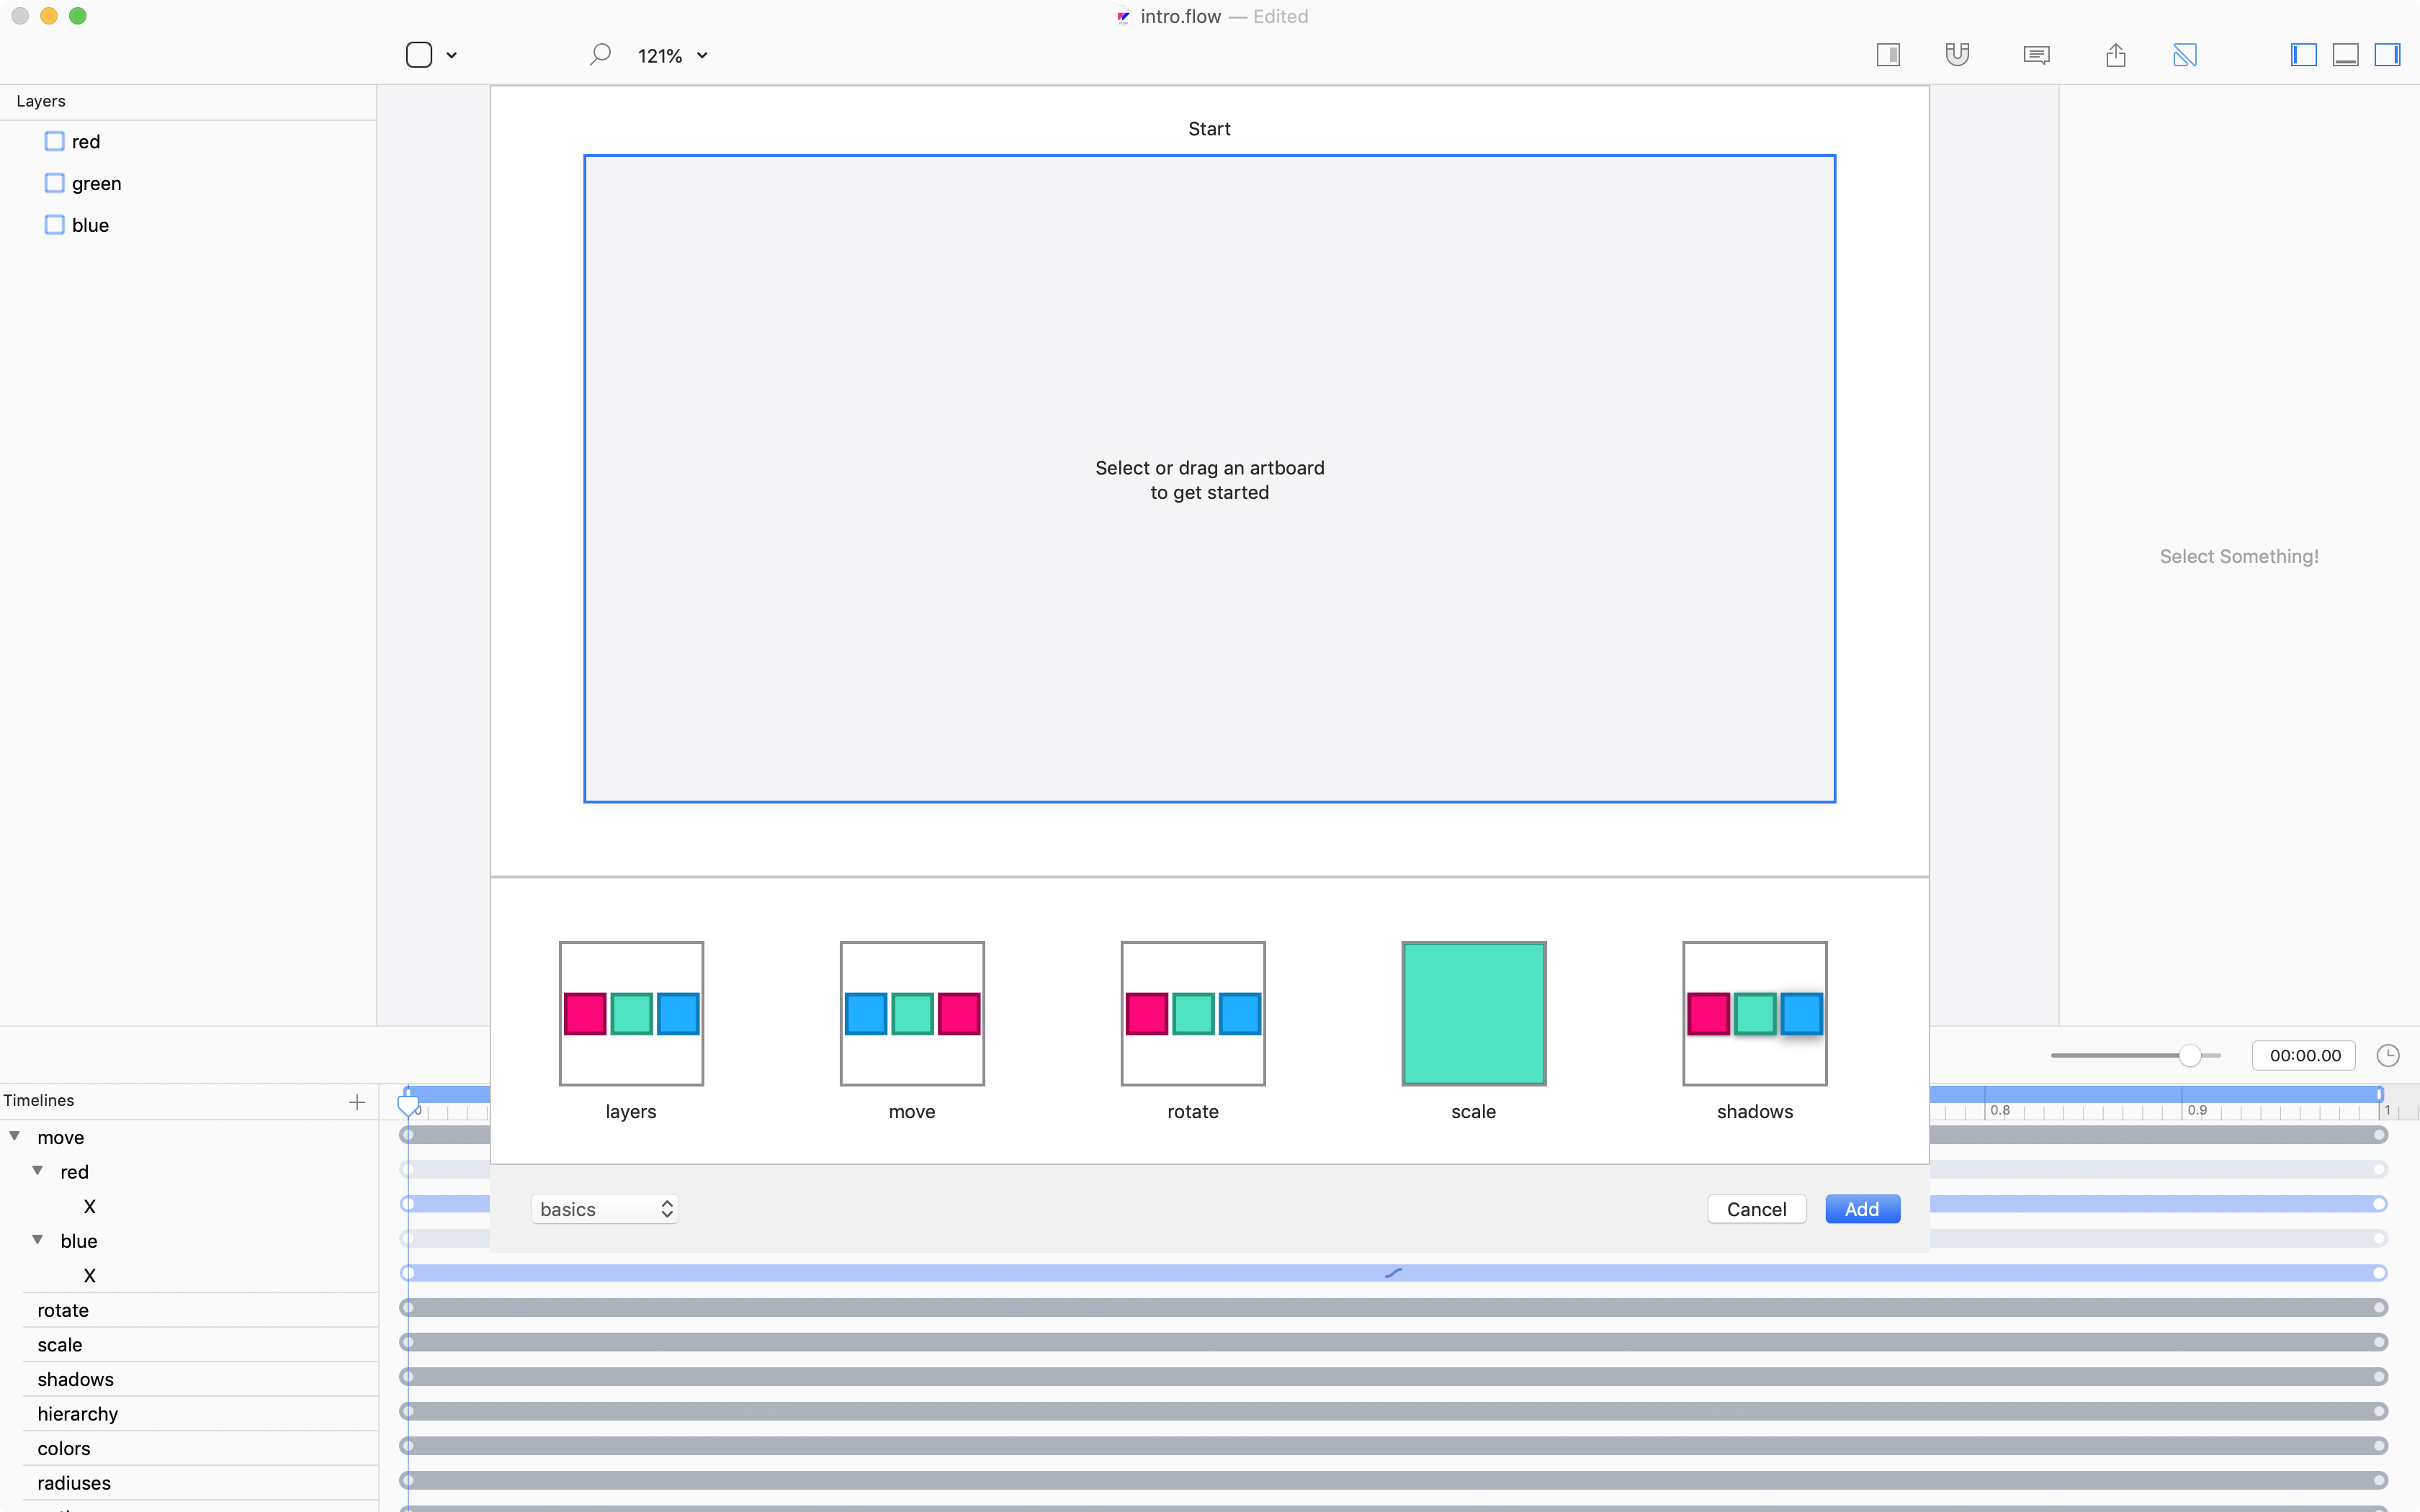
- You can have multiple timelines in a project file and animate the same objects in different ways using them. The
intro.flowfile is a perfect example of this – it takes the same basic files and animates them in multiple ways.
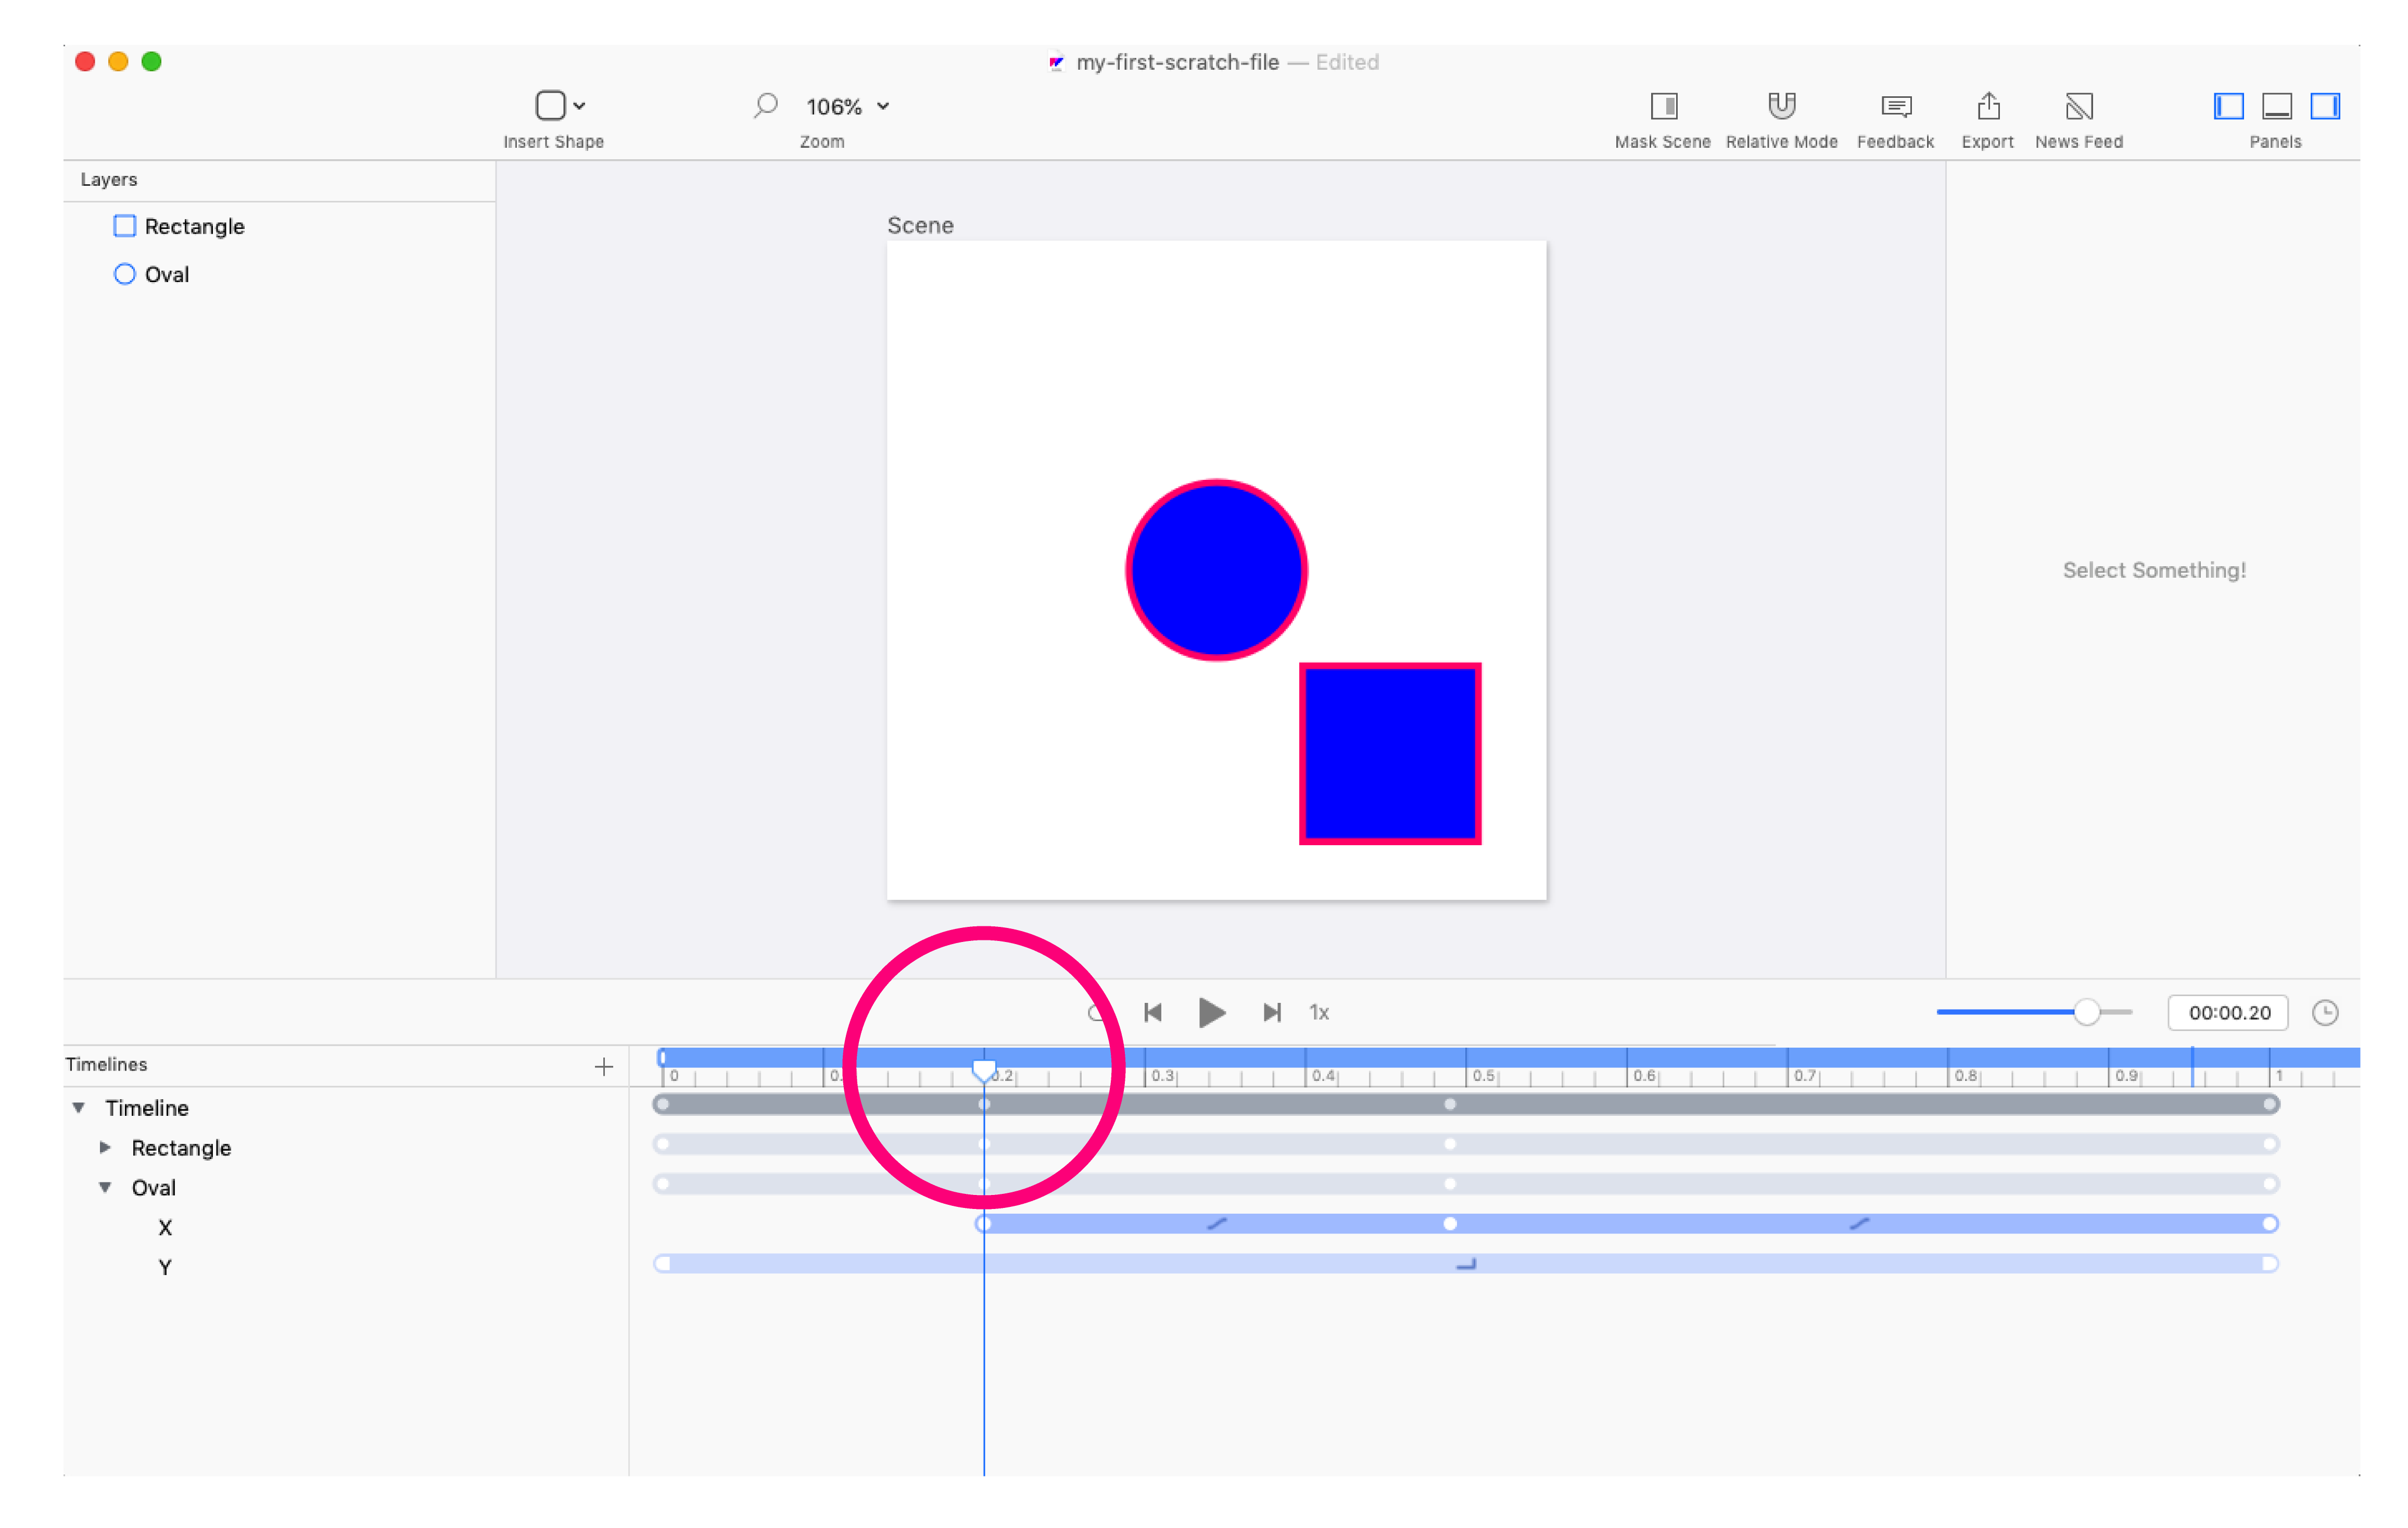
The Timeline
Basic Controls
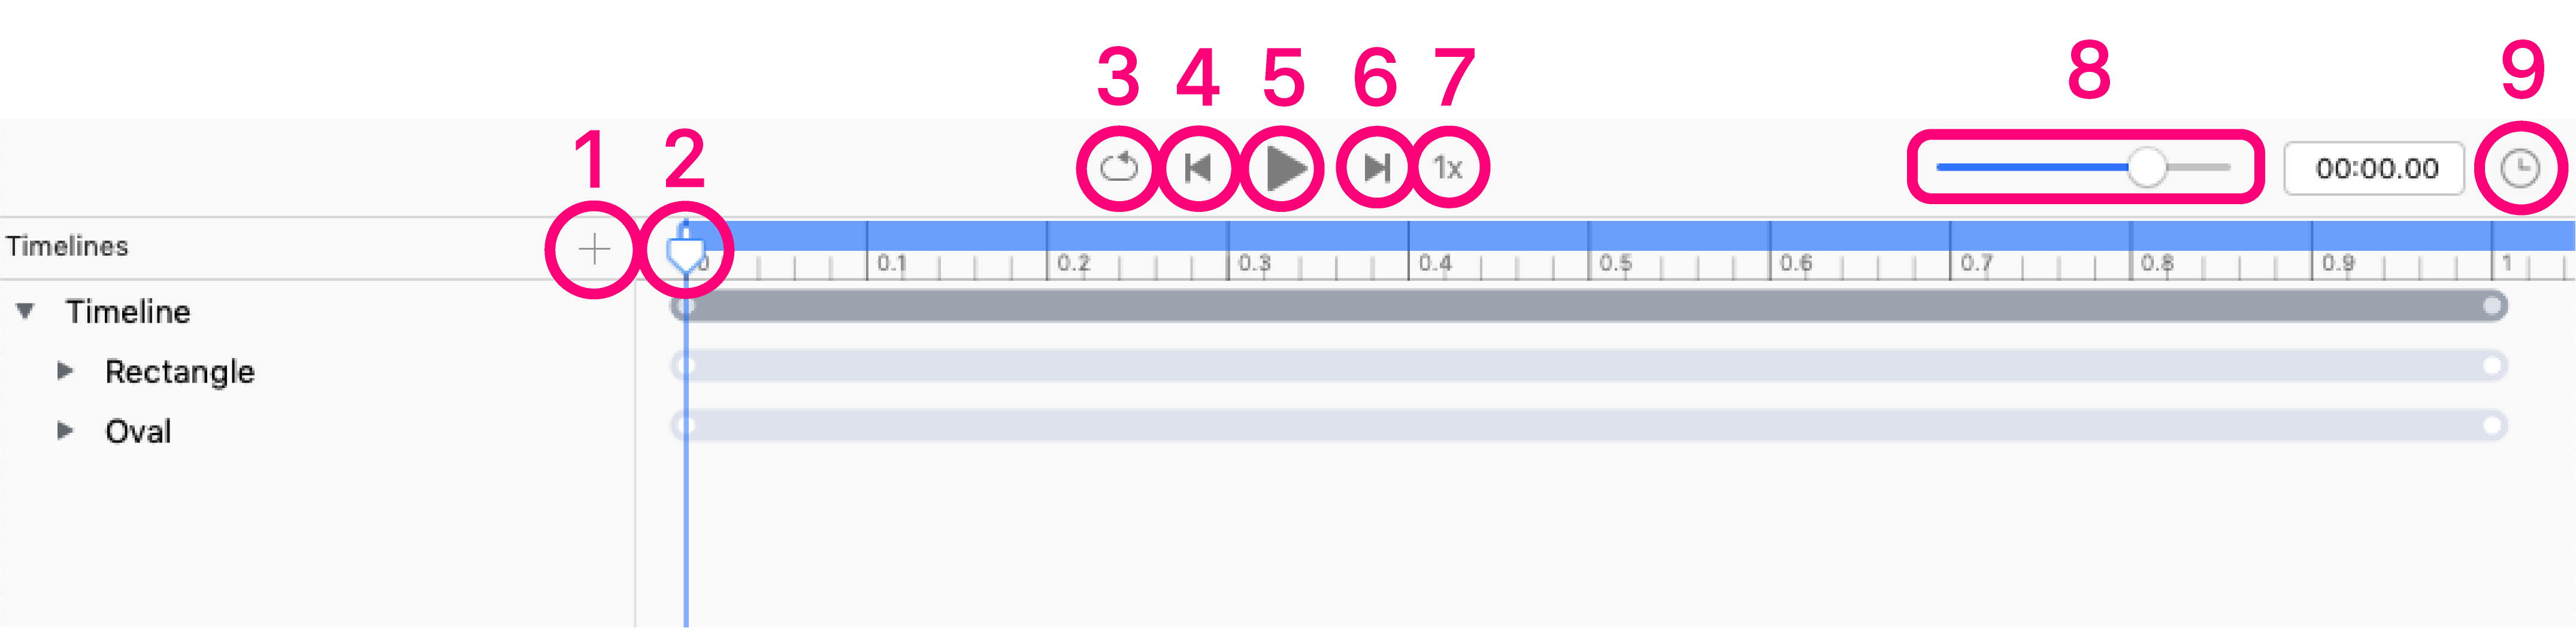
Let’s start with the basics. The timeline has the following controls:
Some tips:
- When the timeline is playing, the
Playhead’s position indicates the animation’s progress. When the timeline isn’t playing, the playhead indicates where a keyvalue will be added, if you make any property changes. - You can change a timeline’s playback speed in intervals of
0.25x,0.5x,1x,2x, and4x. - The
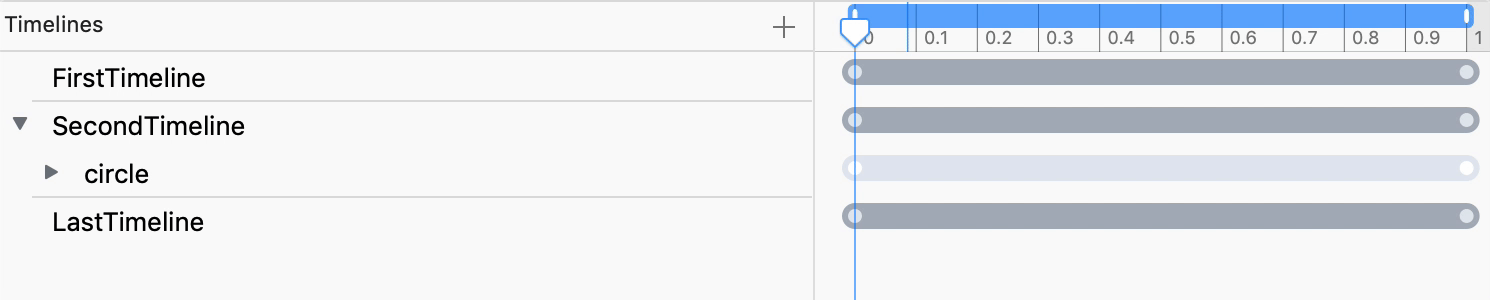
Scale Timelineslider is useful when working with quick (less than 1 second) animations where you need to add lots of keyvalues. Scale it up to ‘zoom in’ for more detail! - Timelines have different colors depending on the property they animate. Timelines can also have gaps in them, if the property doesn’t change during that time period.
Working with the Timeline
Creating a new Timeline
There are a couple ways to create a new timeline, but the easiest is to click the + button to add a new timeline.

The behavior of adding a new timeline changes based on whether you used a linked Sketch file to create your Flow file.
Without a Linked Sketch
If you create a new timeline, you’re presented with an empty stage and artboard.
You can add shapes, images and other layers as you might expect.
You can copy and paste assets (e.g. text / images) from outside of Flow as well.
With a Linked Sketch File
Creating a new timeline presents the following:
You’ll be asked to select a start and end artboard. Some artboards might be grayed out.
For more information, see Import and Animate Sketch Files.
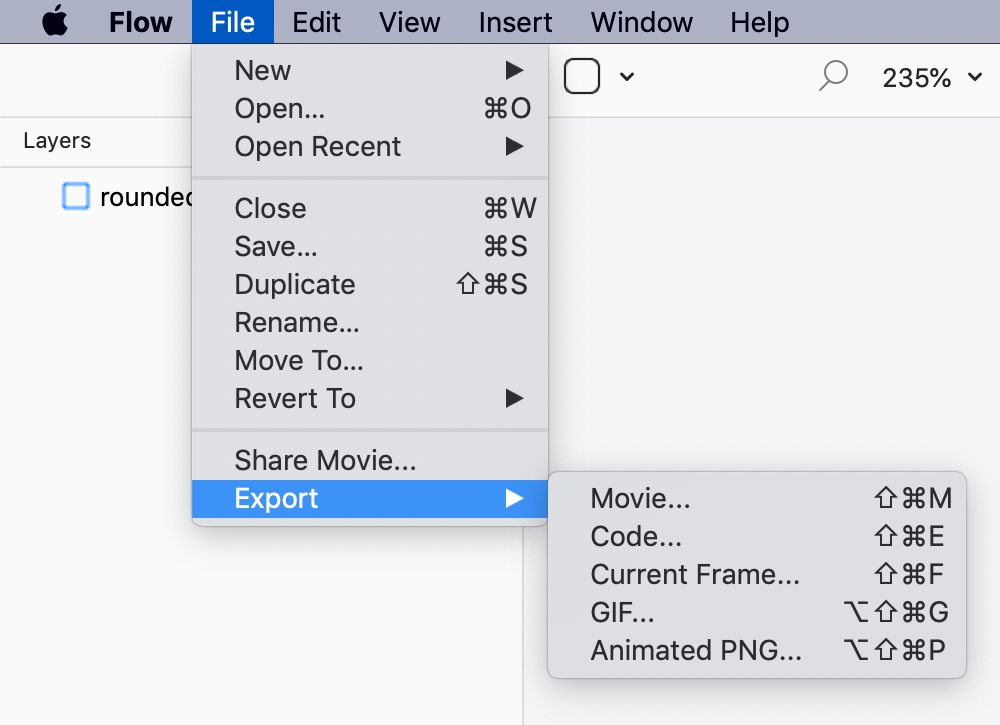
Exporting a Timeline
You can export the current timeline as:
- A
.mov - A
.gif(animated) - A
.apng(animated) - A
.png(single frame) - CODE! (various formats)
To export a timeline, select it and navigate to File > Export.
For media files, the currently selected timeline is the one you export!
Other Timeline Controls
Track Controls
You can Delete, Rename, Duplicate and Reverse a timeline or one of its tracks by right-clicking:
The Time Range
You drag the ends of the Time Range bar to set a specific window of time within which playback will occur.
When the playhead is within this area it will stop at the end, and loop back to the start of the time range.
You can drag the playhead outside of this area, and the next time it plays through the timeline it will enter the range again and abide by its start/end points once more.
Keyvalues
Basic Controls
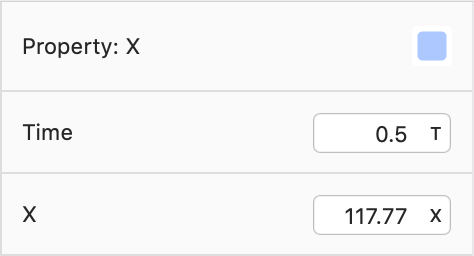
Keyvalues represent one property’s value at a specific point in time.
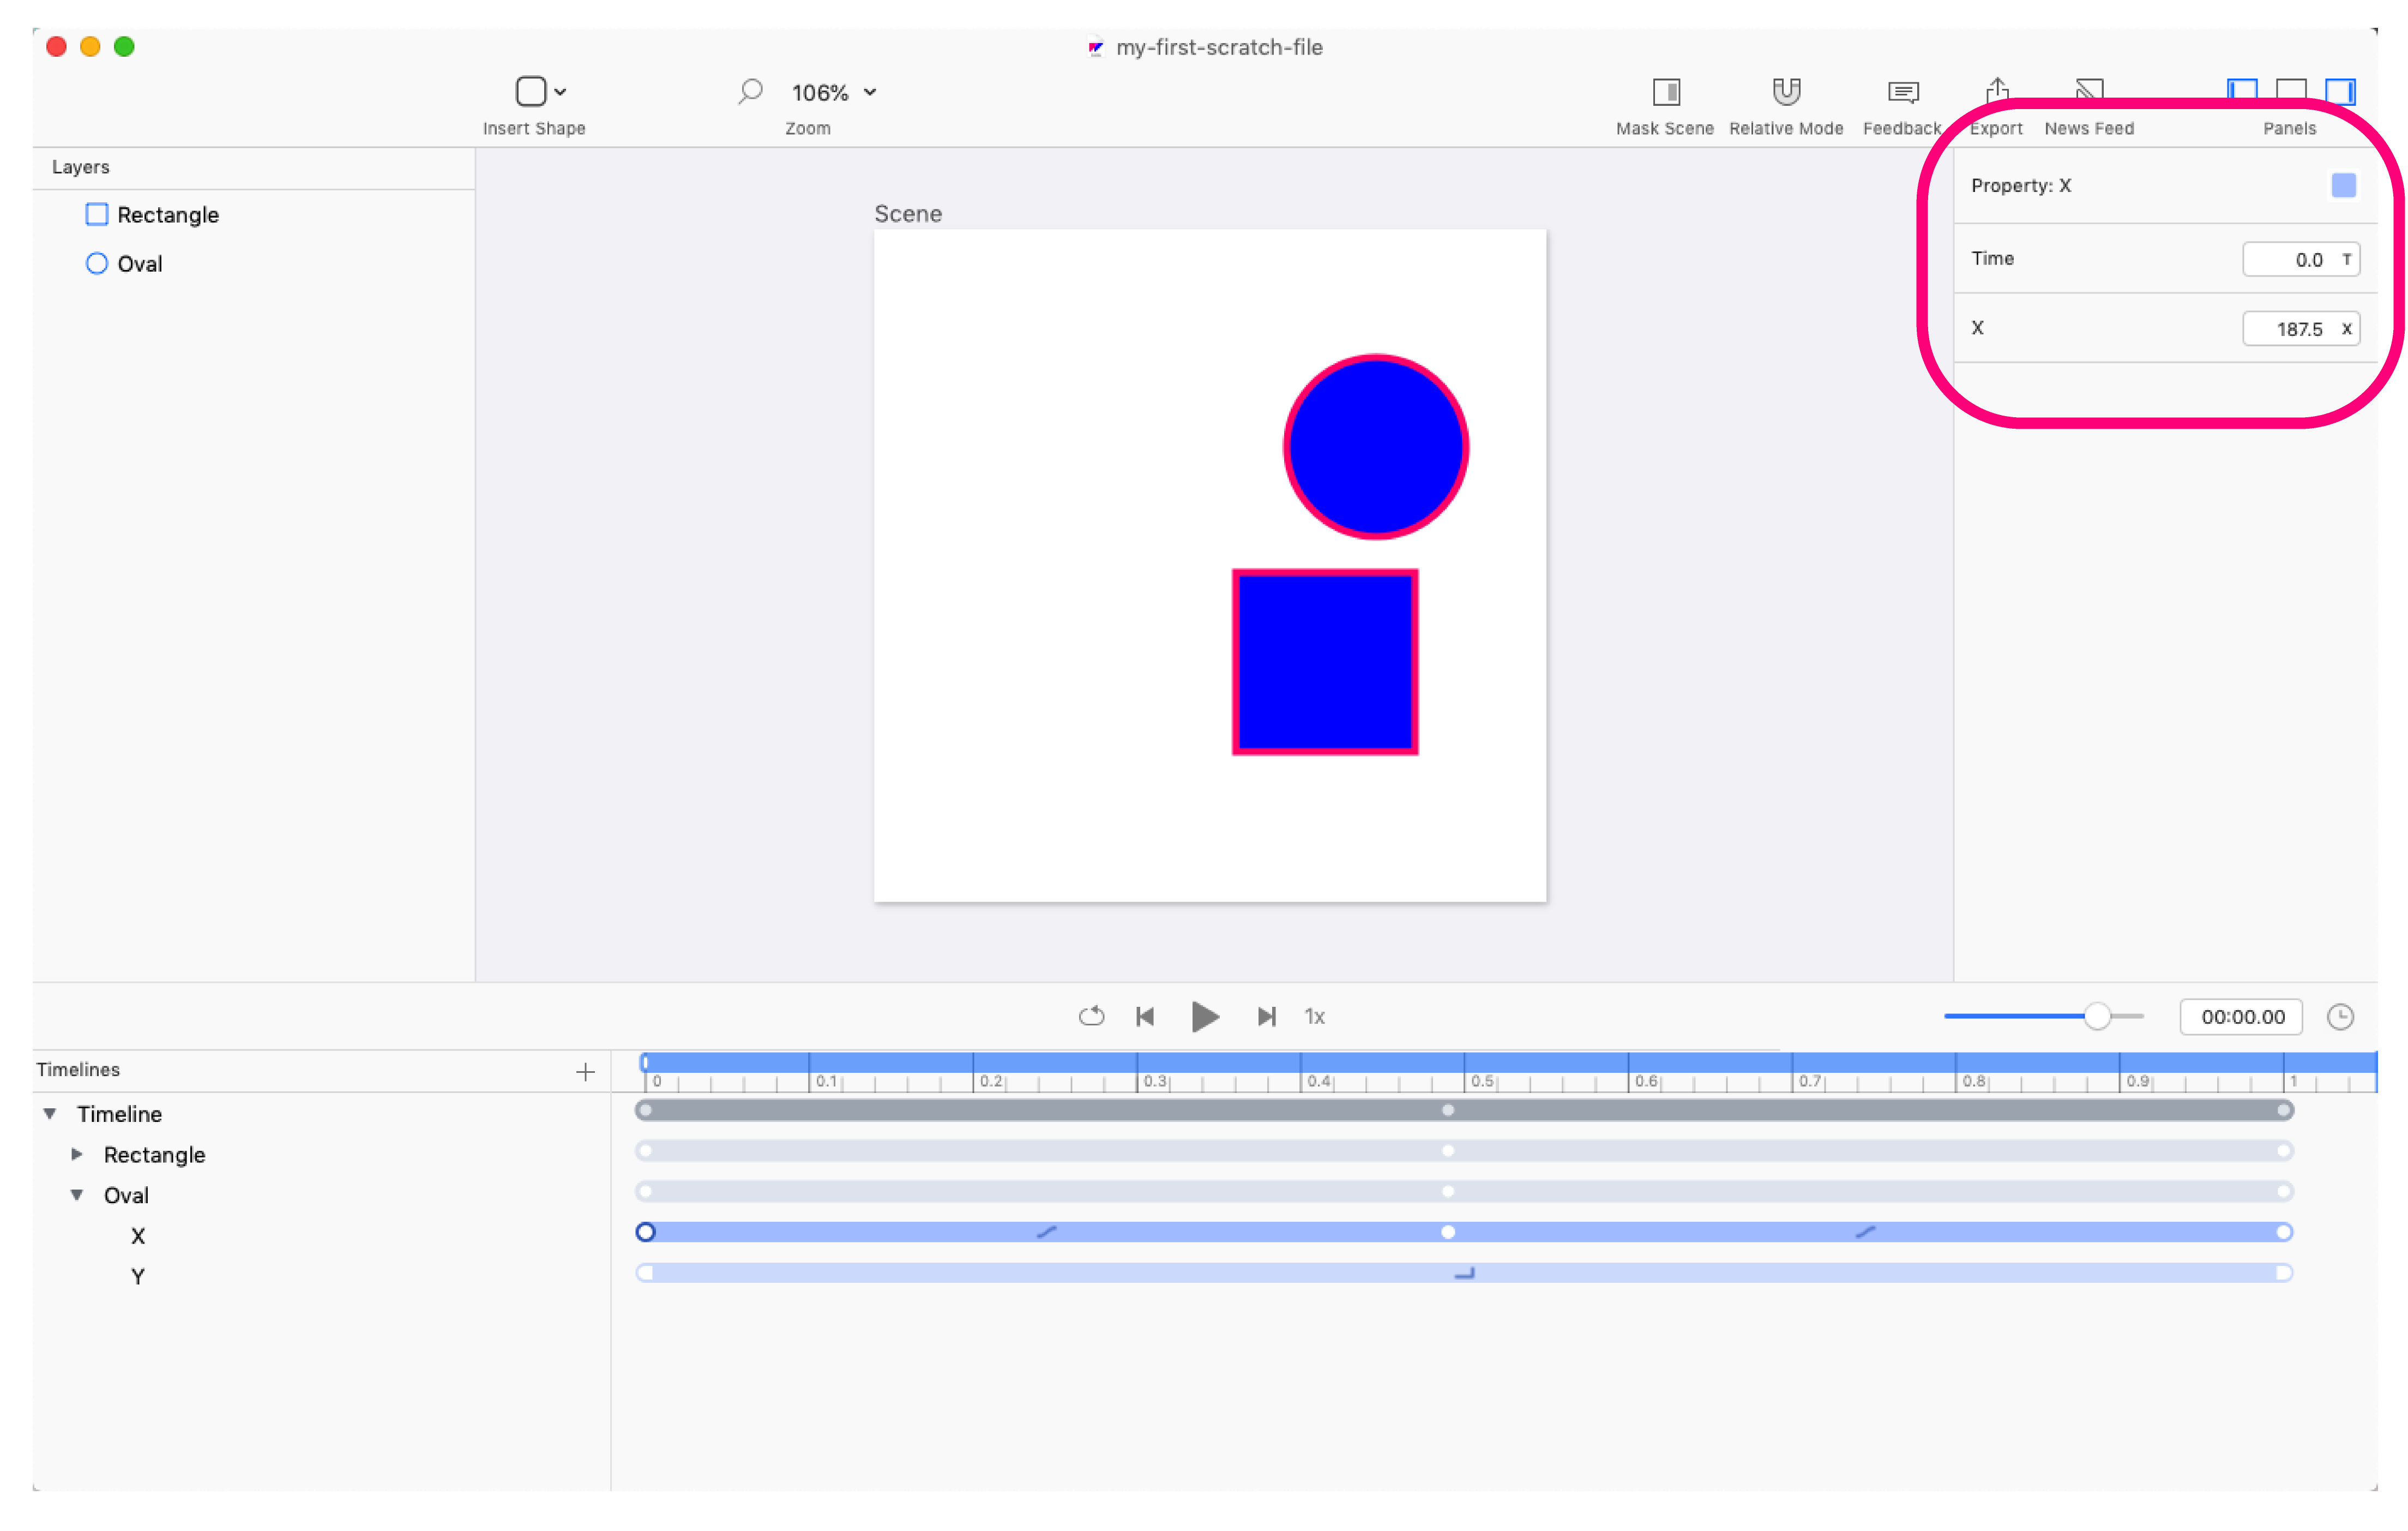
When you animate more than one property in time like the position of a layer – i.e. the x and y coordinates – you create two tracks. Each track has its own value one for x movement, and one for y.
Keyvalues are represented with a circle on the timeline.
Some keyvalues have limited or no options for easing, and can represented with a circle (easing on both sides), half-square (step on one side) or square icons (steps on both sides).
Working with Keyvalues
Creating a new Keyvalue
Creating a new keyvalue is automatic. All you need to do is place the playhead where you want it to be and then edit an object’s properties.
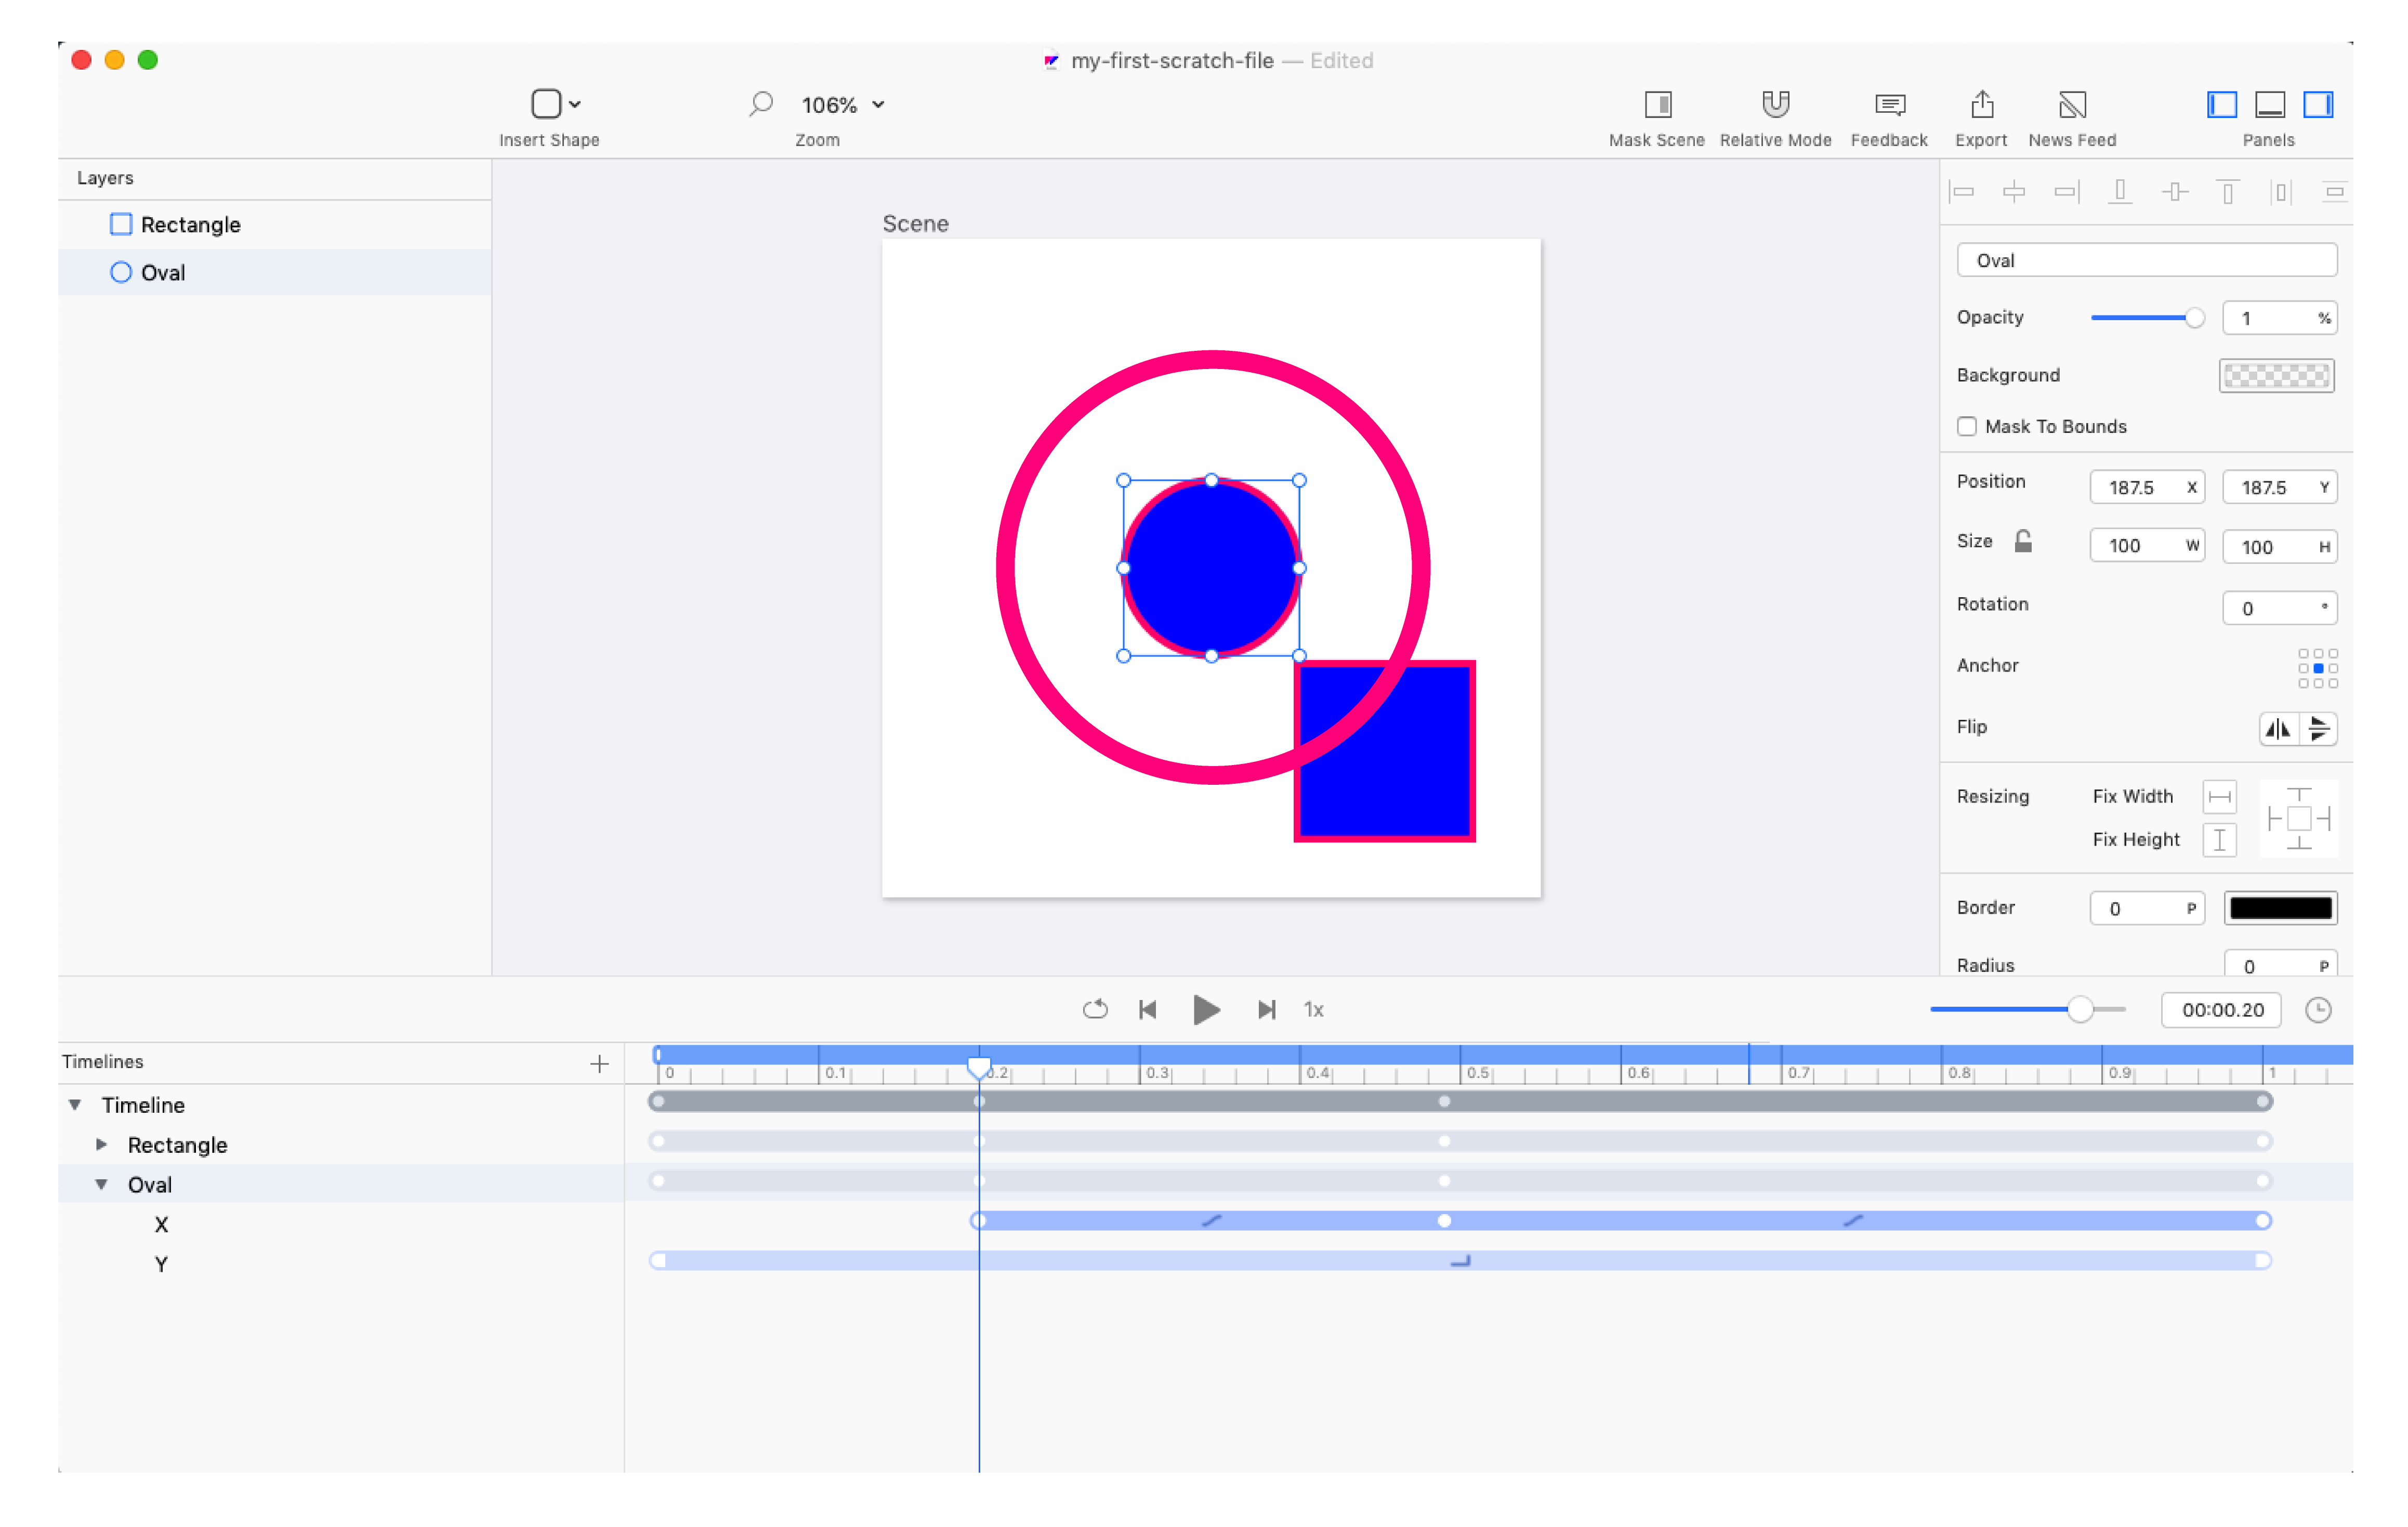
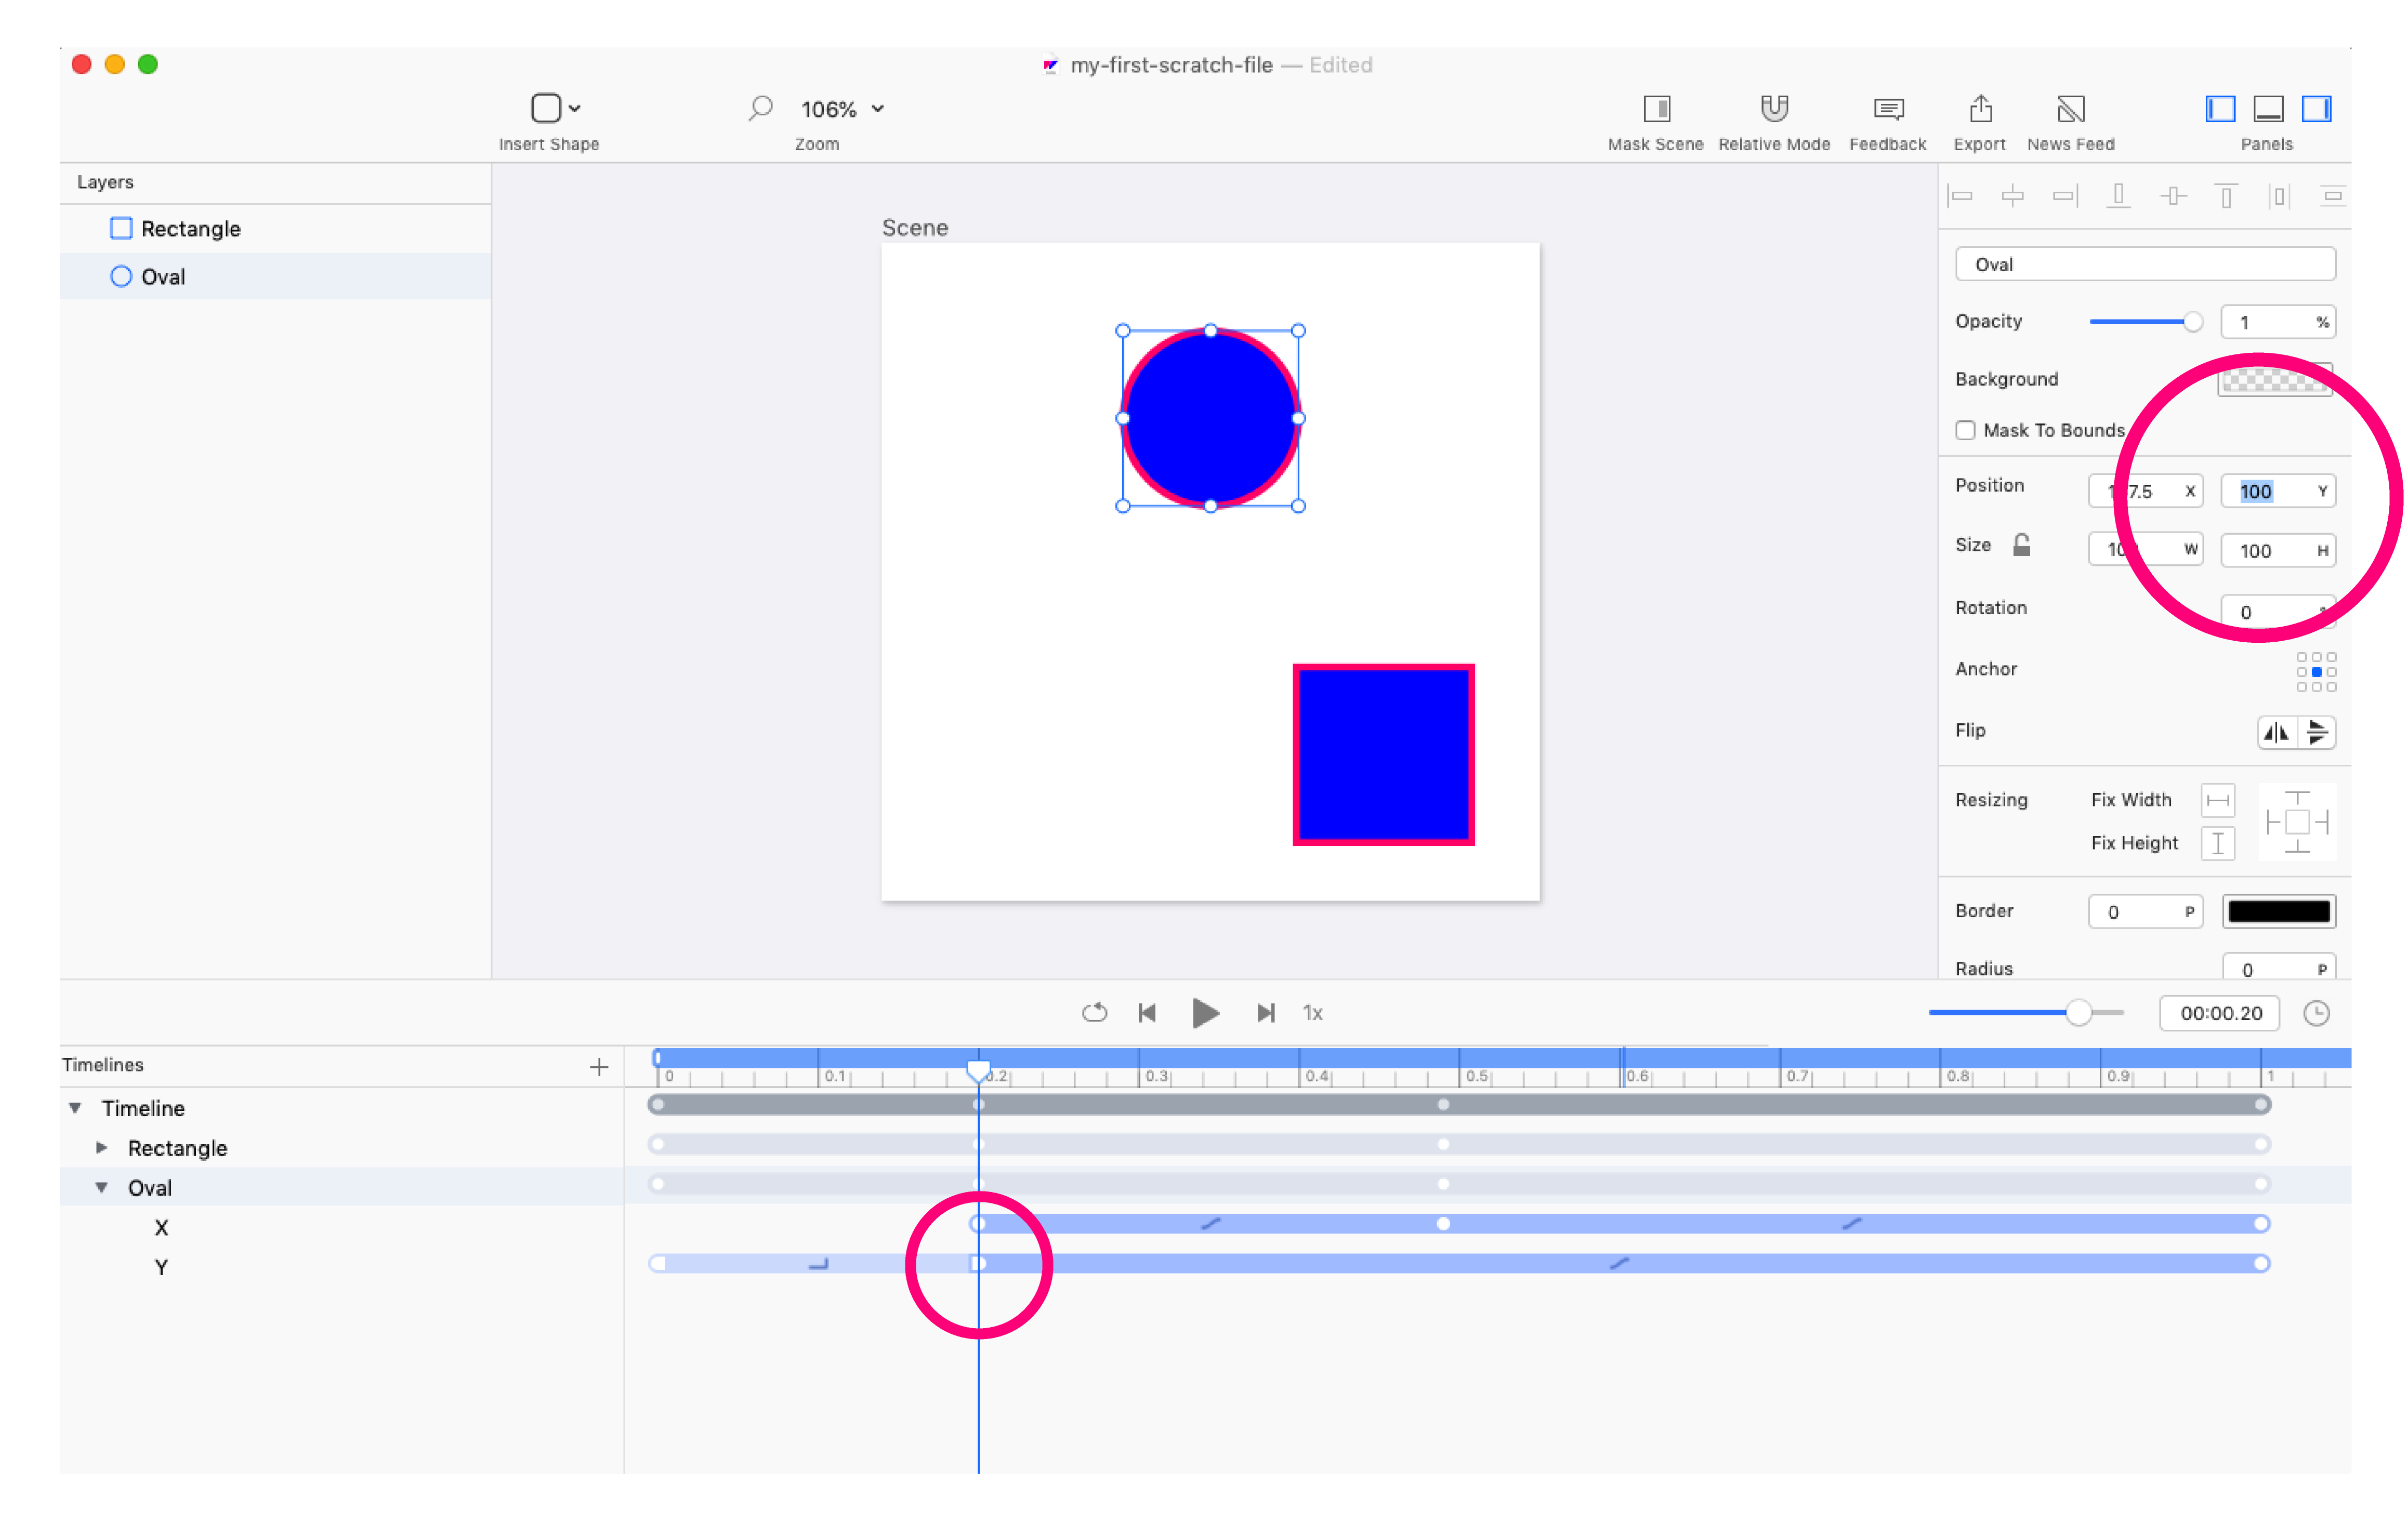
As soon as you edit a property, Flow creates the keyvalue for you. You can then reposition the keyvalue if needed!
If you’re making additional changes to a property you’ve already edited, Flow adds a new keyvalue to the existing track for that property. If you’re animating a new property, Flow creates a new track for that property and adds a keyvalue to it.
Moving a Keyvalue
Move keyvalues on the timeline by selecting them and dragging them.

You can also move a keyvalue by selecting it and editing the Time property’s value in the Properties pane.
You can’t set the time to less than 0, but you can set it beyond the current duration of the timeline. It will adjust the length of the current timeline.
Selecting Keyvalues
You can select a keyvalue by clicking the keyvalue symbol.
When you select a keyvalue, the Properties panel shows the values assosciated with the keyvalue. In this case, it’s the X position of the circle.
AREA-Select
You can use the mouse to select a group of keyvalues.

SHIFT-Select
While pressing the Shift key, selecting a keyvalue will also select ALL OTHER KEYVALUES prior to the selected one on its track.

CMD-Select
While pressing the Command key, you can select multiple individual keyvlaues at the same time.

Duplicating Keyvalues
Copy / Paste
When you select a keyvalue, then copy and paste it, the value is pasted a the current time of the playhead.

When you copy/paste keyvalue groups, the first keyvalue is pasted at the playhead’s position, and the rest relative to the first keyvalue.

The playhead also moves to the time of the last keyvalue.
Option-Drag
You can option-drag a kevalue to duplicate it. When you have 2 equal keyvalues side by side in the timeline, there appears a gap. The gap indicates that there is no animation during that time.

You can also duplicate groups of keyvalues.

Keyvalue Groups
You can move groups of keyvalues in the same way was single values.

What’s cool about groups is you can scale their relative positions to one another.
Scaling Keyvalue Groups
Pressing SHIFT while you move a keyvalue at either end of the group, will scale the entire selection.

Properties Panel
When you select a group of keyvalues, a special property panel becomes avaialble. It looks like this:
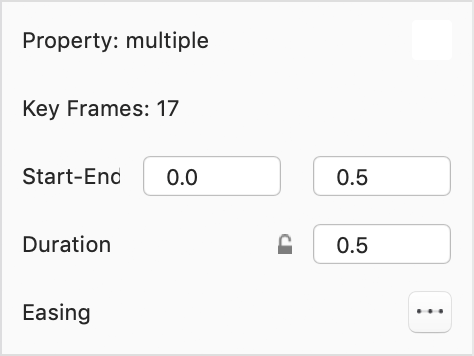
Here are some notes about this panel:
- If all the values are the same type, it will show at the top.
- You can see the number of keyvalues currently selected.
- You can edit the start and end points of a group, which will scale the group unless…
- You can lock the duration of the group, which means setting the start / end will move the group
- You can see, and edit, the easing curves for the group…
Using the properties panel you can set the beginning or end points of that group.
A keyvalue group will scale if you set the start or end property. Or, you can lock the duration of the group, which will result in the whole group moving and keeping its duration.


This locks the relative positions of keyvalues to one another. This means their timing stays consistent when you edit the start or end values of the group.