
Create Launch Animations With Content on the First Frame
If your animation has content on the first frame, then you need to spend a bit of time in Xcode to make the launch sequence look smooth.
In this tutorial, we’ll export an animation with content on the first frame – it will also have a blue background.
Grab this animation to begin:
Generate Launch Animation
First thing to do is generate a launch animation from Flow using the file you just downloaded.
Export the animation using the
iOS - Launch Animationoption.
Here’s what your initial project will look when you run it:

Animation Background
Let’s start by changing the background color for the animation view.
In Xcode:
- Select
Main.storyboard - Select the
viewfrom theArtboard View Controller Scene - In the properties panel, navigate to the
Attributes Inspector - Change the background color to blue
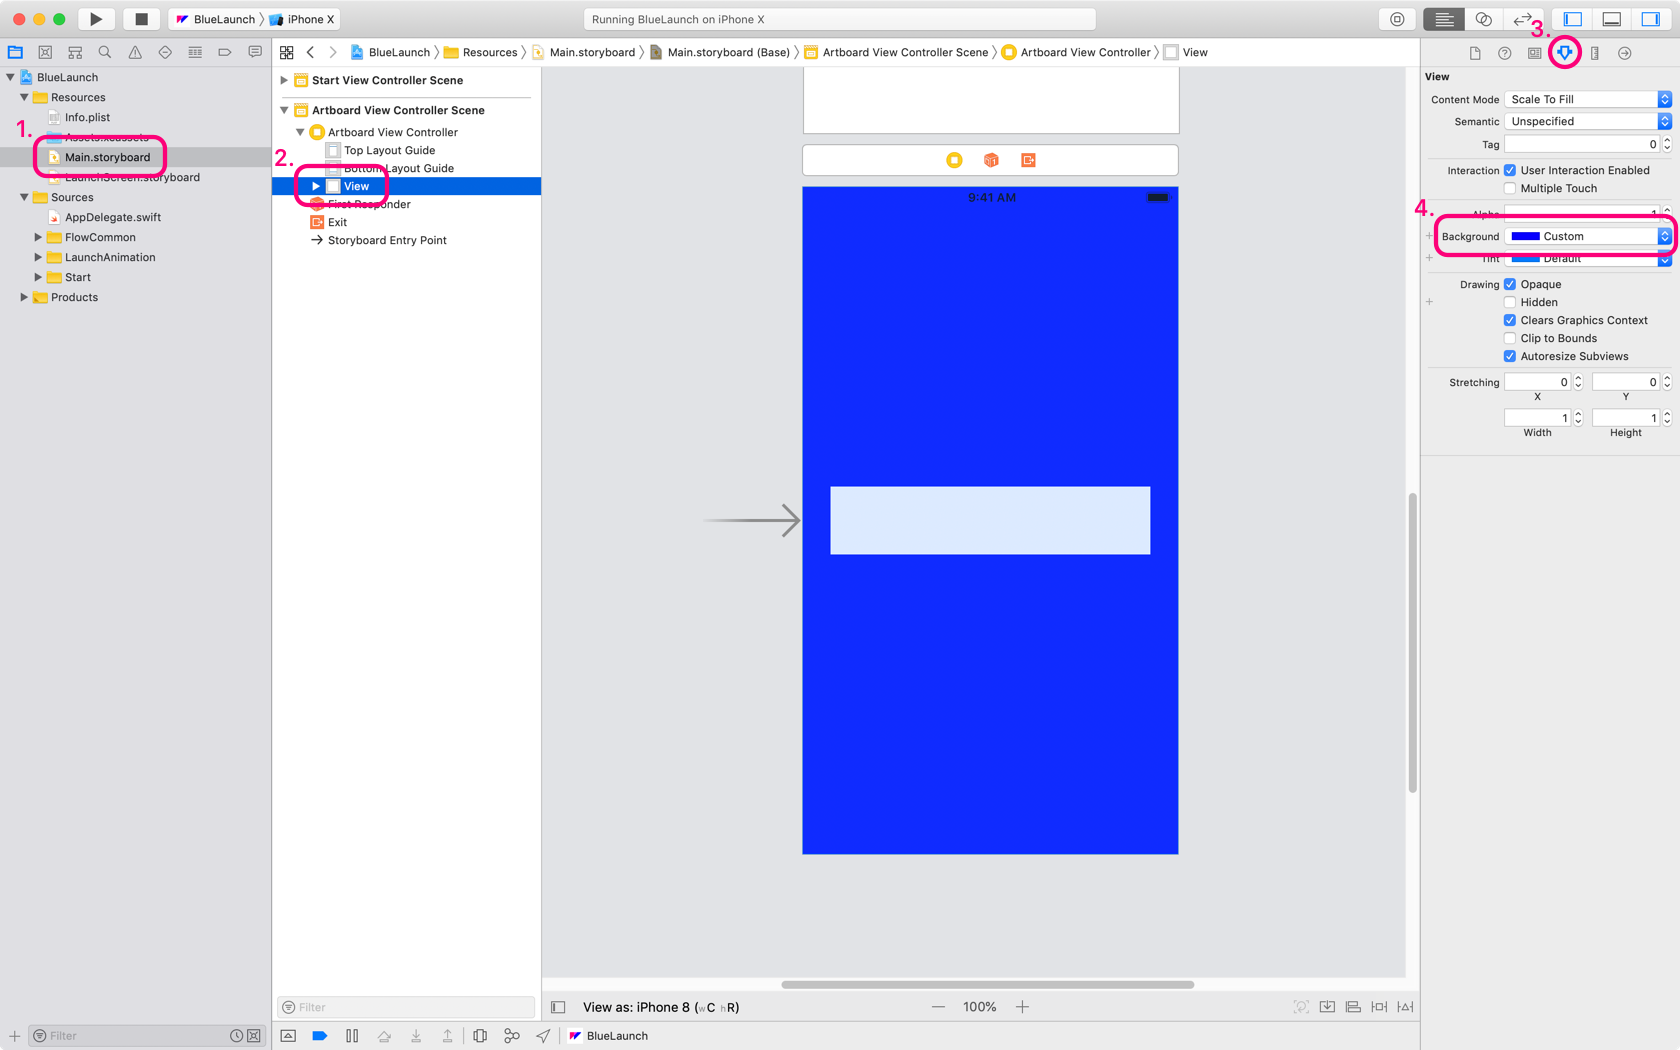
Great, now your launch animation will look like this:

Launch Screen
Next, let’s prepare our launch screen to match our animation.
In Xcode:
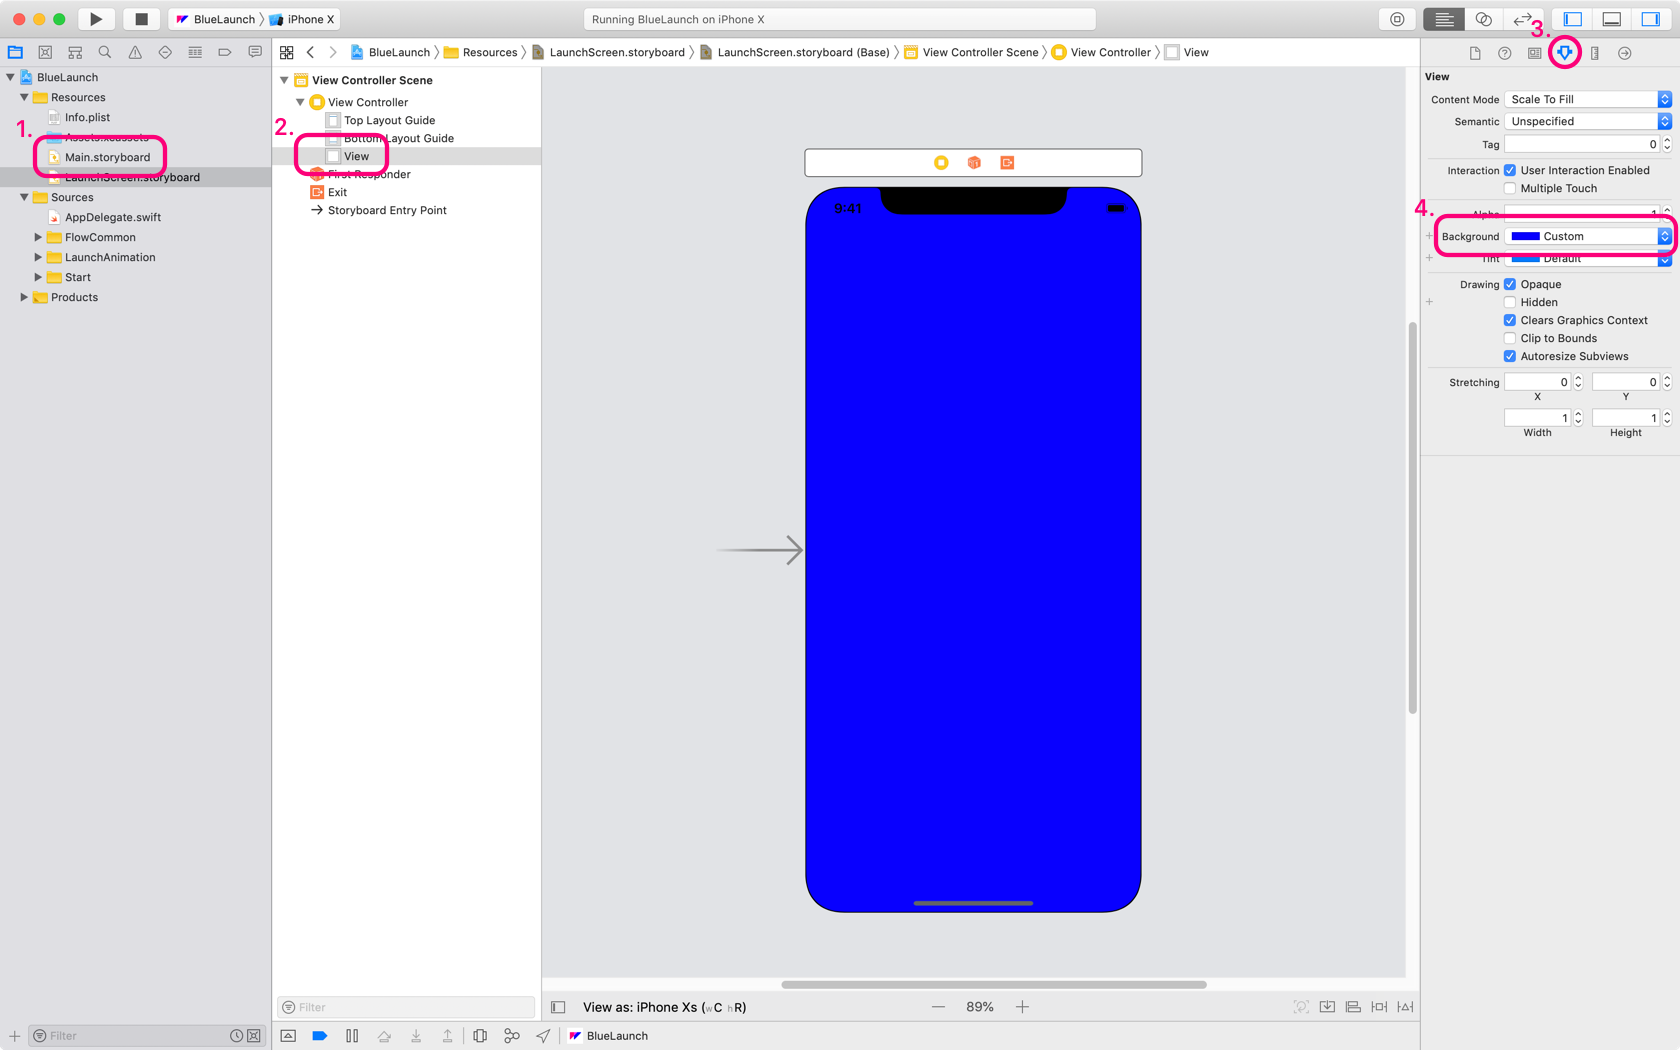
- Select
LaunchScreen.storyboard - Select the
viewfrom theView Controller Scene - In the properties panel, navigate to the
Attributes Inspector - Change the background color to blue
Our next task is to create the asset that will match up with the first frame of our animation. This is quite easy to do.
In Flow:
- Move the playhead to the beginning of the animation
-
Hit
⇧⌘Fto export the current frame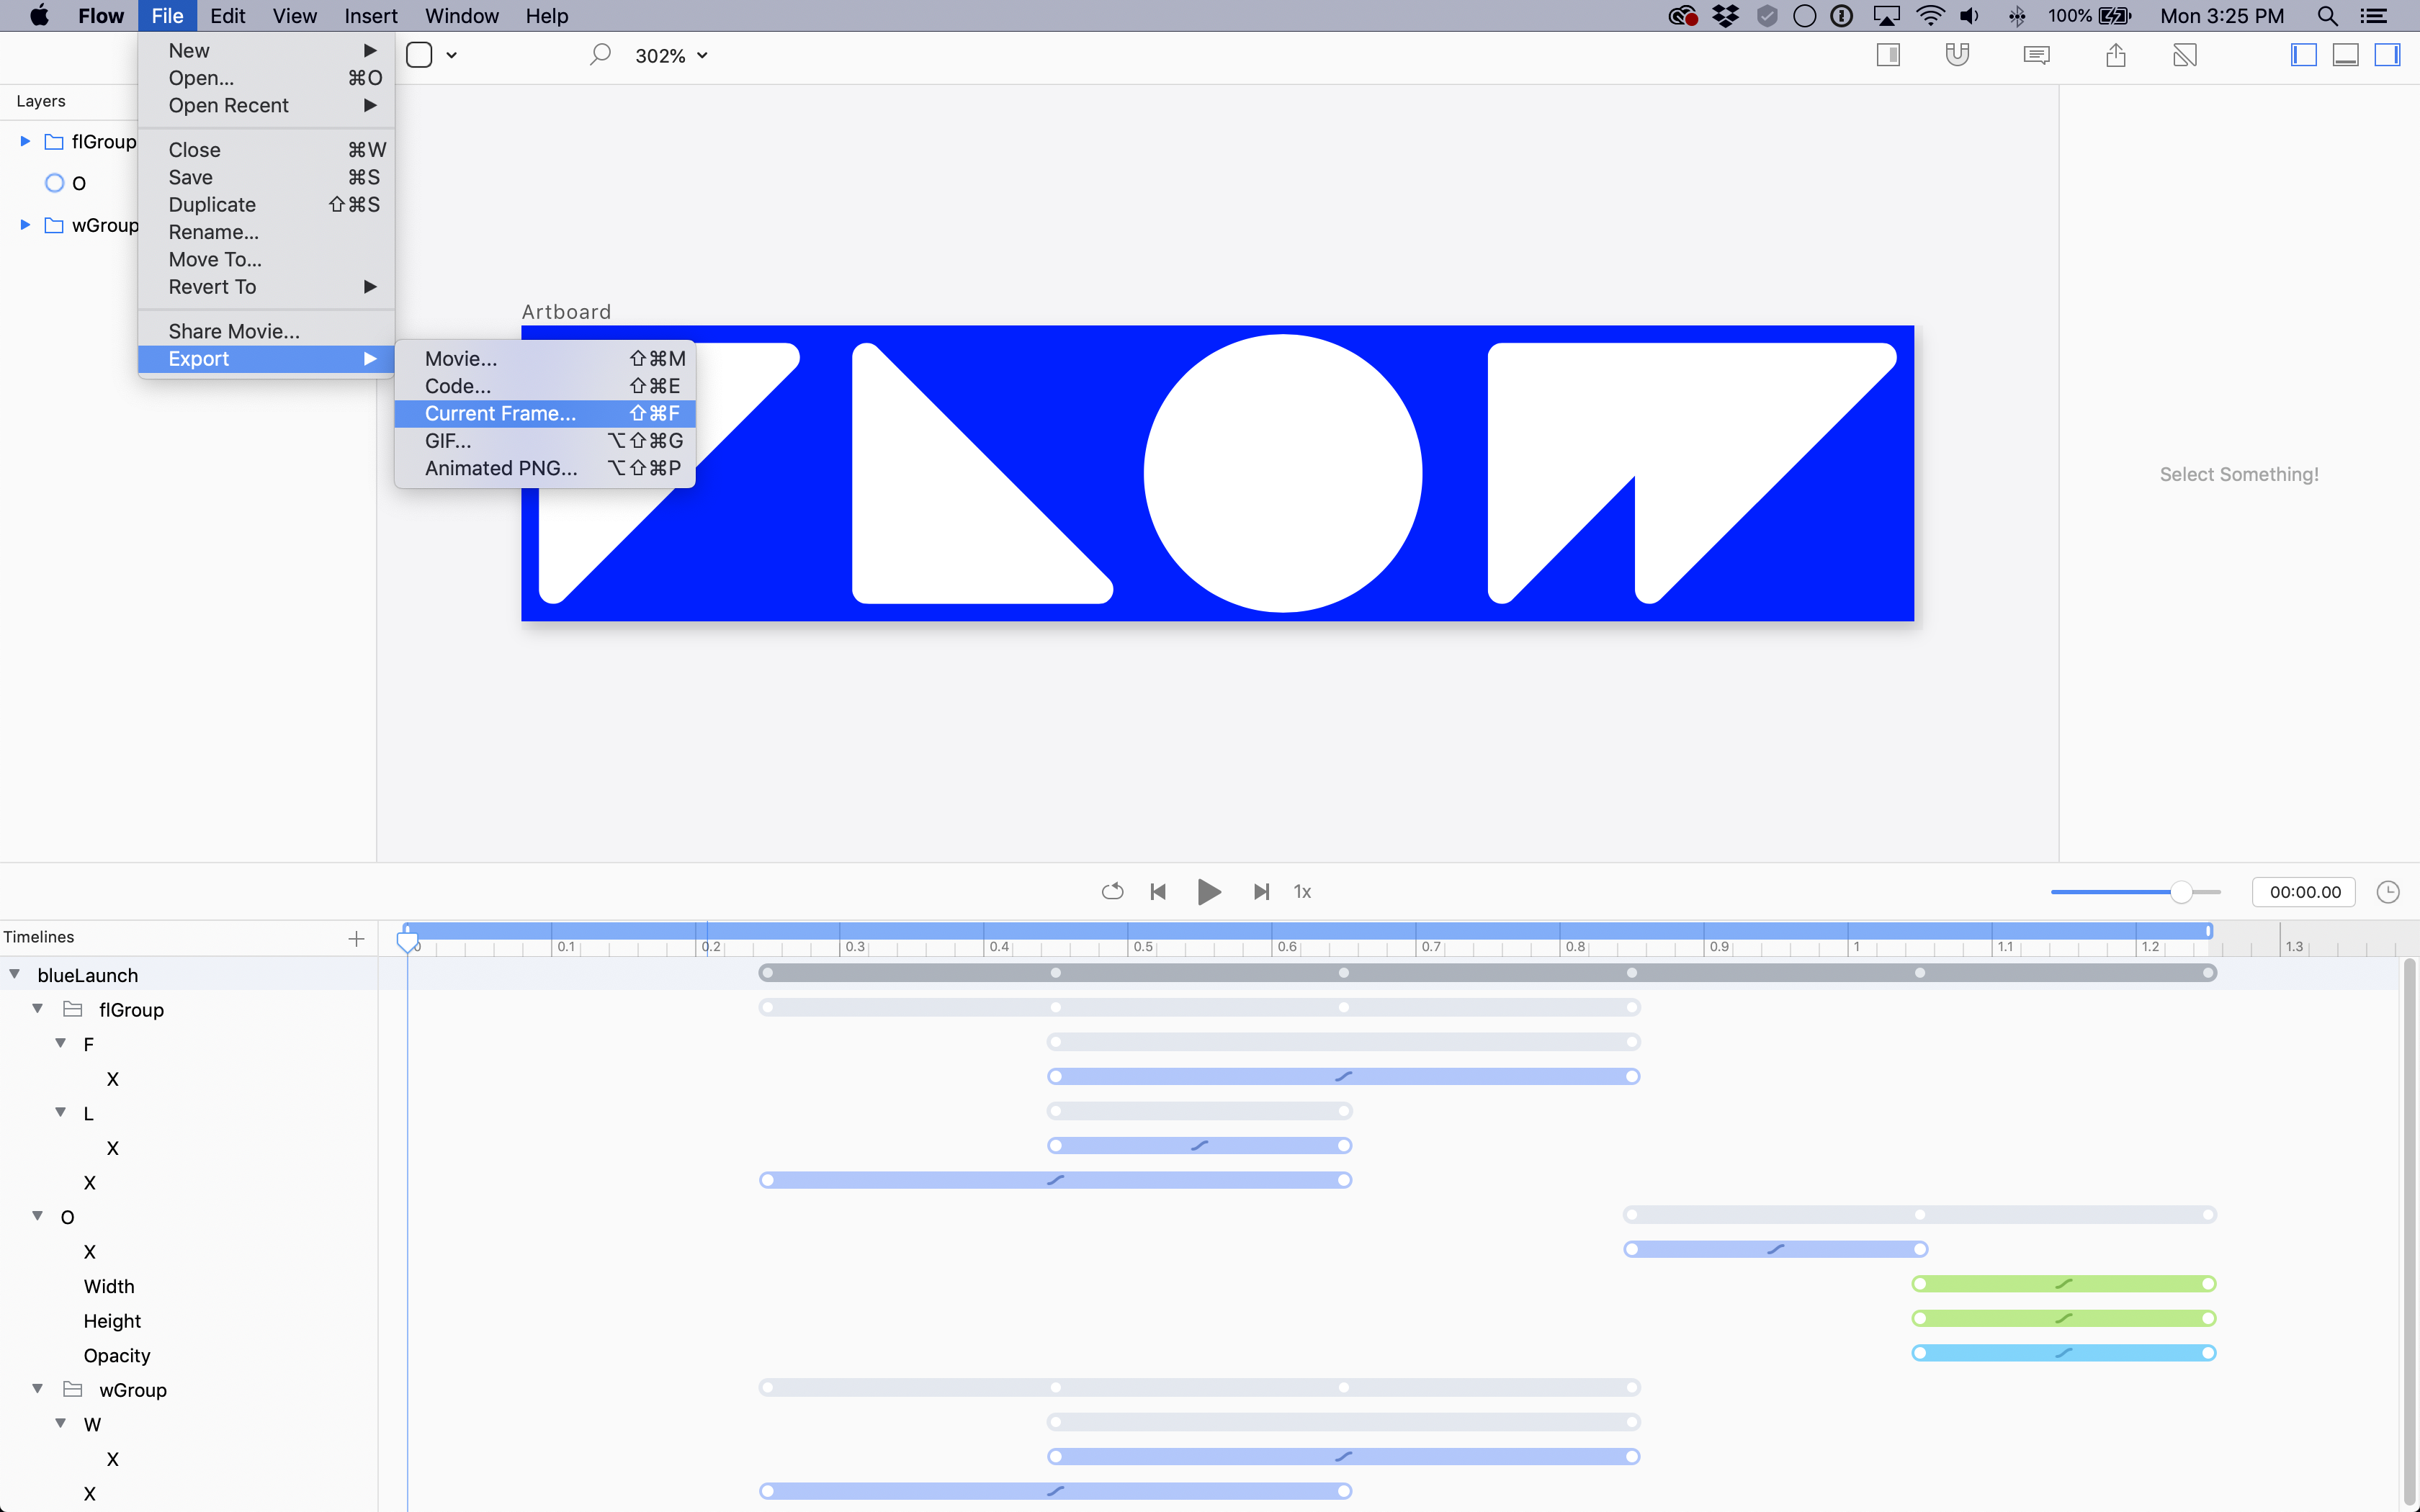
- Repeat the last step 2 more times for 2x and 3x resolution versions, adding an
@2xand an@3xrespectively, to the file name.

The file names we used were:
blueLaunchScreenFirstFrame.pngblueLaunchScreenFirstFrame@2x.pngblueLaunchScreenFirstFrame@3x.png
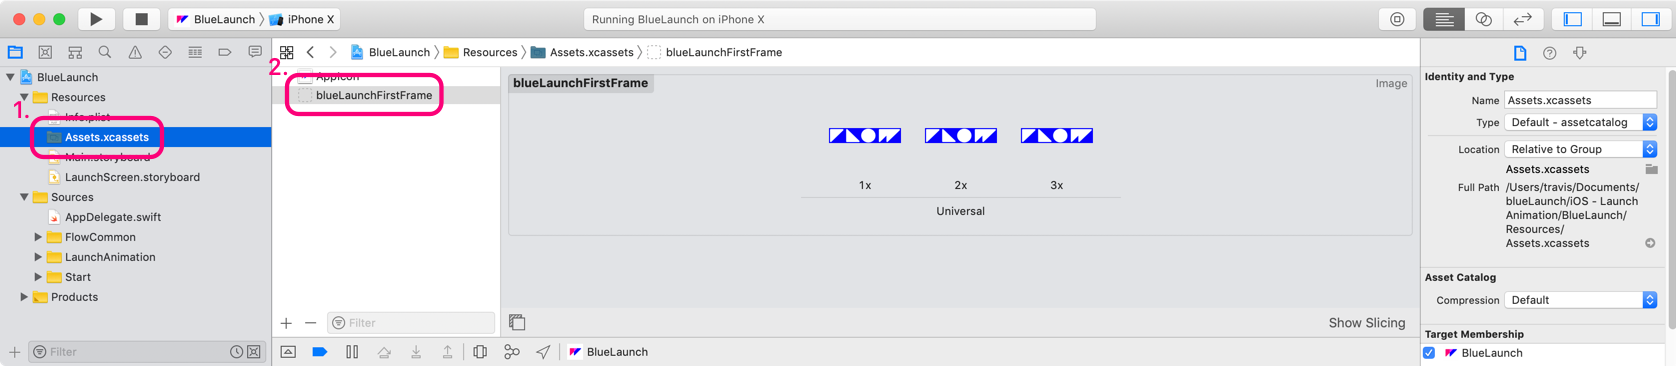
In Xcode:
- Select the assets folder from the project navigator
- Drag the 3 images into the assets folder
This creates an asset that has 3 resolutions, it will look good on all retina devices.
Next, we’re going to add an image view to the launch screen.
- Select
LaunchScreen.storyboard - Tap the
Librarybutton at the top-right of the window -
In the library window, search for the term: image
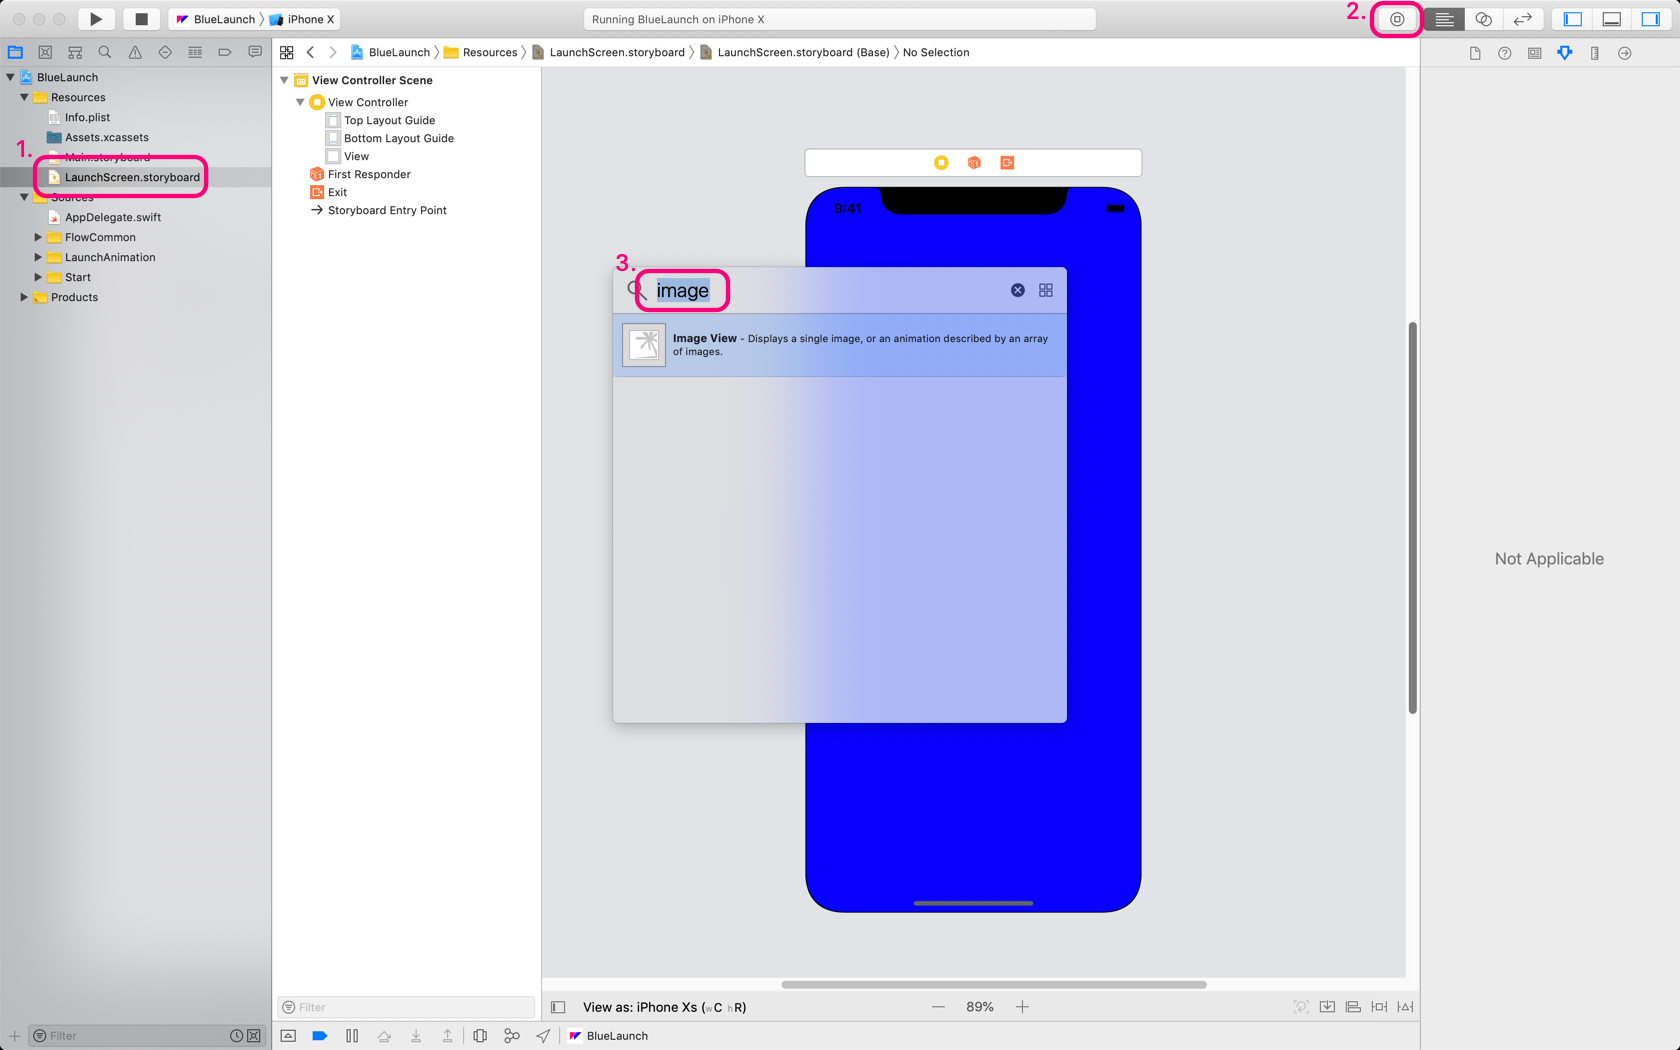
- Drag an image view onto the main view
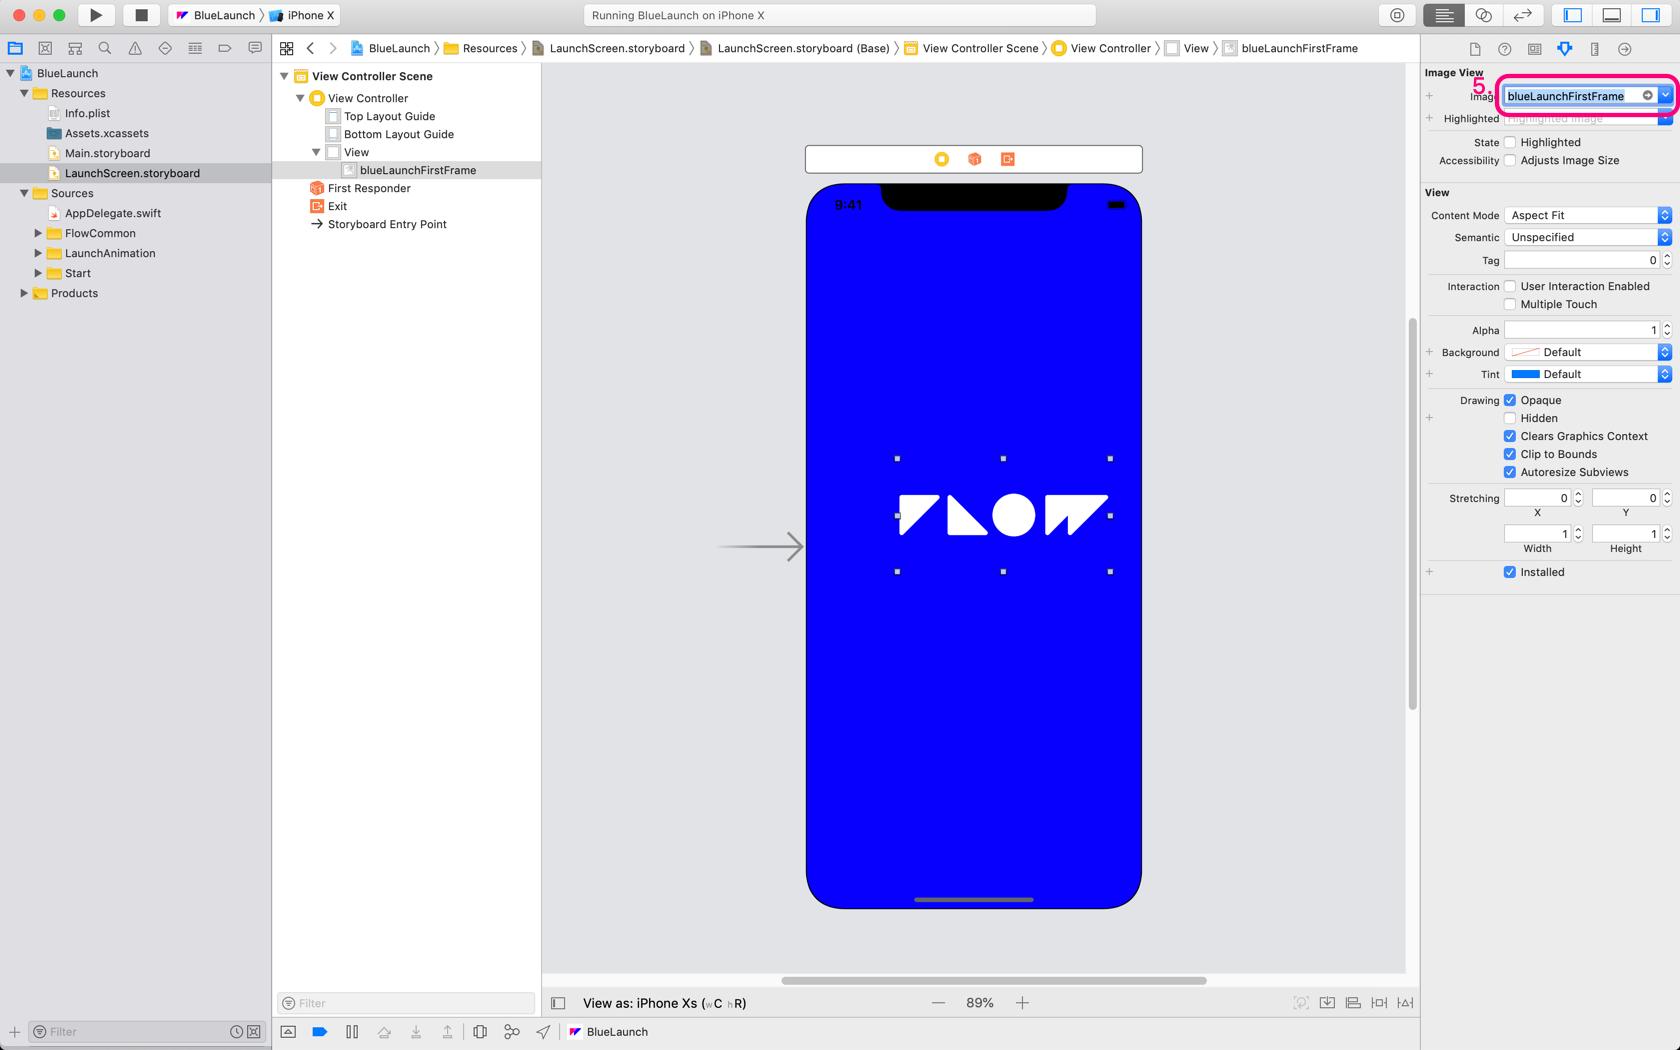
-
Set the name of the image to the name of your asset
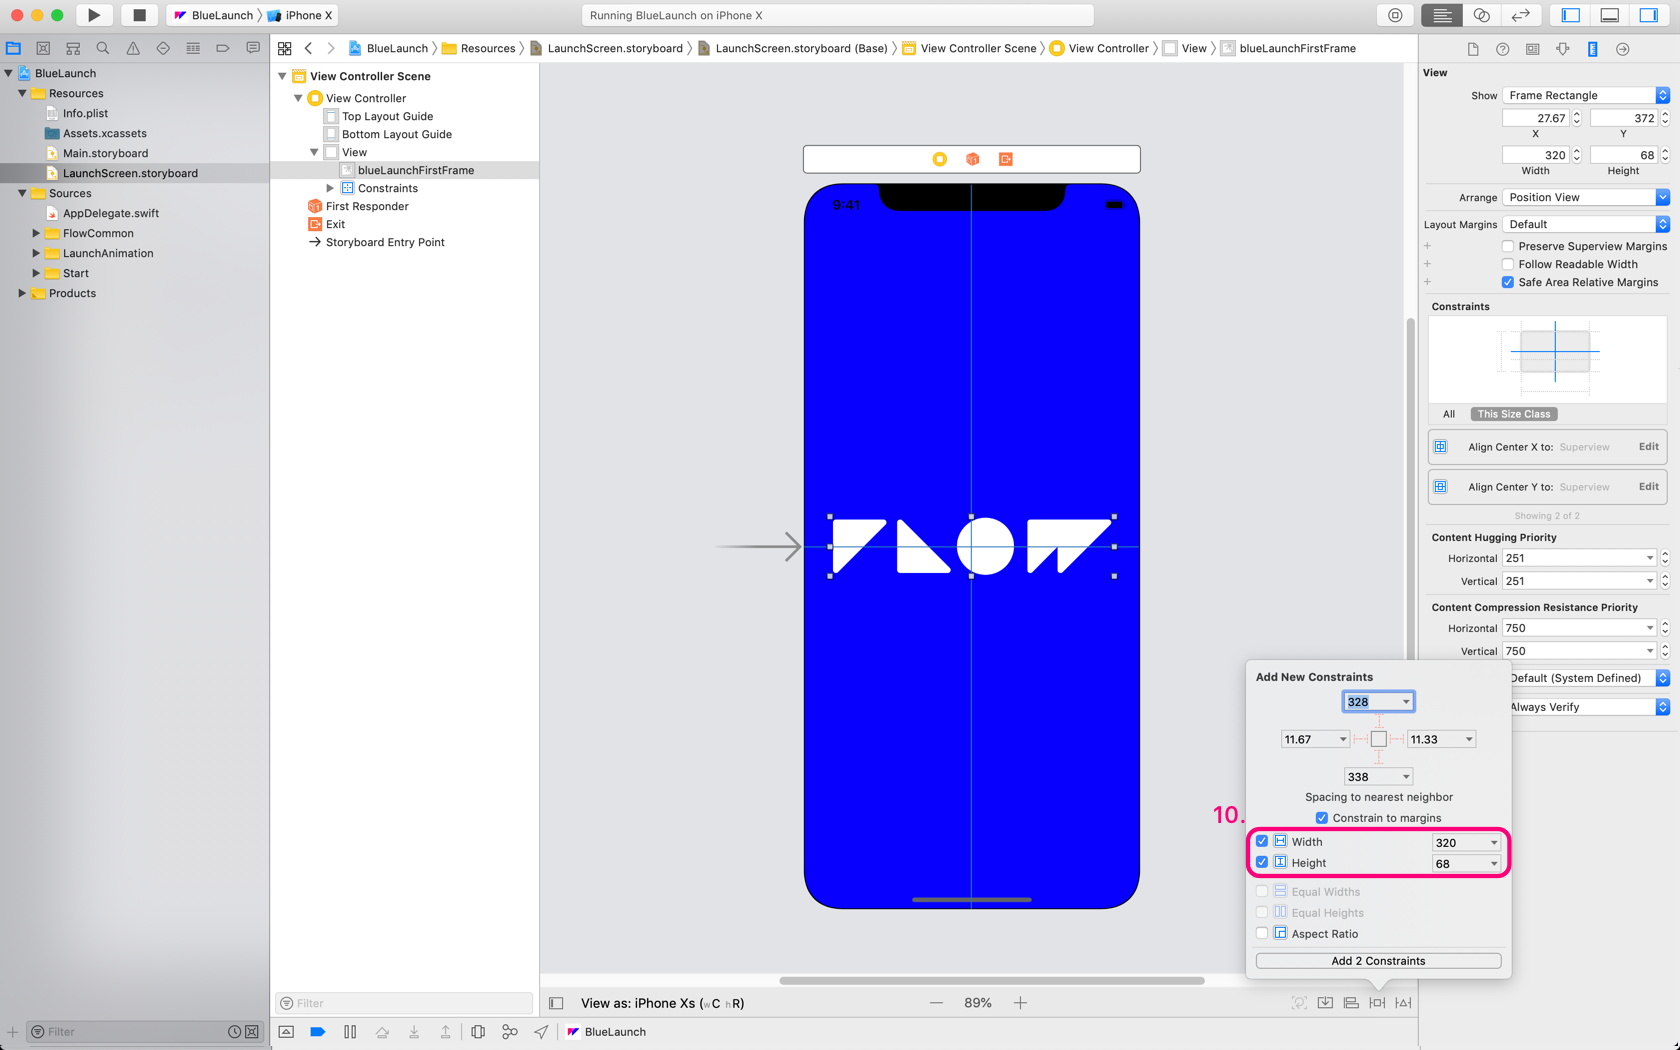
- Select the size inspector
-
Change the size of the view to
320 x 68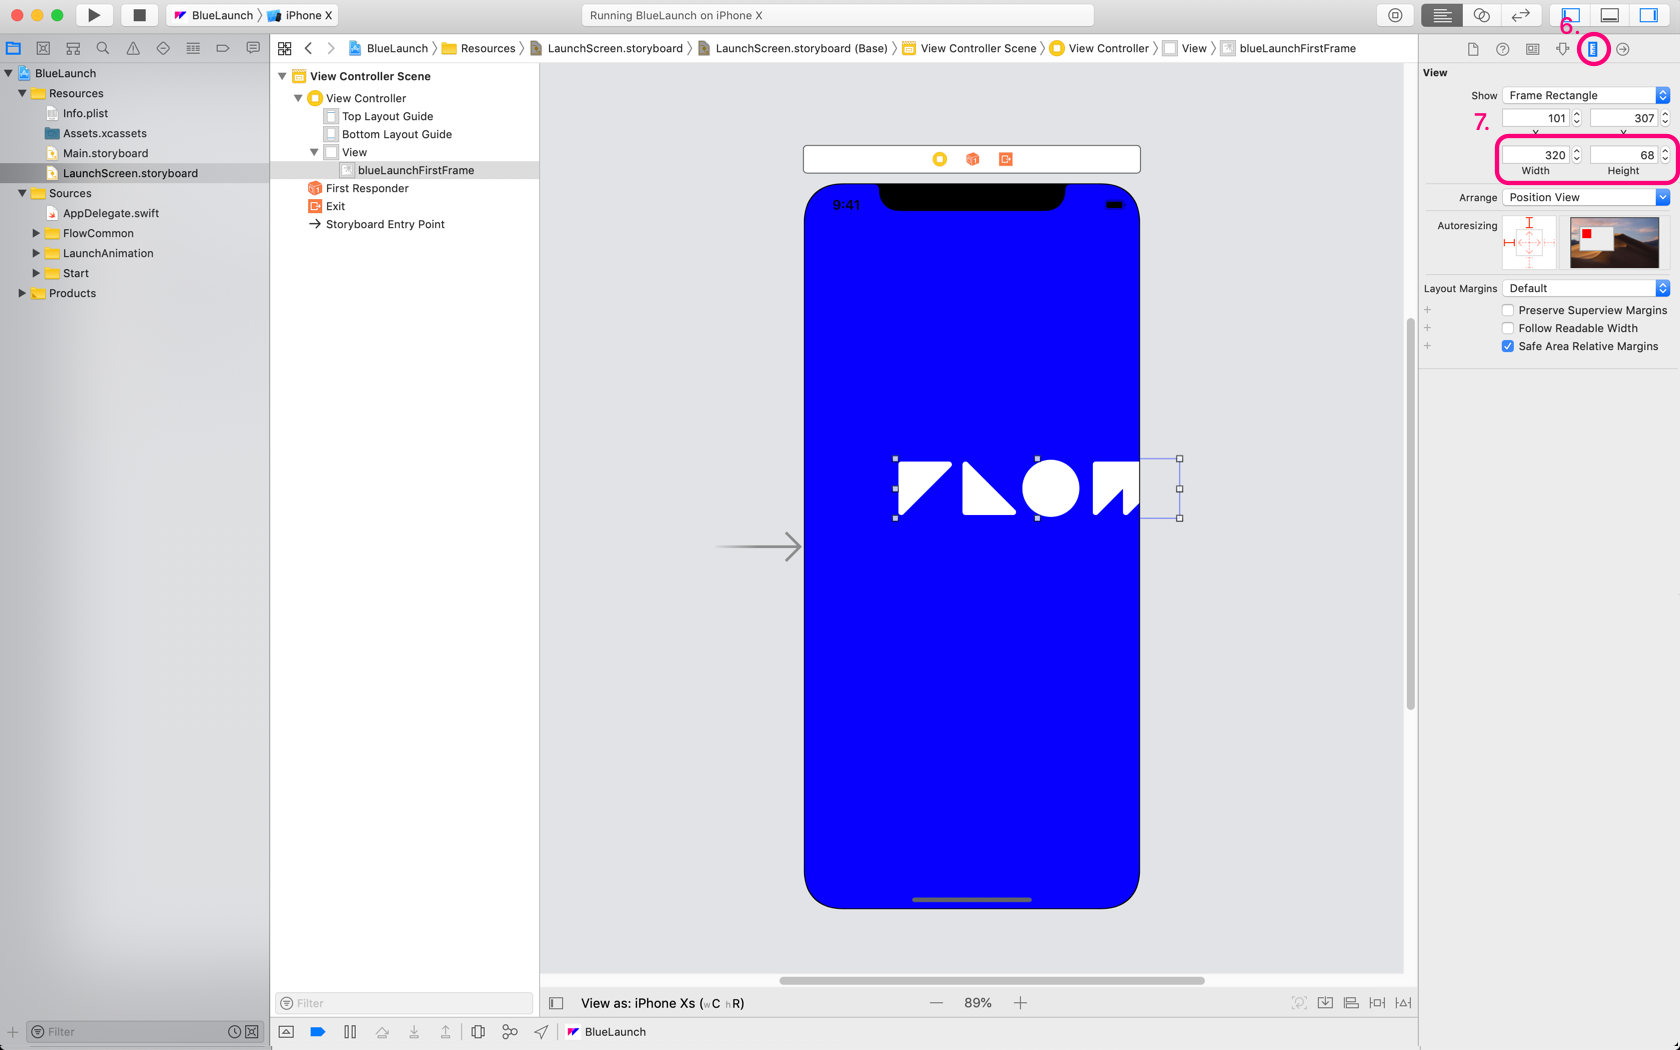
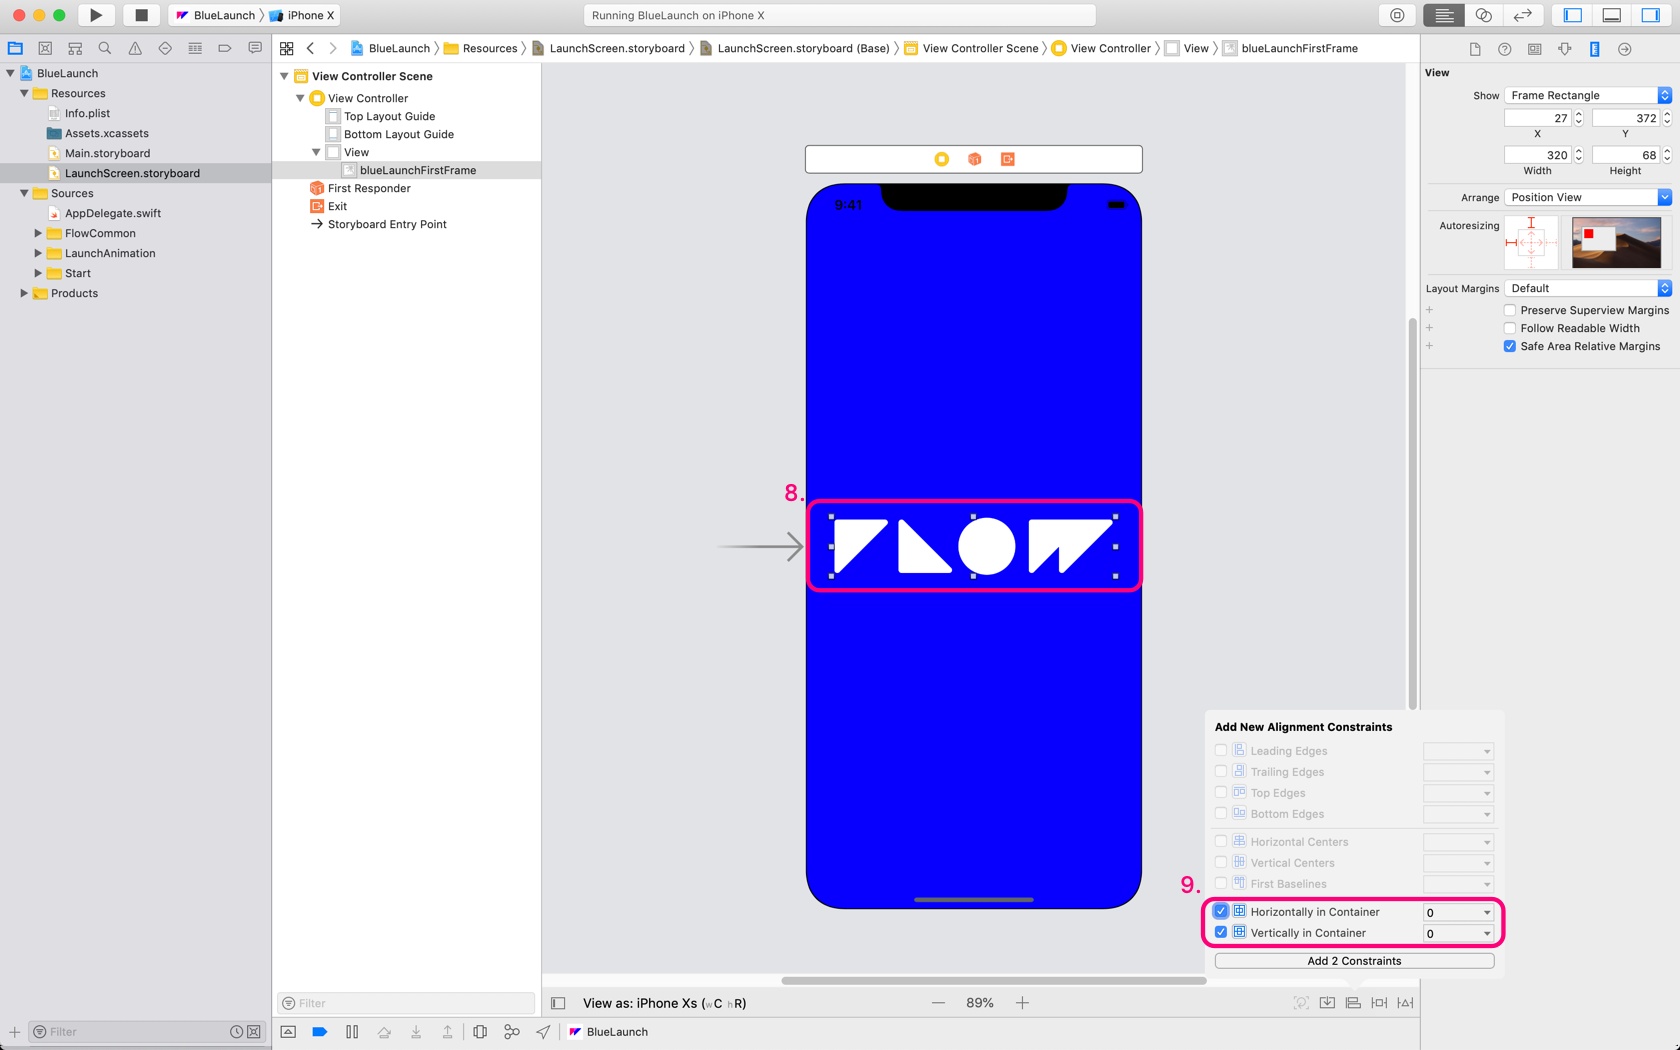
- Drag the image view to the center of the main view
-
Add horizontal and vertical constraints
-
Add width and height constraints
- Hit
RUN


There will now be a smooth transition fom the launch screen to the first frame of your animation.
Run on an iPhone
You might not actually see the proper launch sequence in the iOS Simulator. We suspect it’s because of the time it takes to start up the simulator.
It’s best to check this launch sequnce directly on an iPhone. And, even better by compiling it from Xcode, quitting the app, and restarting via the app icon on the device.