Learn Core UI Concepts with a Happy Button
In this tutorial you'll learn how to take a design comp, structure it into an animatable format, and then build a playful UI Animation.
Intro
This tutorial walks throug from a very early point in the design phase… Imagine you’ve envisioned this animation…

…and you’ve created the various steps as assets in Sketch, but haven’t prepared anything for Flow.
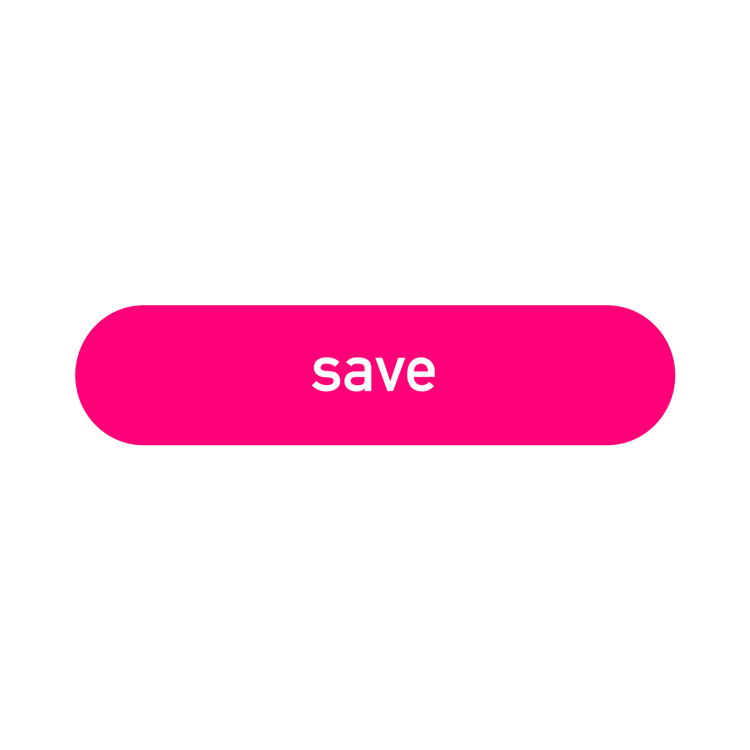
And, if you want to jump straight to the end…
Prepare Your Sketch File
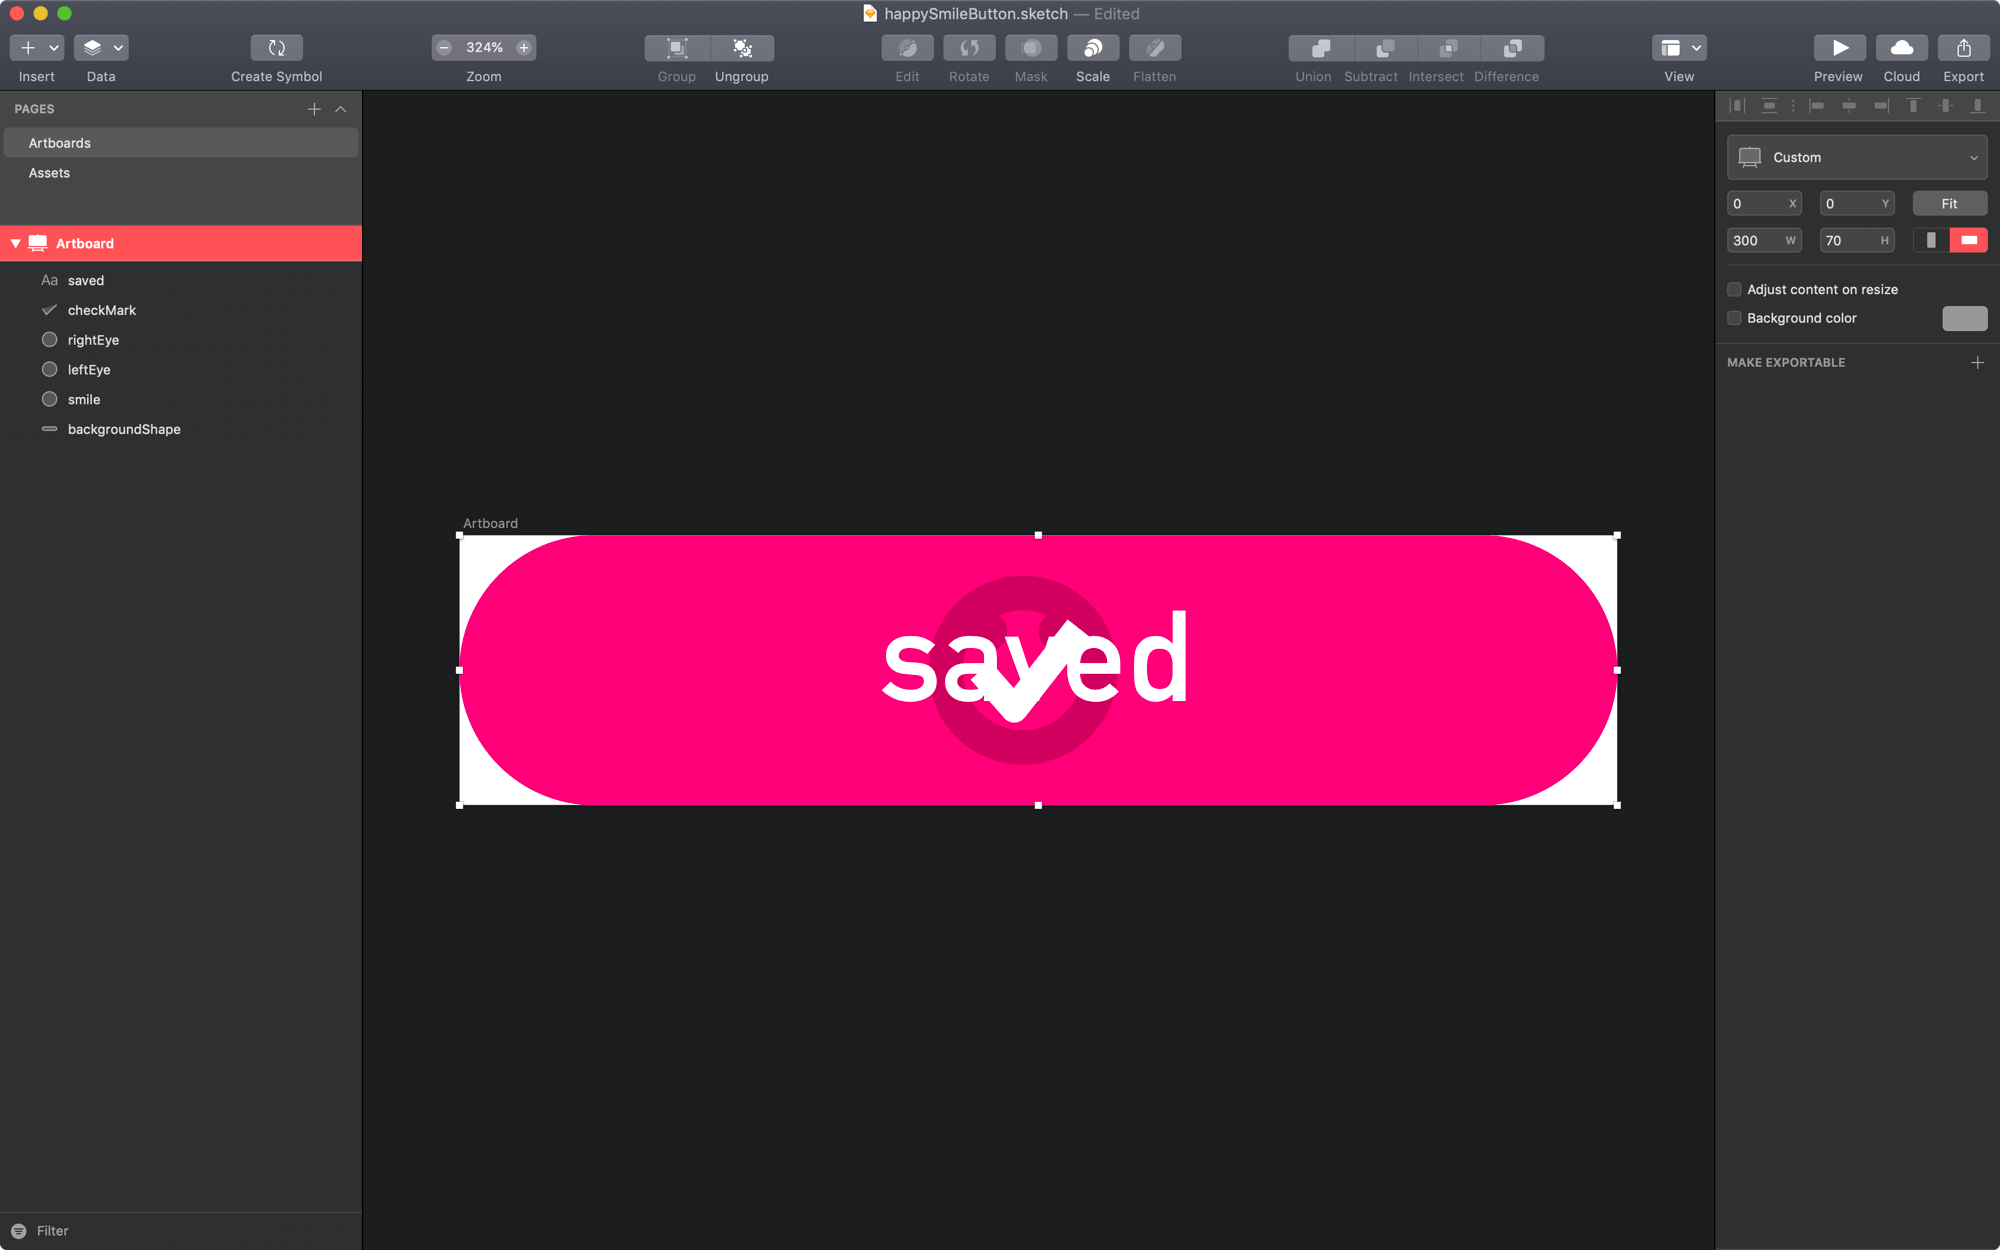
We’re starting this tutorial right after having sketched out the concept for an animation, and well before we should import anything into Flow. Here’s what the Sketch file looks like:

This is a good layout of the various steps in the animation. From top to bottom we have:
- Main state
- Pressed state
- Shrunk with a smile asset
- Mid-point color
- Final color
- Check mark
- Final state
Will we need all of these states to import into Flow? No… Here’s how to think about pulling this together.
What You Really Need
The concept of this animation is a button. A button will be a single object, with one background… So, at a minimum we’ll need only 1 background shape – because we know that we can scale and change its color in Flow. Also, a button only needs a single title label – we can change its content in Flow as well. Finally, we will also need a copy of each of the unique assets (i.e. the face and the checkmark)
Create a New Page
Make a new and add a new artboard sized to the button design – 300 x 70.

When you're bringing a Sketch file into Flow you'll notice the import window separates your selection by pages. So, it's generally good practice to organize the things you want to animate into their own pages.
Copy the Assets
Now, copy the following assets into the artboard you just created.
- The pink background shape.
- The label that says
saved« YES, the longer label with thed - The face
- The checkmark
That’s it… We’re now ready to tweak these elements into animatability.
Rename Everything
Always. Always. Always rename your layers appropriately. It helps when you’re animating, and even moreso when things go to code. And please, by all means just follow these two examples:
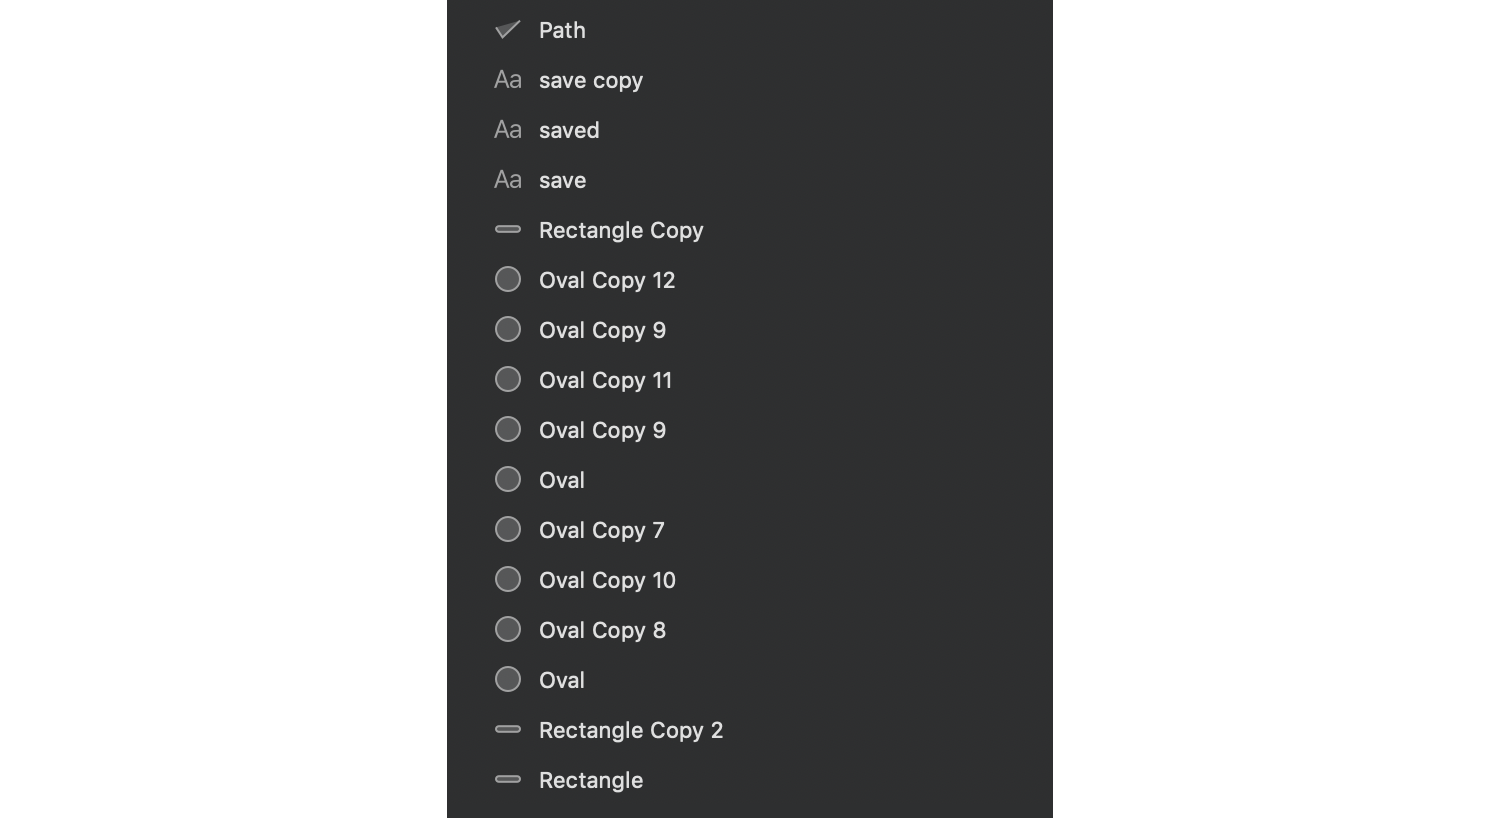
BAD
Sketch does a good job of copying and renaming layers while you’re working fast. For the most part, the names of layers don’t matter when you’re working purely visually. However, when you start animating and all your layers are named some version of Oval then it gets hard to know what you’re trying to edit.
Don’t leave your layers like this:
GOOD
Rename your layers to something understandable, unique and descriptive. Don’t use spaces, and only use alpha numeric characters (none of these: !@#$%^&*()) BECAUSE if you do want to export to code these kinds of chars just don’t mix well with compilers.
Rename your layers to this:

Keep it Simple
The face animation looks like it’s all dark and fills in with another color… At first, this may appear to be a tricky animation – you might think you need masks and odd shapes, or some kind of fancy scaling – but it really isn’t if you can think about how to break down your animation into simple components.
Two Faces
The easiest way to “fill in the face” is two use copies – one dark, overlaid with one light. Let’s set that up…
- Group the
leftEye,rightEyeandsmilelayers. - Rename the group
darkFace - Duplicate the group and rename it to
lightFace - Change the fill color of the eyes to white
Your design file should look like this:
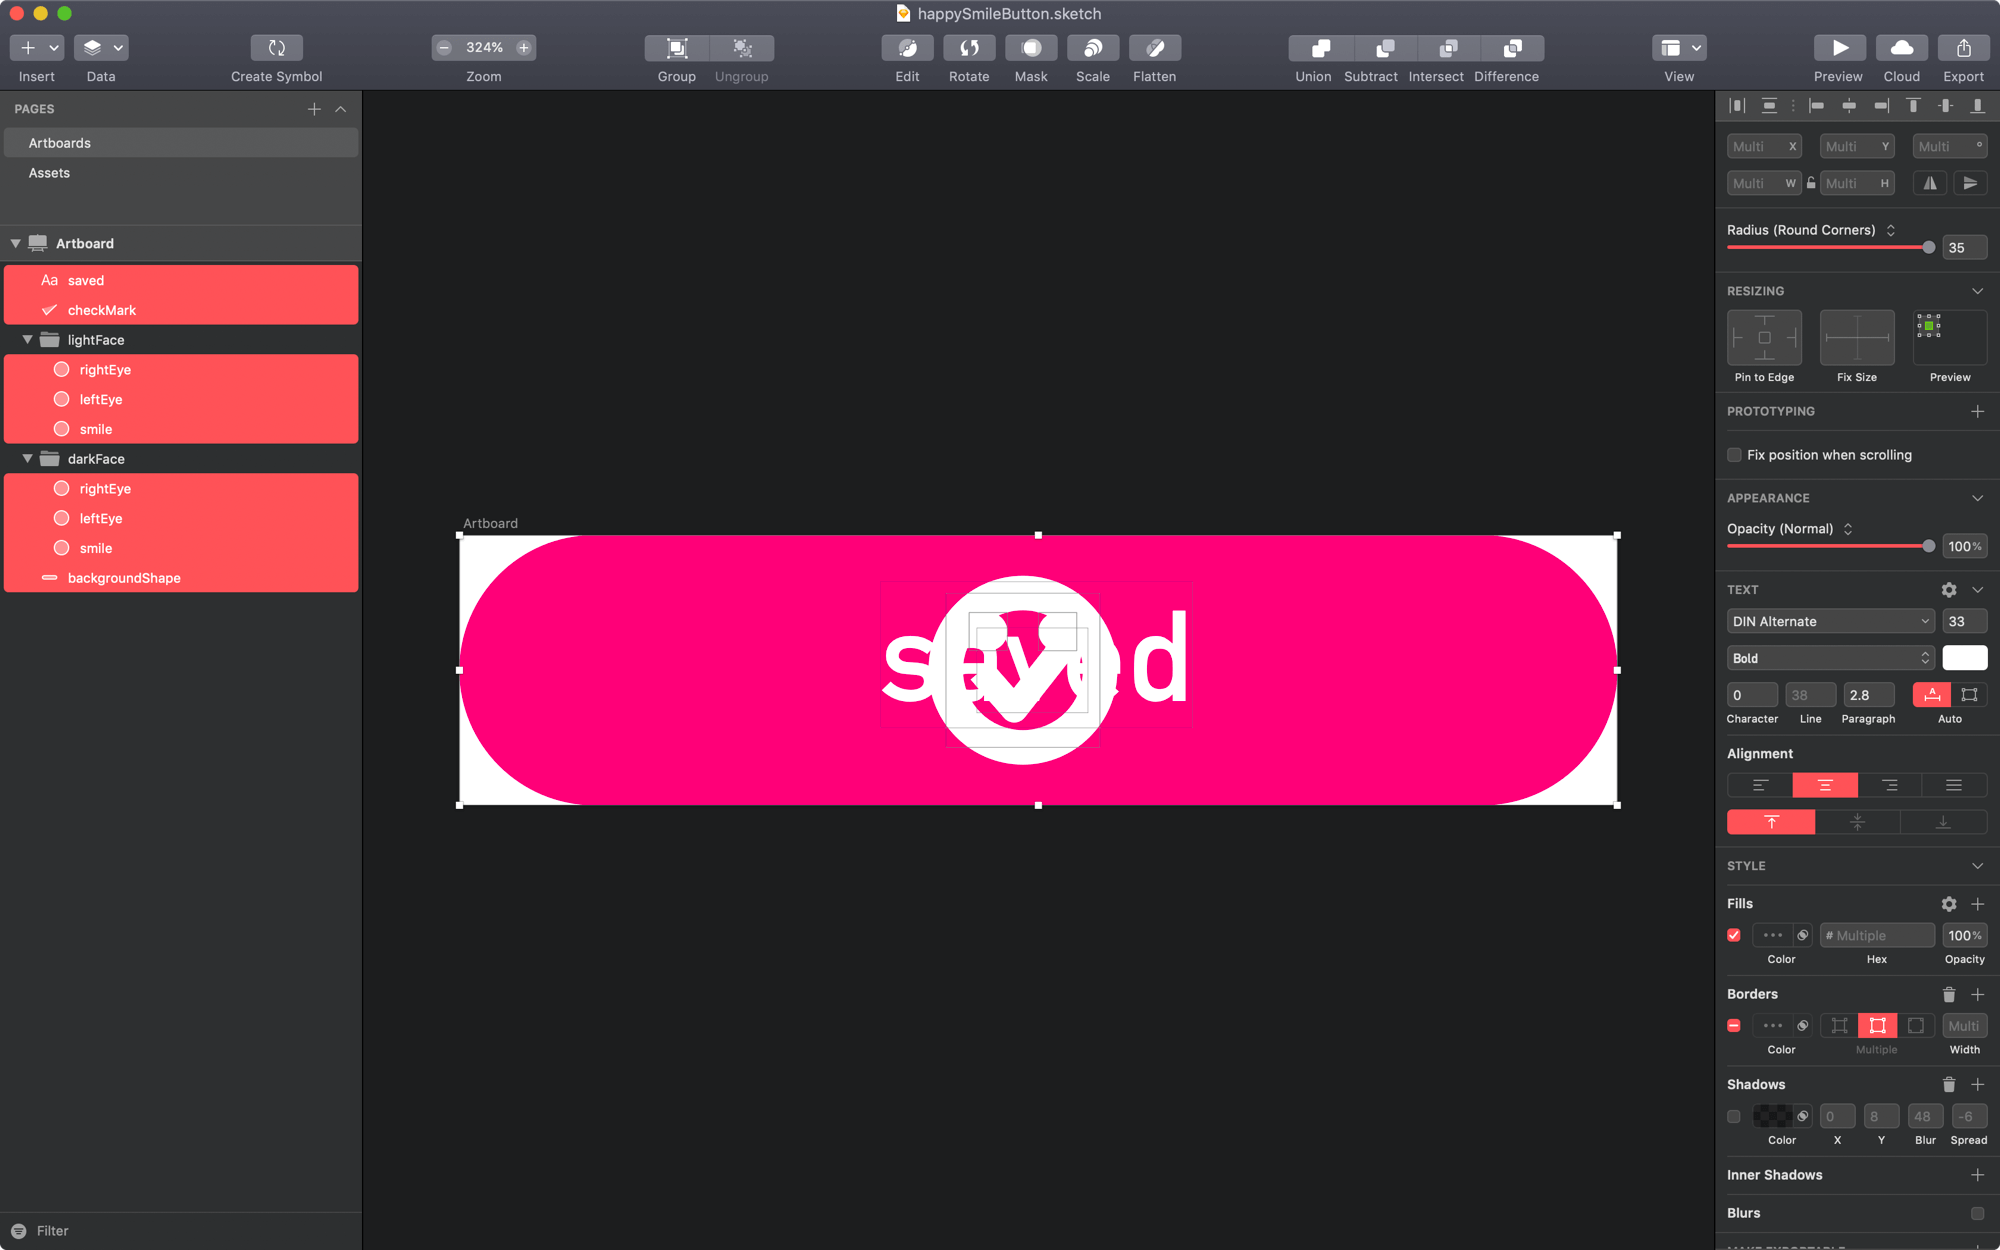
Done. We’re ready to Flow.
Animatable Paths
We’re going to modify the shape in Flow so that it only shows half of the shape’s border, making it a smile.
Also, we can animate the path of the circle in Flow. This is why we use a path instead of a solid shape.
Another way to keep things simple is to know how you can manipulate shapes / layers in Flow.

This is also why the checkMark is a path and not a solid shape either.
Now, our design is all set to be animated. Let’s get to it.
Flow
Head on over to Flow where we’ll finish setting things up, and get started with our animation.
Setup
First, let’s get things ready.
- Import the artboard
- Zoom to 300%
- Expand the timeline duration to
4.0s
You can change the timeline duration by tapping the small clock icon above the right-hand side of the timeline.
backgroundShape
We’ll start with the background because it’s most visual part of the animation.
- Hide all layers except the
backgroundShape - Move the playhead to
0.25s - Lock the w/h and change the height to
60 - Change the fillColor to
#CF0263(orr: 207, g: 2, b: 99if you’re not on OSX 10.14)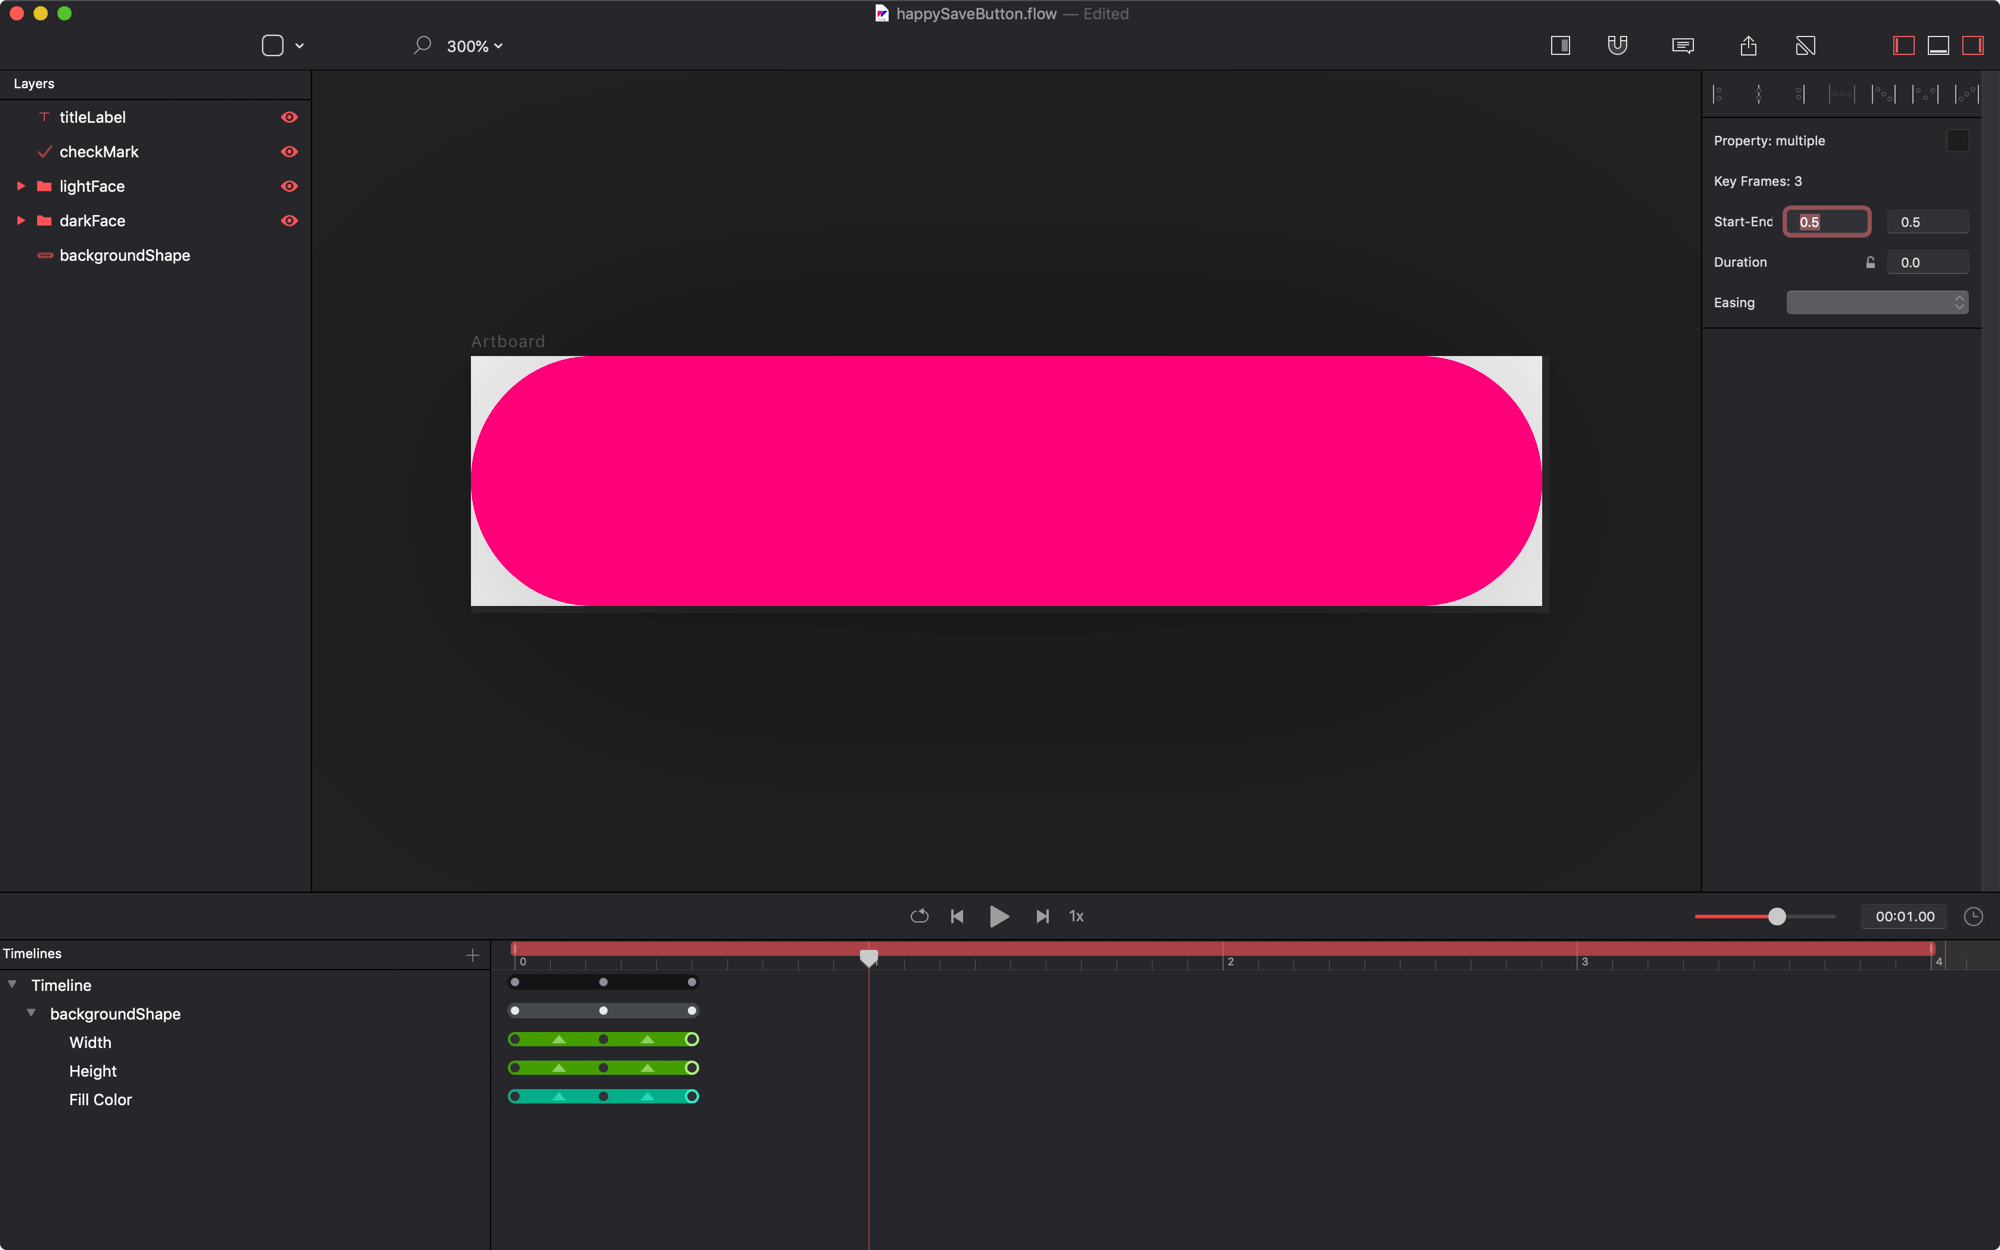
The background quickly shrinks, changes color, and returns to its original state. - Move the playhead to
1.0s - Unlock the w/h and change its
widthto70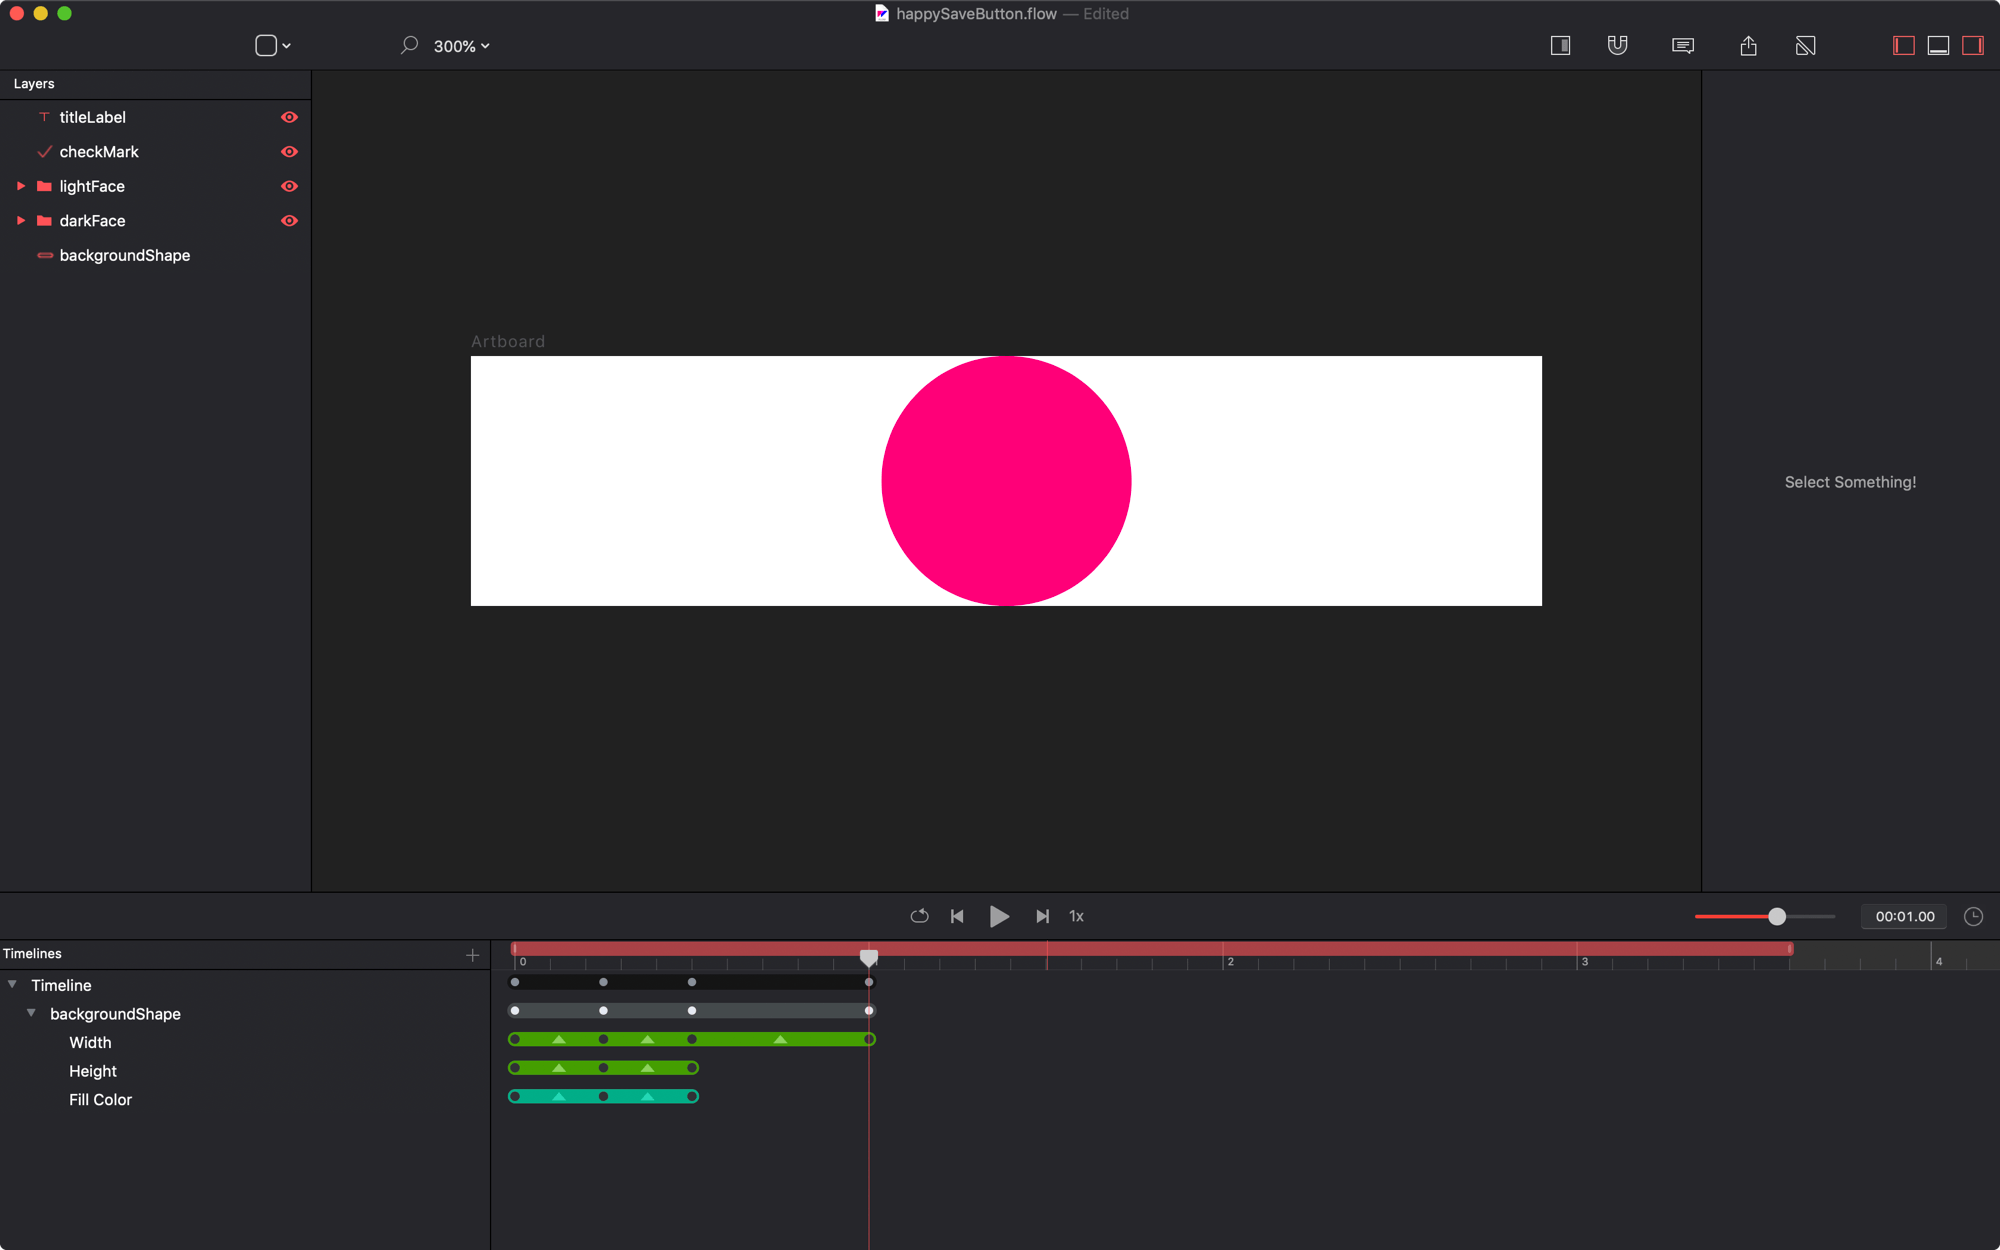
The animations starting point for this animation is created at 0.75 seconds. - Move the playhead to
2.0s - Change the
fillColorto#0CCDA2(orr: 12, g: 205, b: 162if you’re not on OSX 10.14) - Select the previous color keyvalue, press OPTION (⌥), then it to
1.0s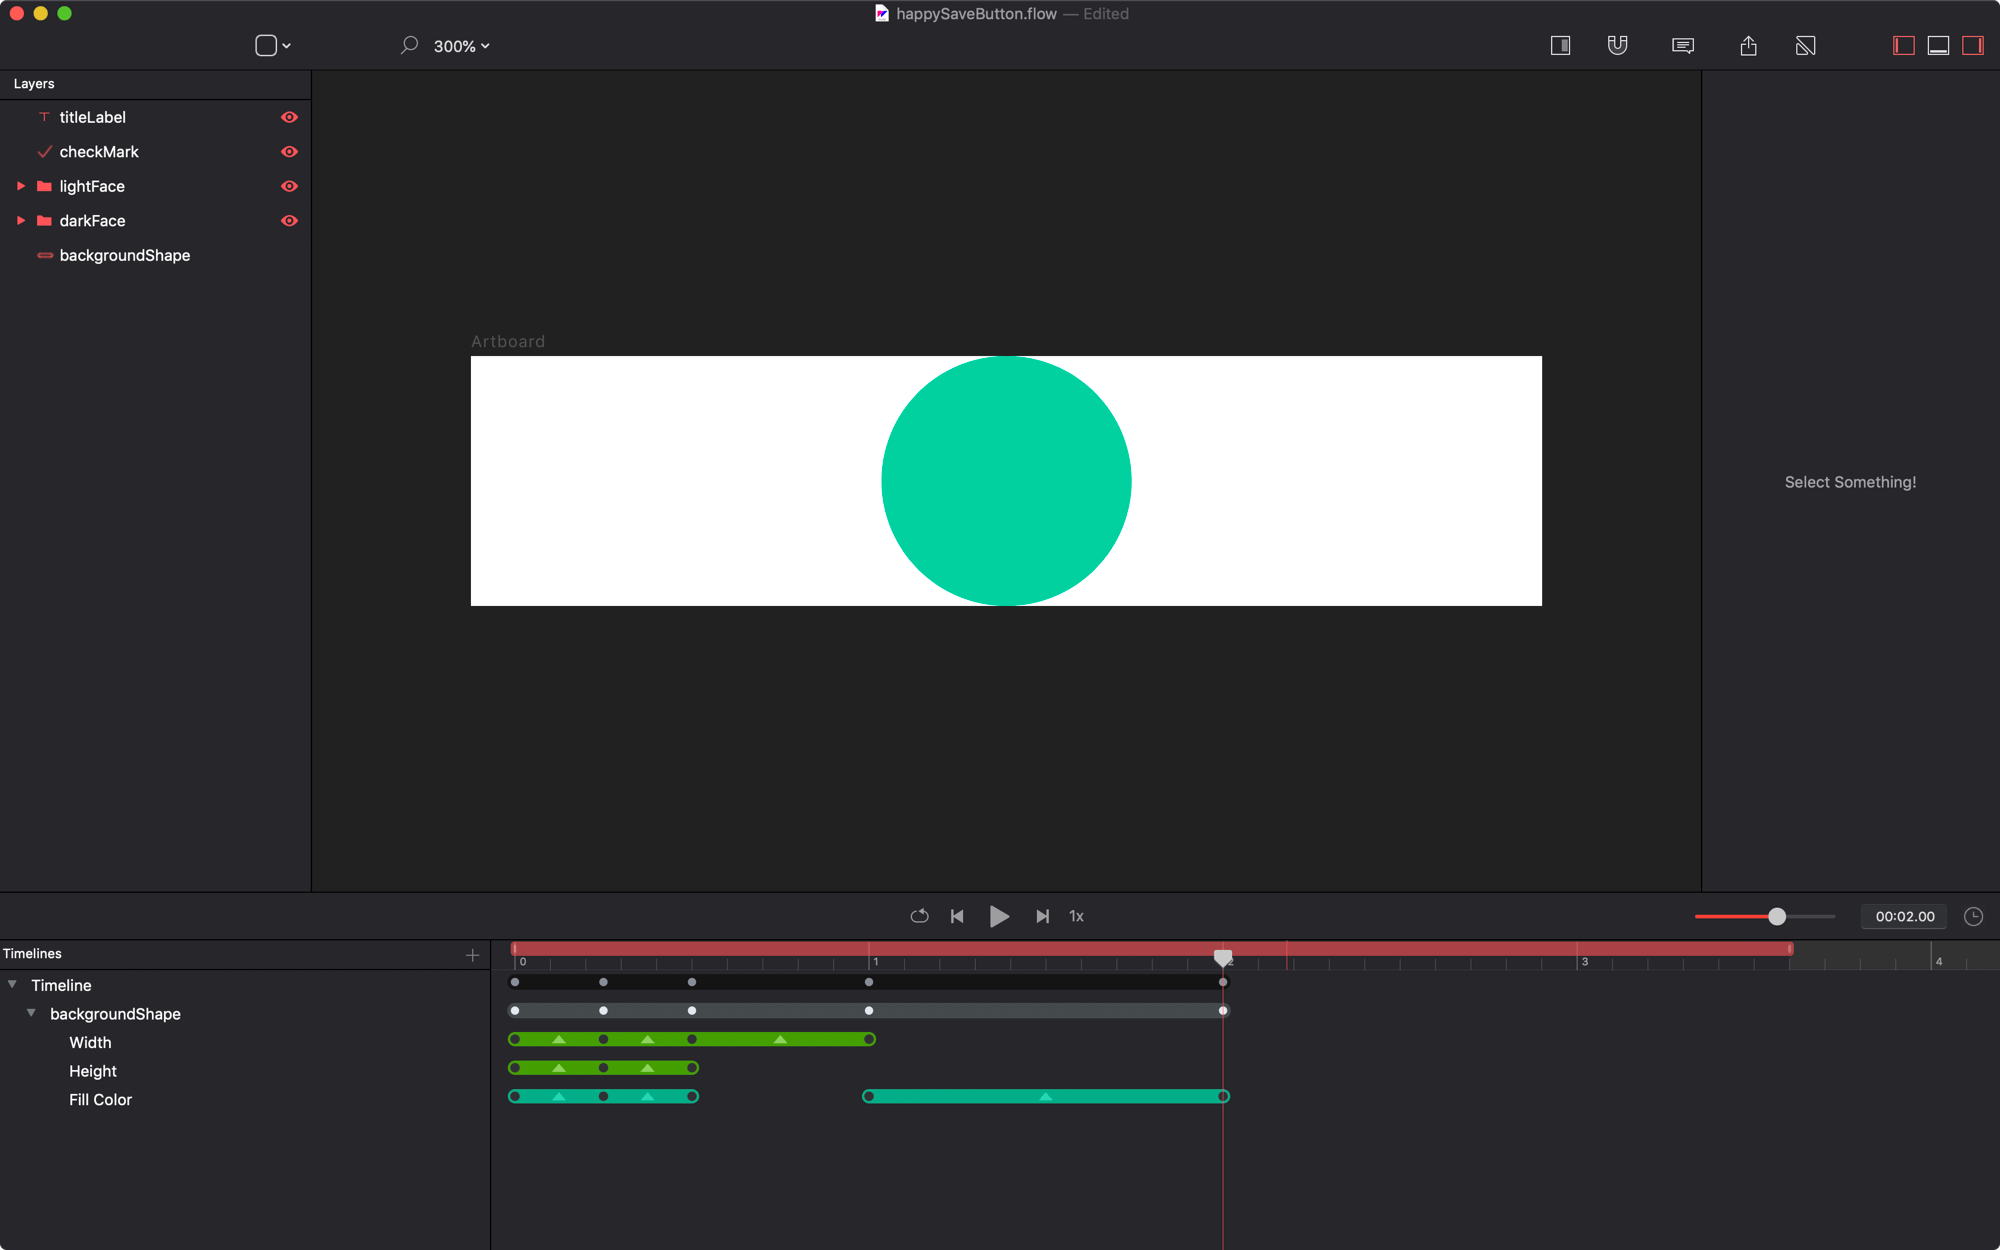
The animations starting point for this animation is created at 0.75 seconds. - Move the playhead to
3.1s - Change the
widthto300 - Select the previous color keyvalue, press OPTION (⌥), then drag previous keyvalue to
2.6s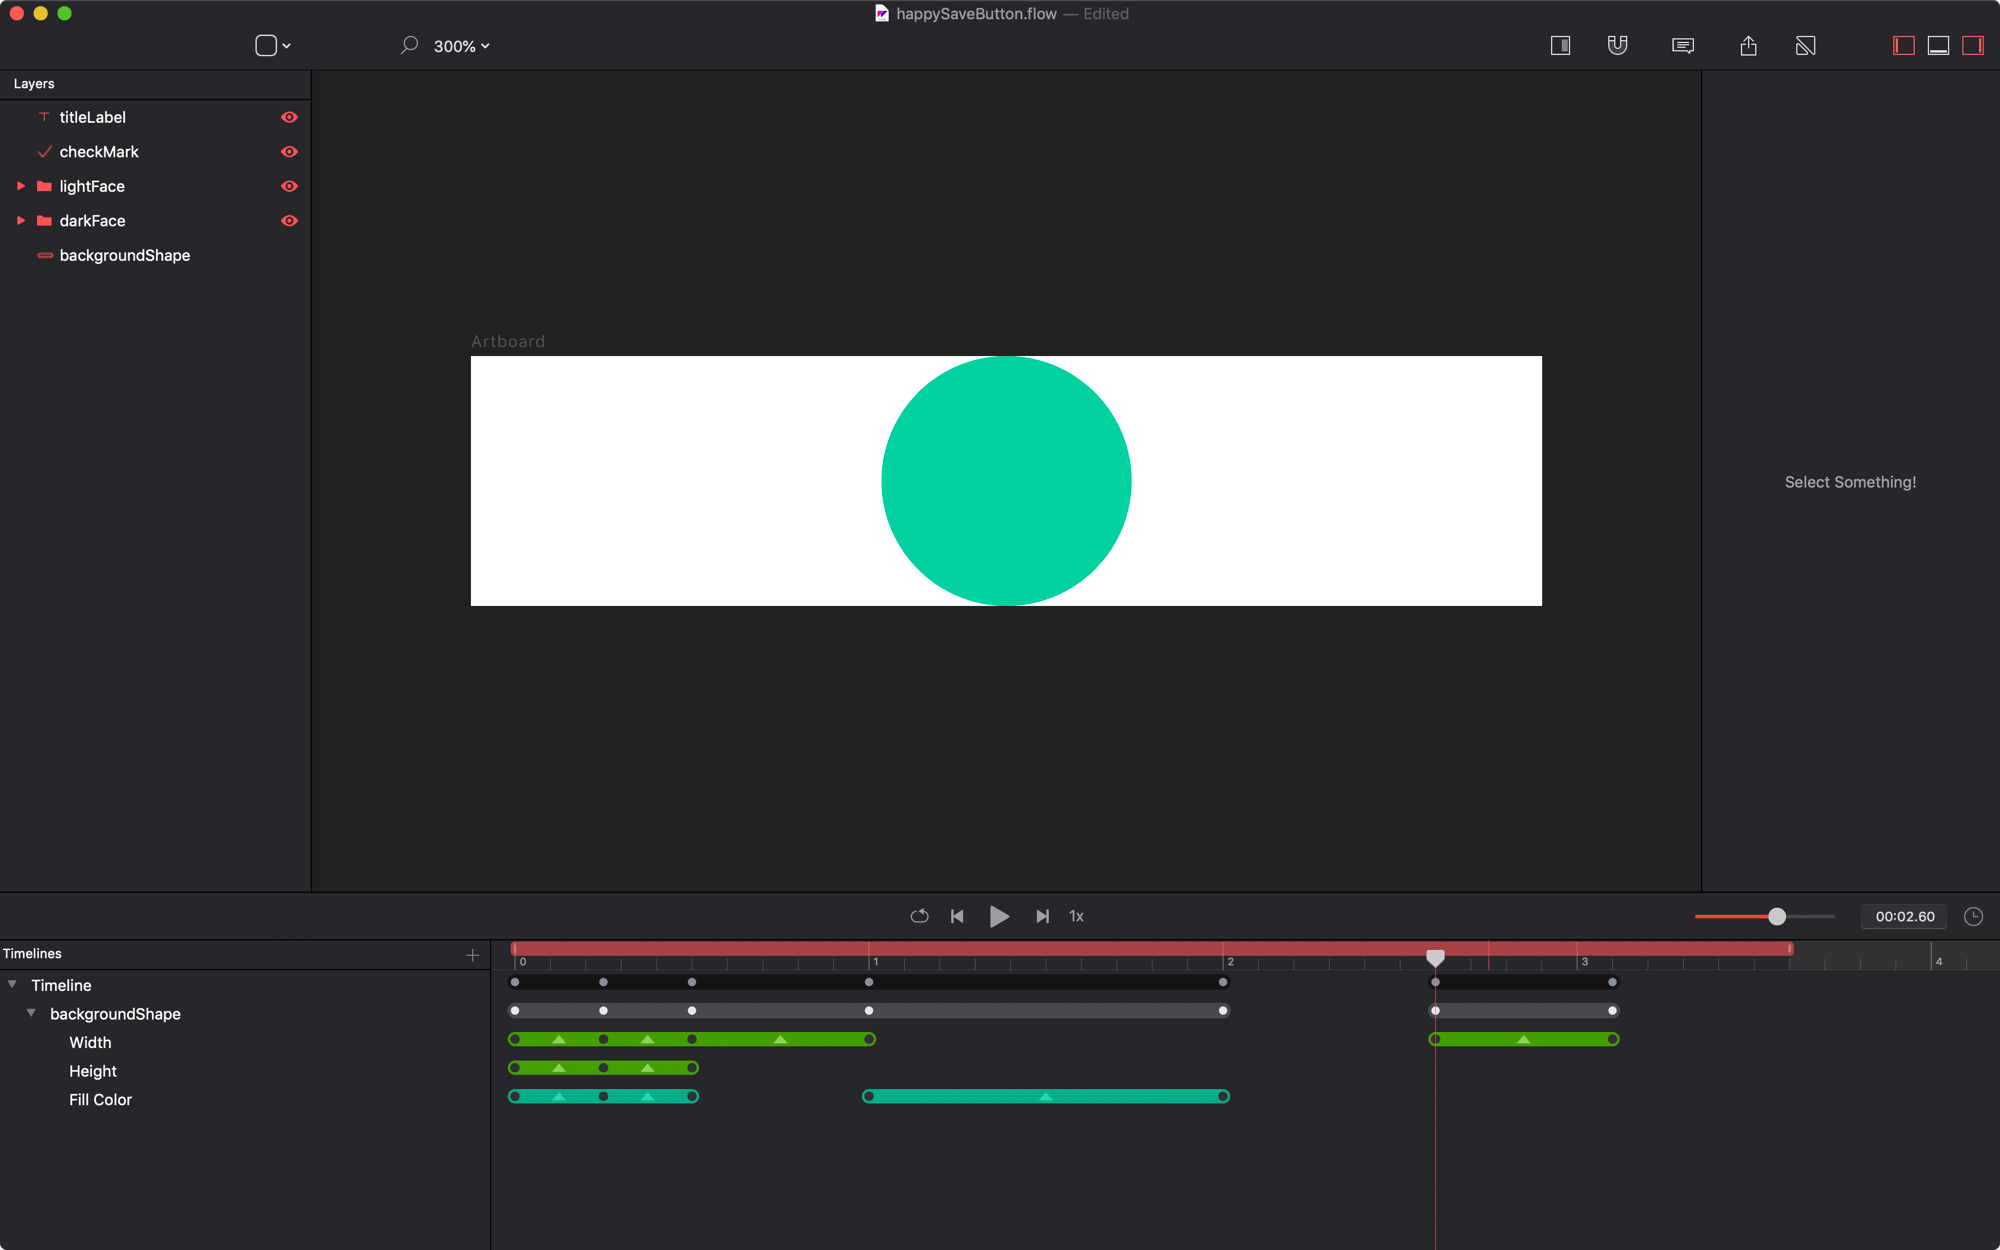
The animations starting point for this animation is created at 0.75 seconds.
That’s it, the main background animation is in place. Check it out:

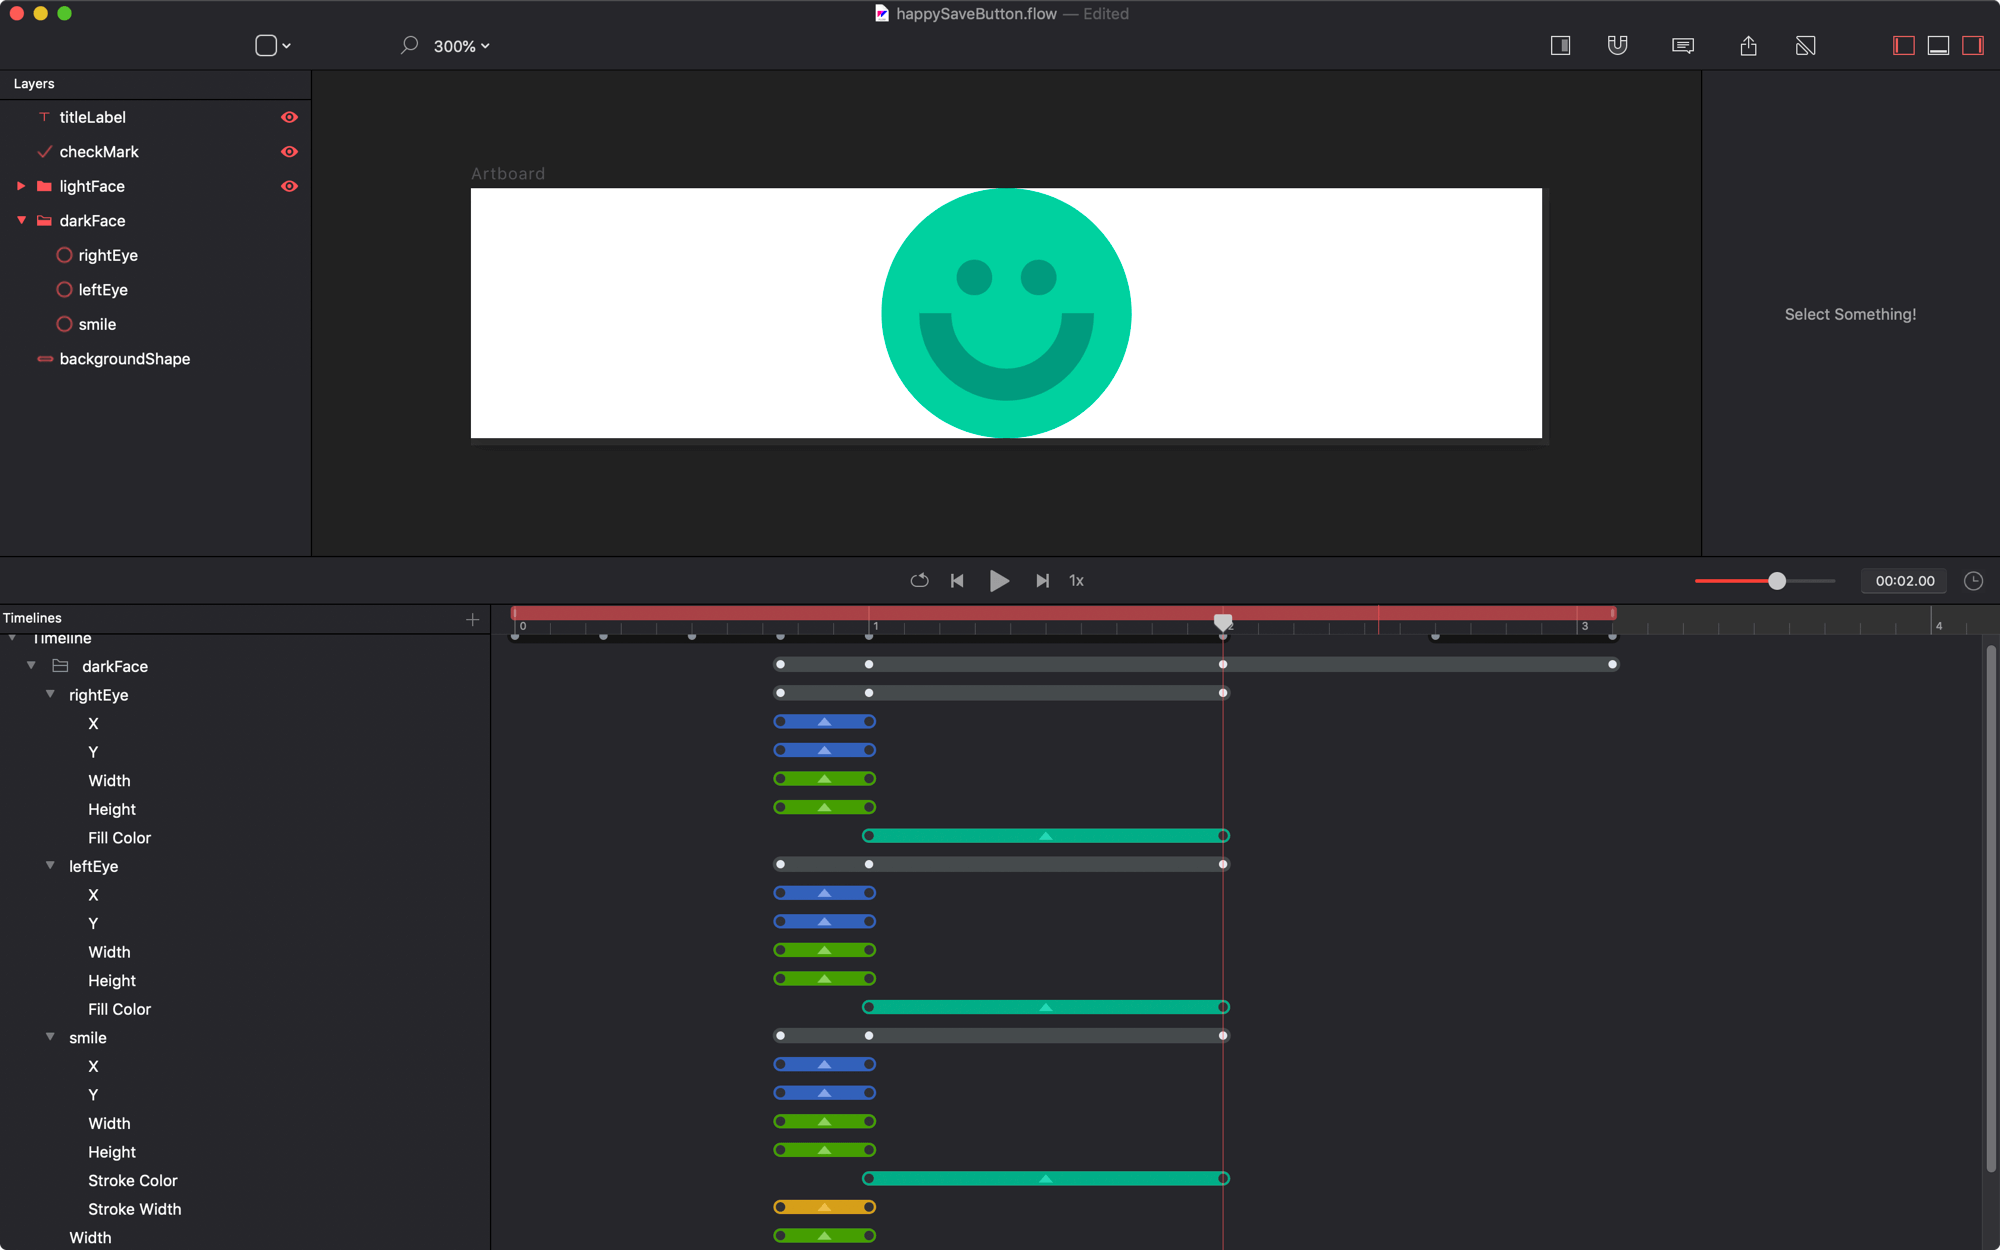
darkFace
Let’s animate the dark face now.
- Reveal the
darkFacelayer - Turn on relative mode (
⌘⌥R) - Select the smile layer
- Rotate the shape to
90° - Set the stroke
endto0.5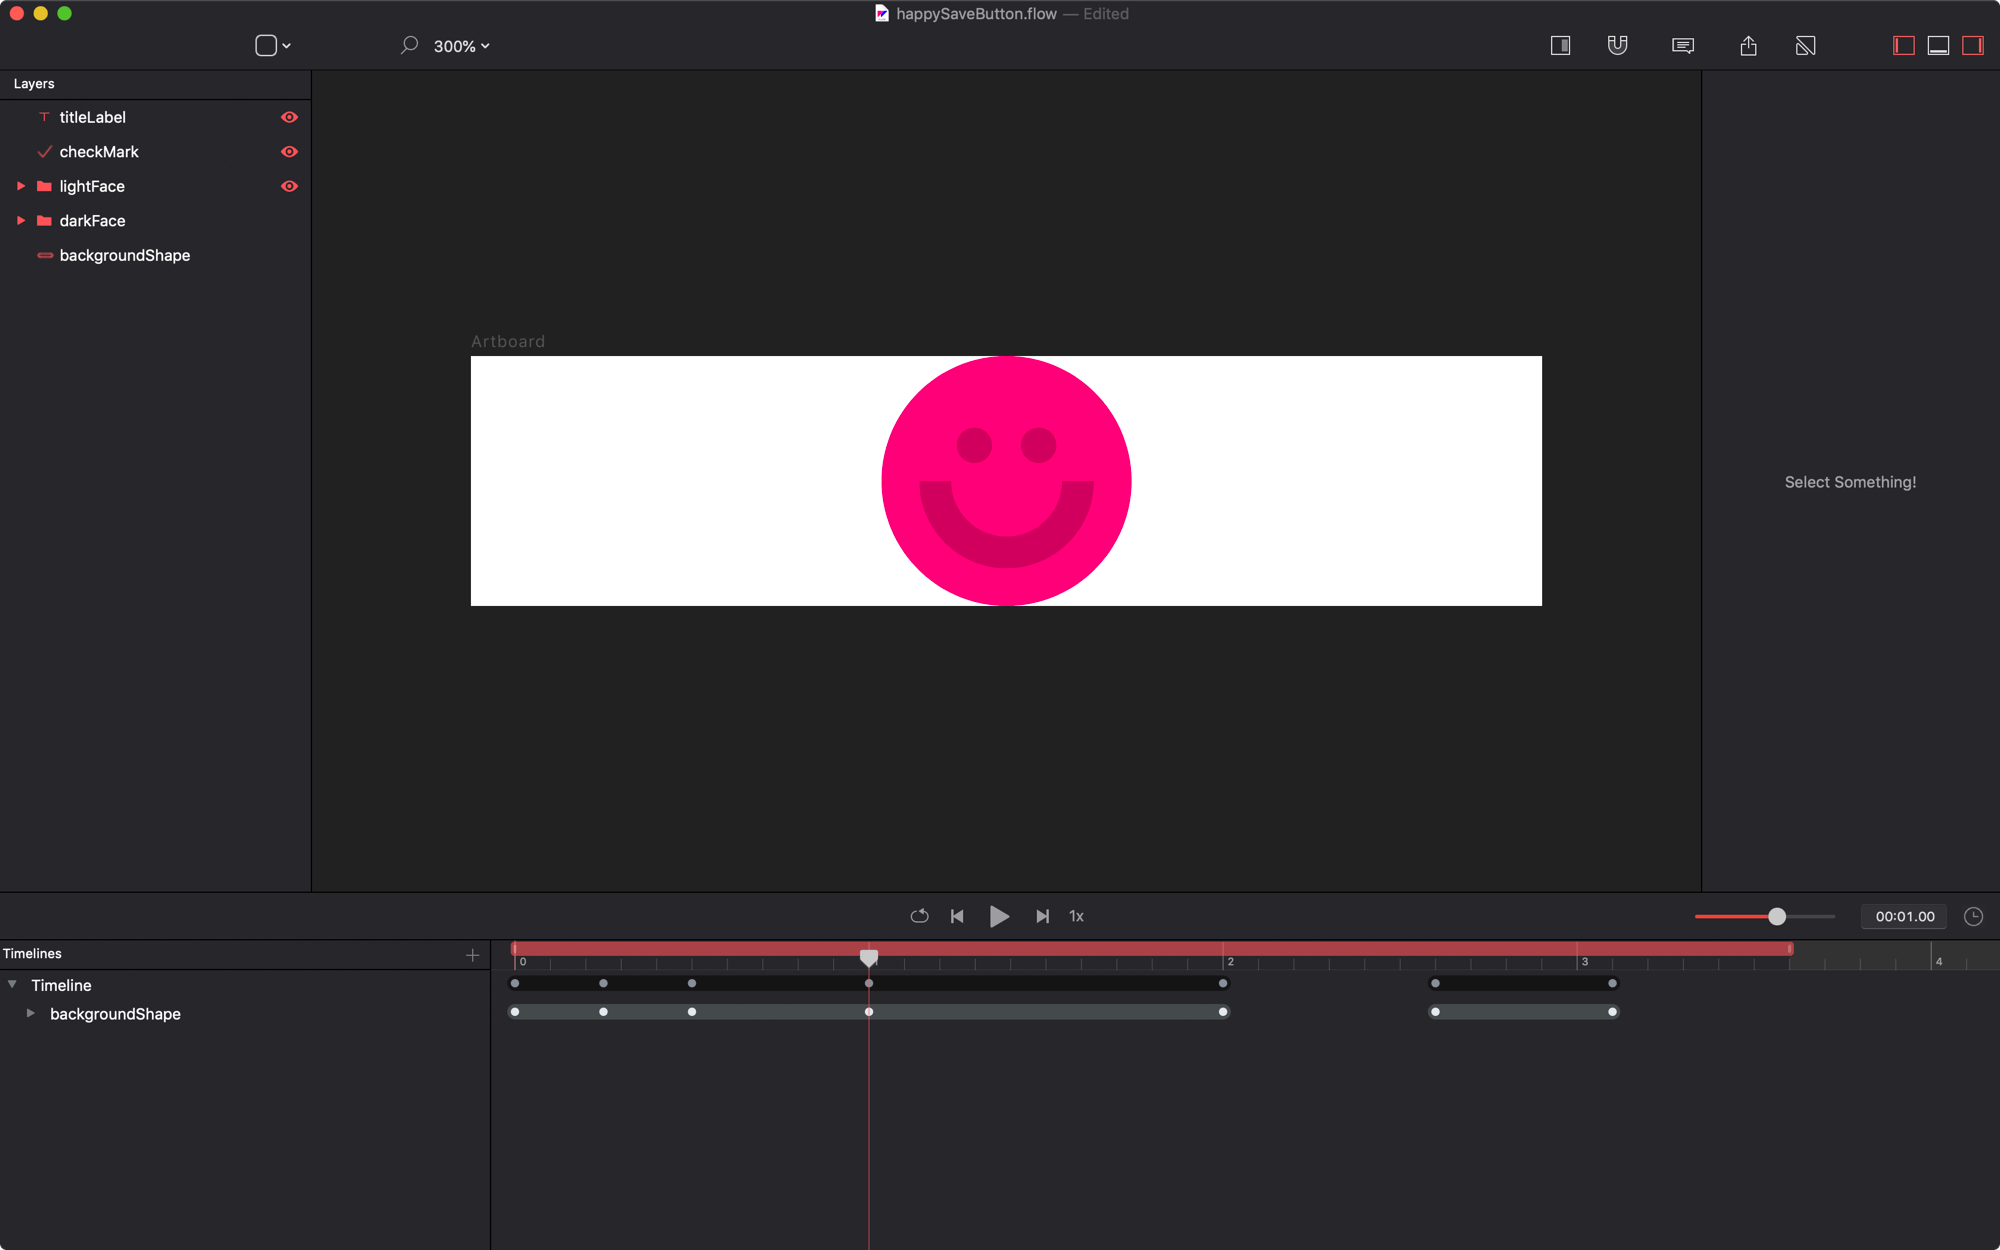
The smile behind the smile (eventually).
Using stroke
startandendare great for animations and iOS. But, if you’re exporting to HTML you’ll have to usedashPatternand the patternoffsetto get the same results.
Animating the Face (pt1)
Next, we’re going to add a subtle scale animation to the face. This requires a couple steps.
- move the playhead to
0.75s - turn
offrelative mode - select the
darkFacegroup - scale it to
20 x 20 - change the smile’s
stroke widthto4 - change the group opacity to
0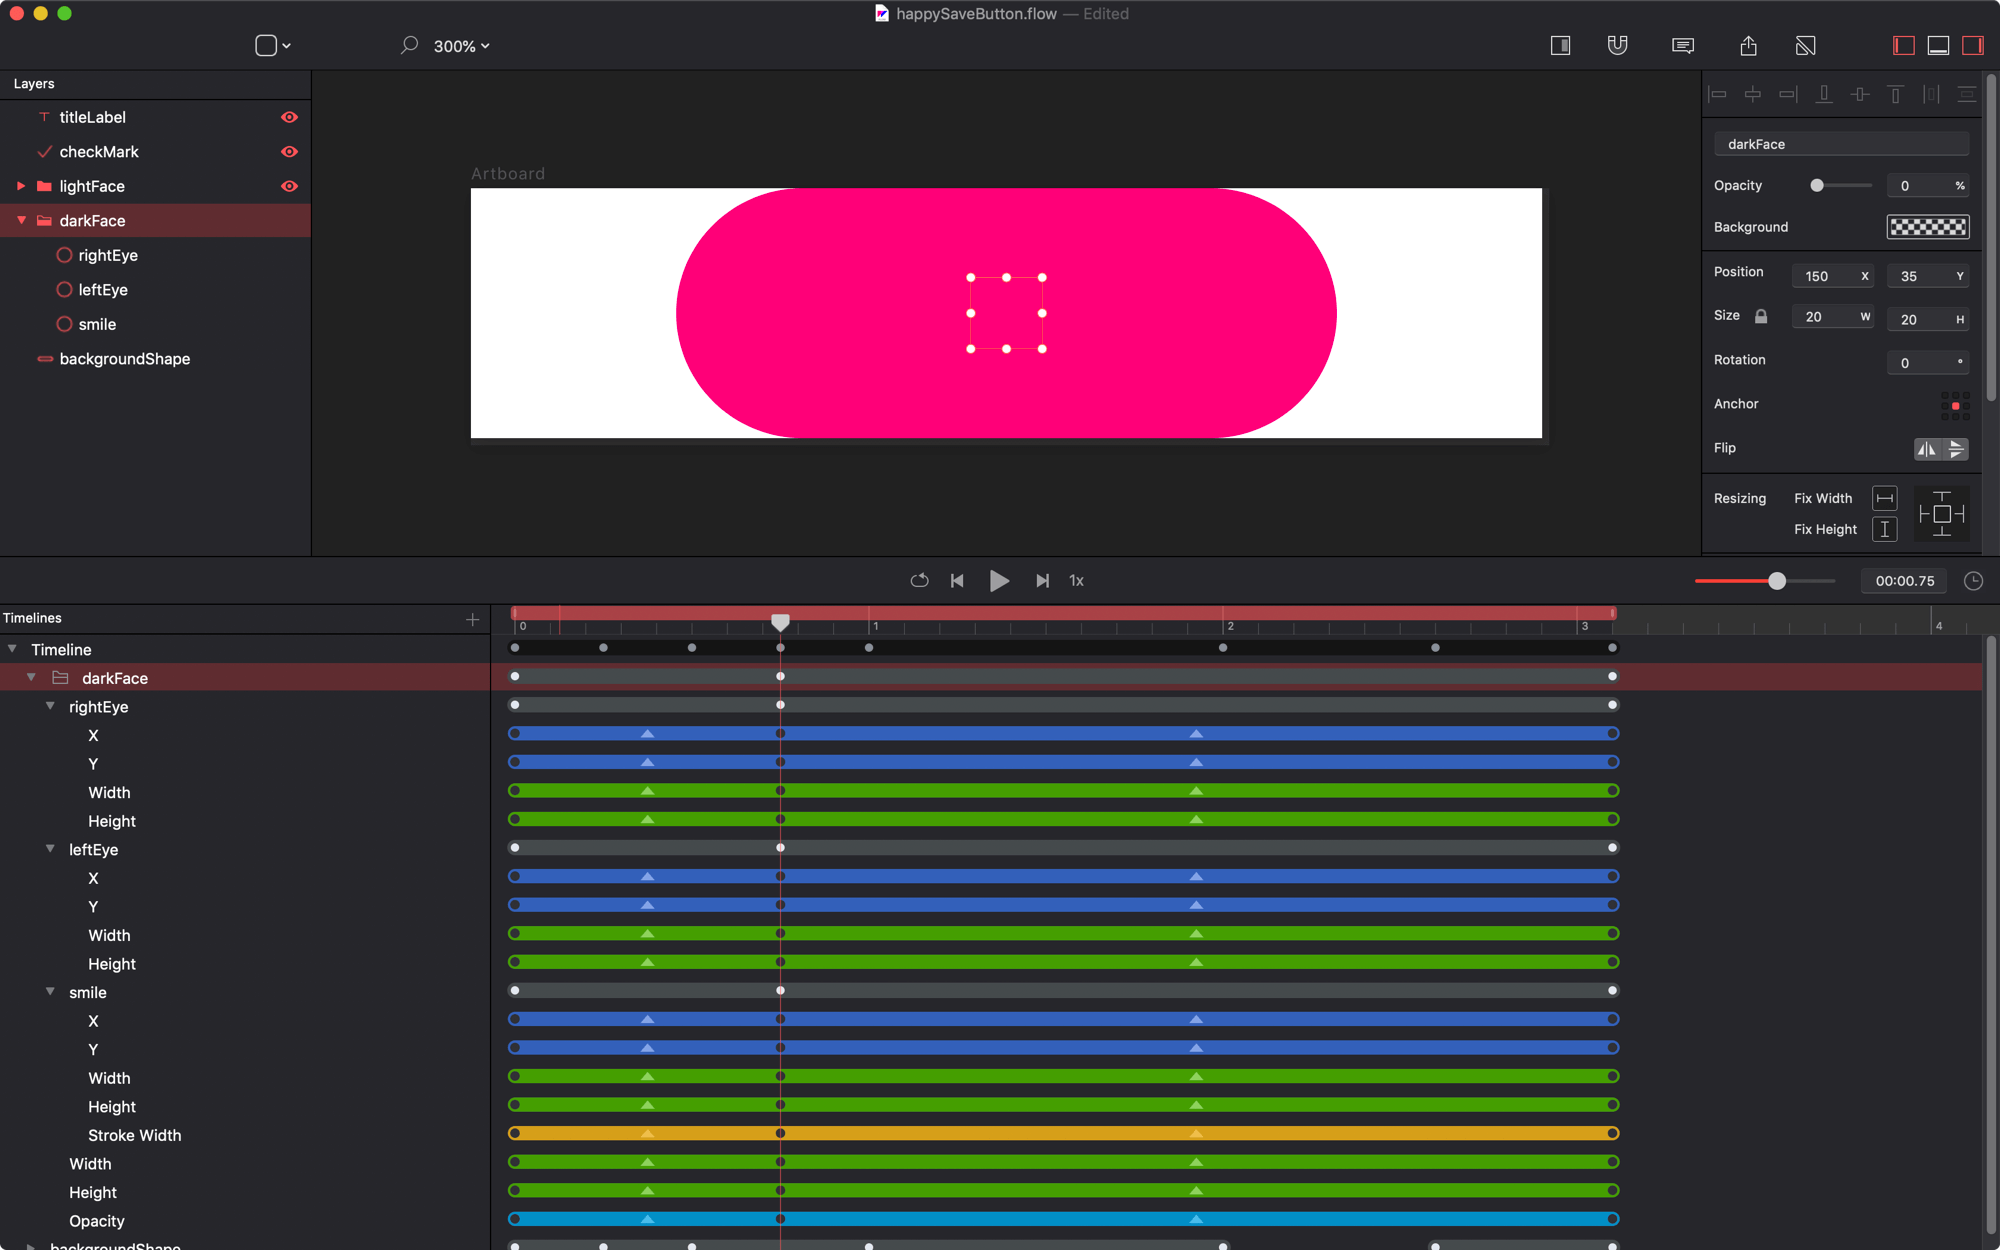
The animations starting point for this animation is created at 0.75 seconds. - select all the keyvalues for all layers of the darkFace group at
0s - delete them
Deleting the keyvalues at `t=0` means this is how the layers will look at the beginning of the whole animation. - select all the keyvalues for all layers of the darkFace at the end of the timeline
- move them to
1.0s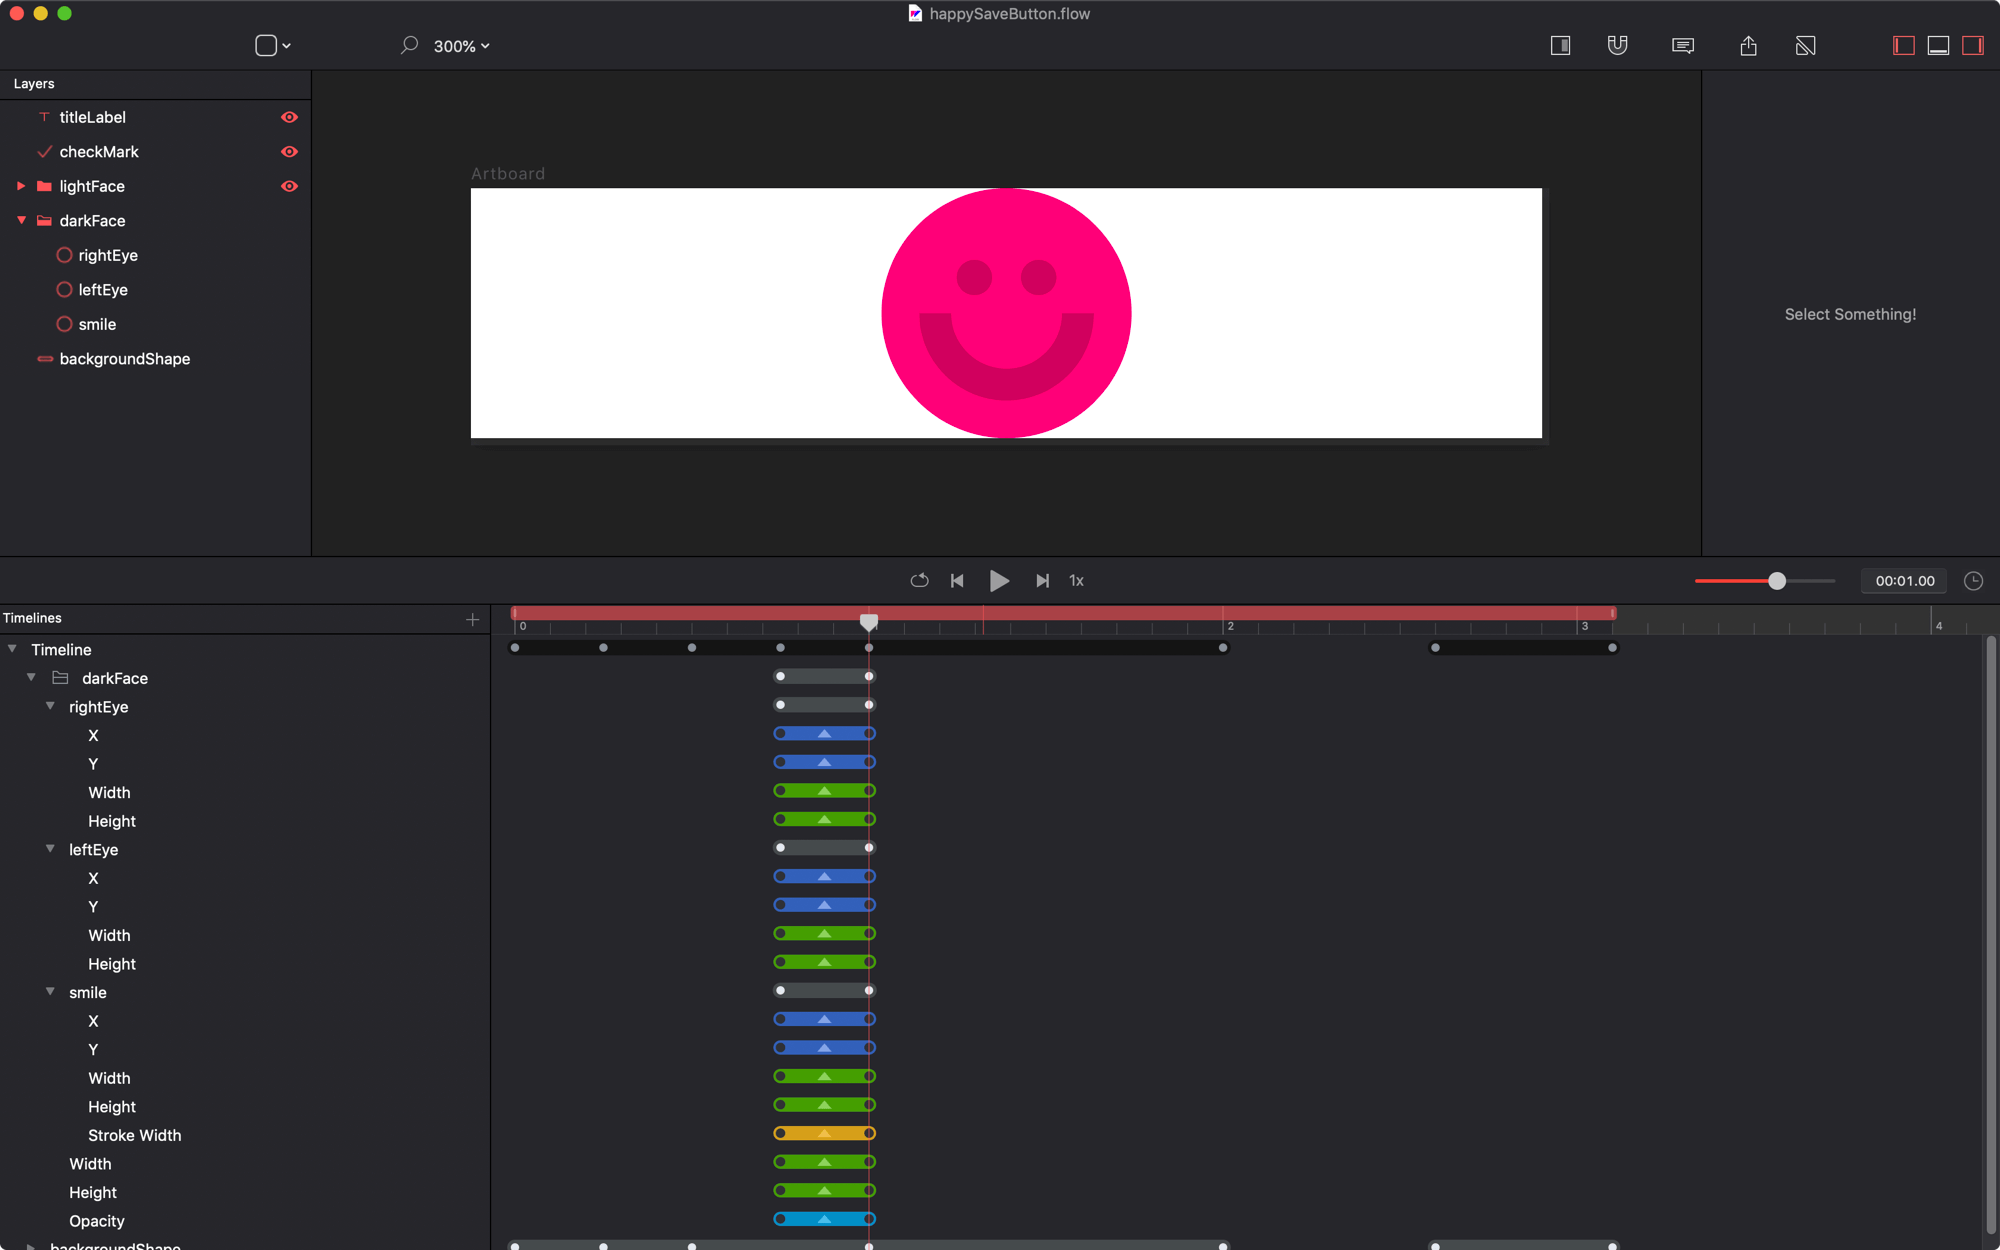
Moving the keyvalues from the end to `1.0`s makes this part of the face animation a whopping 1/4 second long. - Move the playhead to
2.0s - Change the
fillColorforleftEyeandrightEyeto#28987F - Change the
strokeColorforsmileto#28987F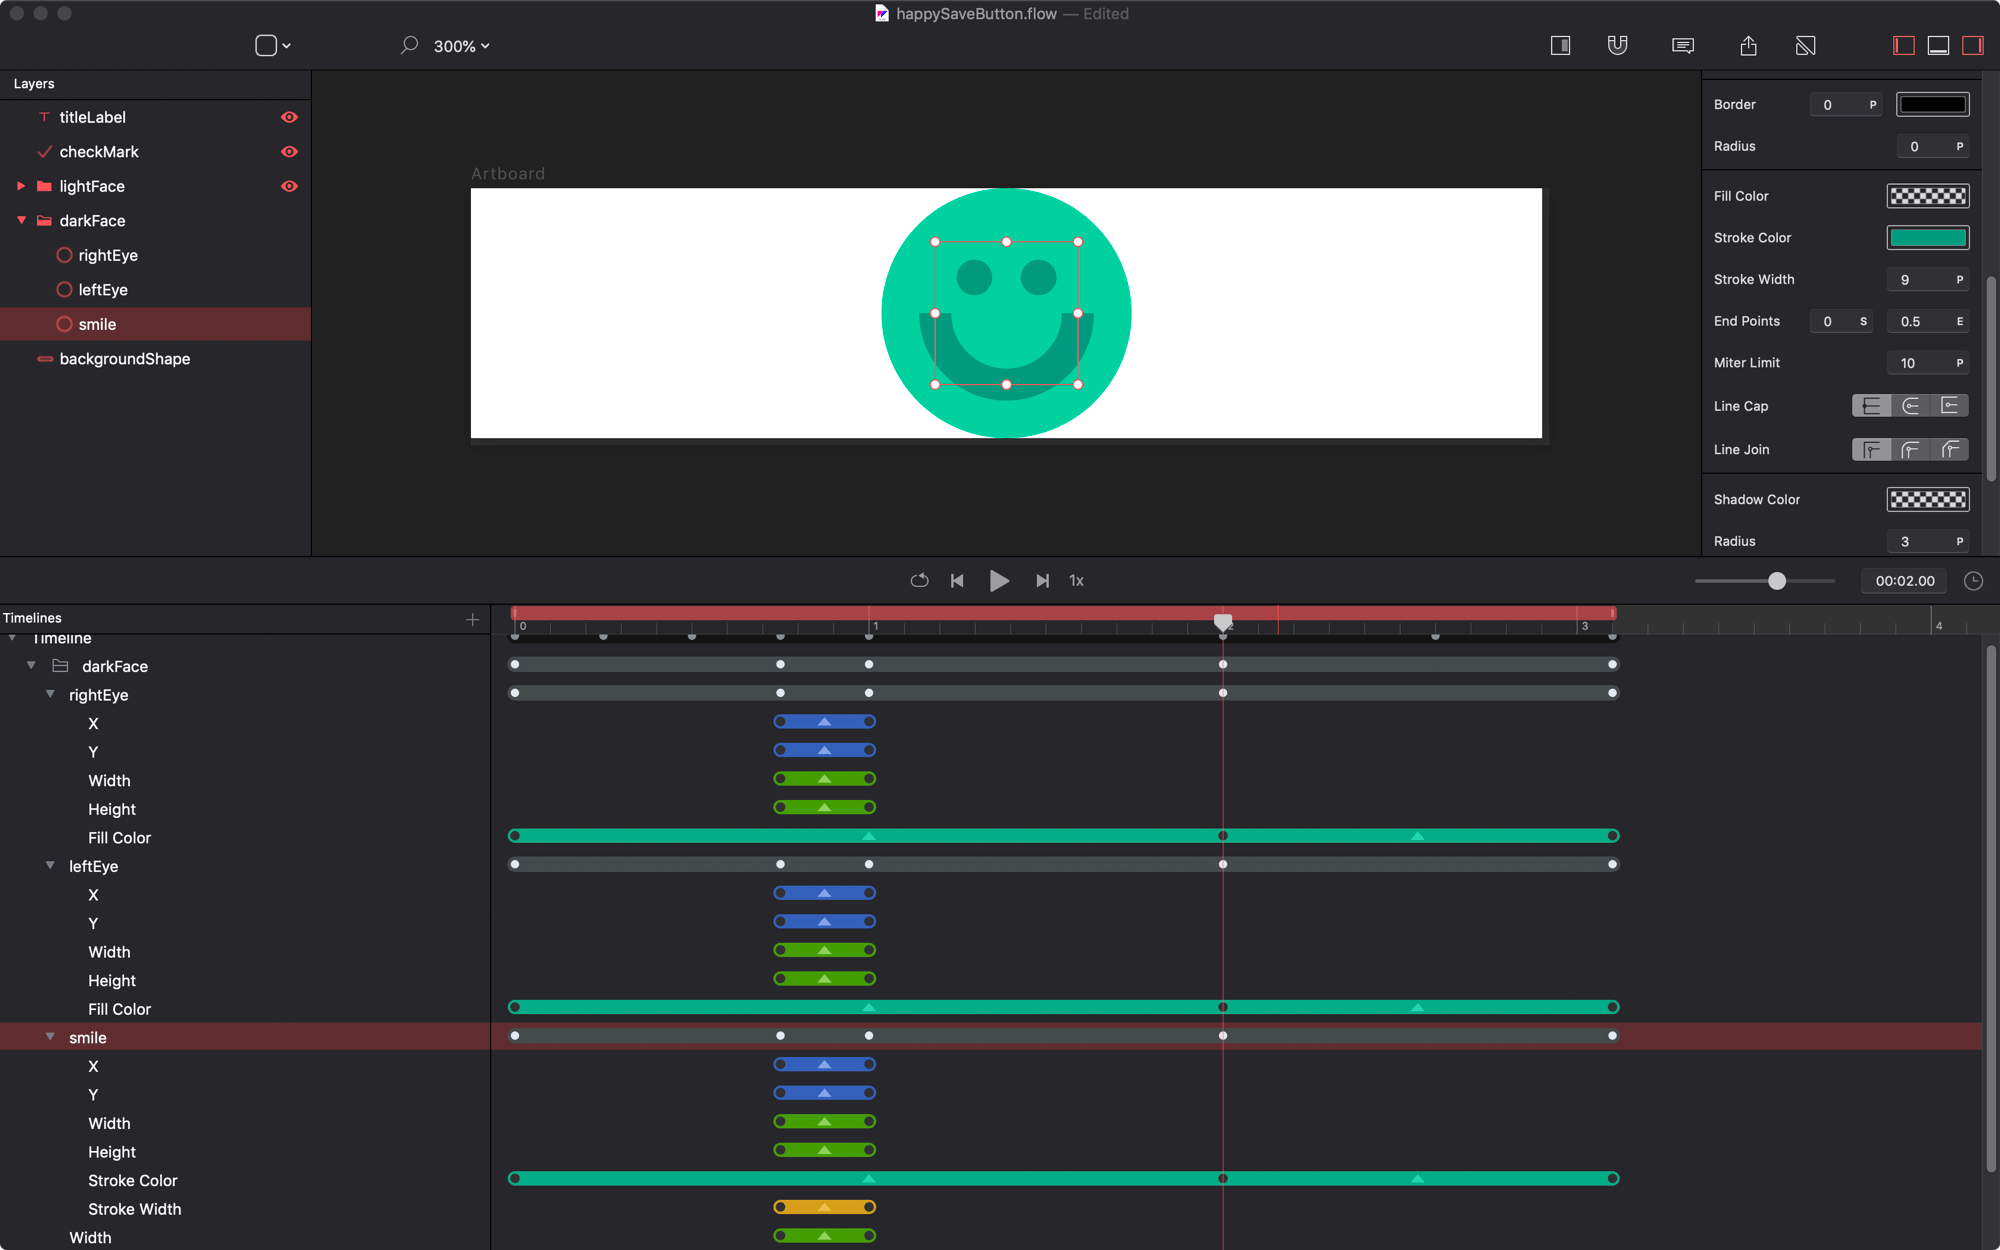
Changing the color of the eyes and smile. - Move the first keyvalues for the new animations to
1.0 - Delete the last keyvalues
Now the face changes color nicely. - Change the
opacityto0 - Change the new animation’s curve to
step left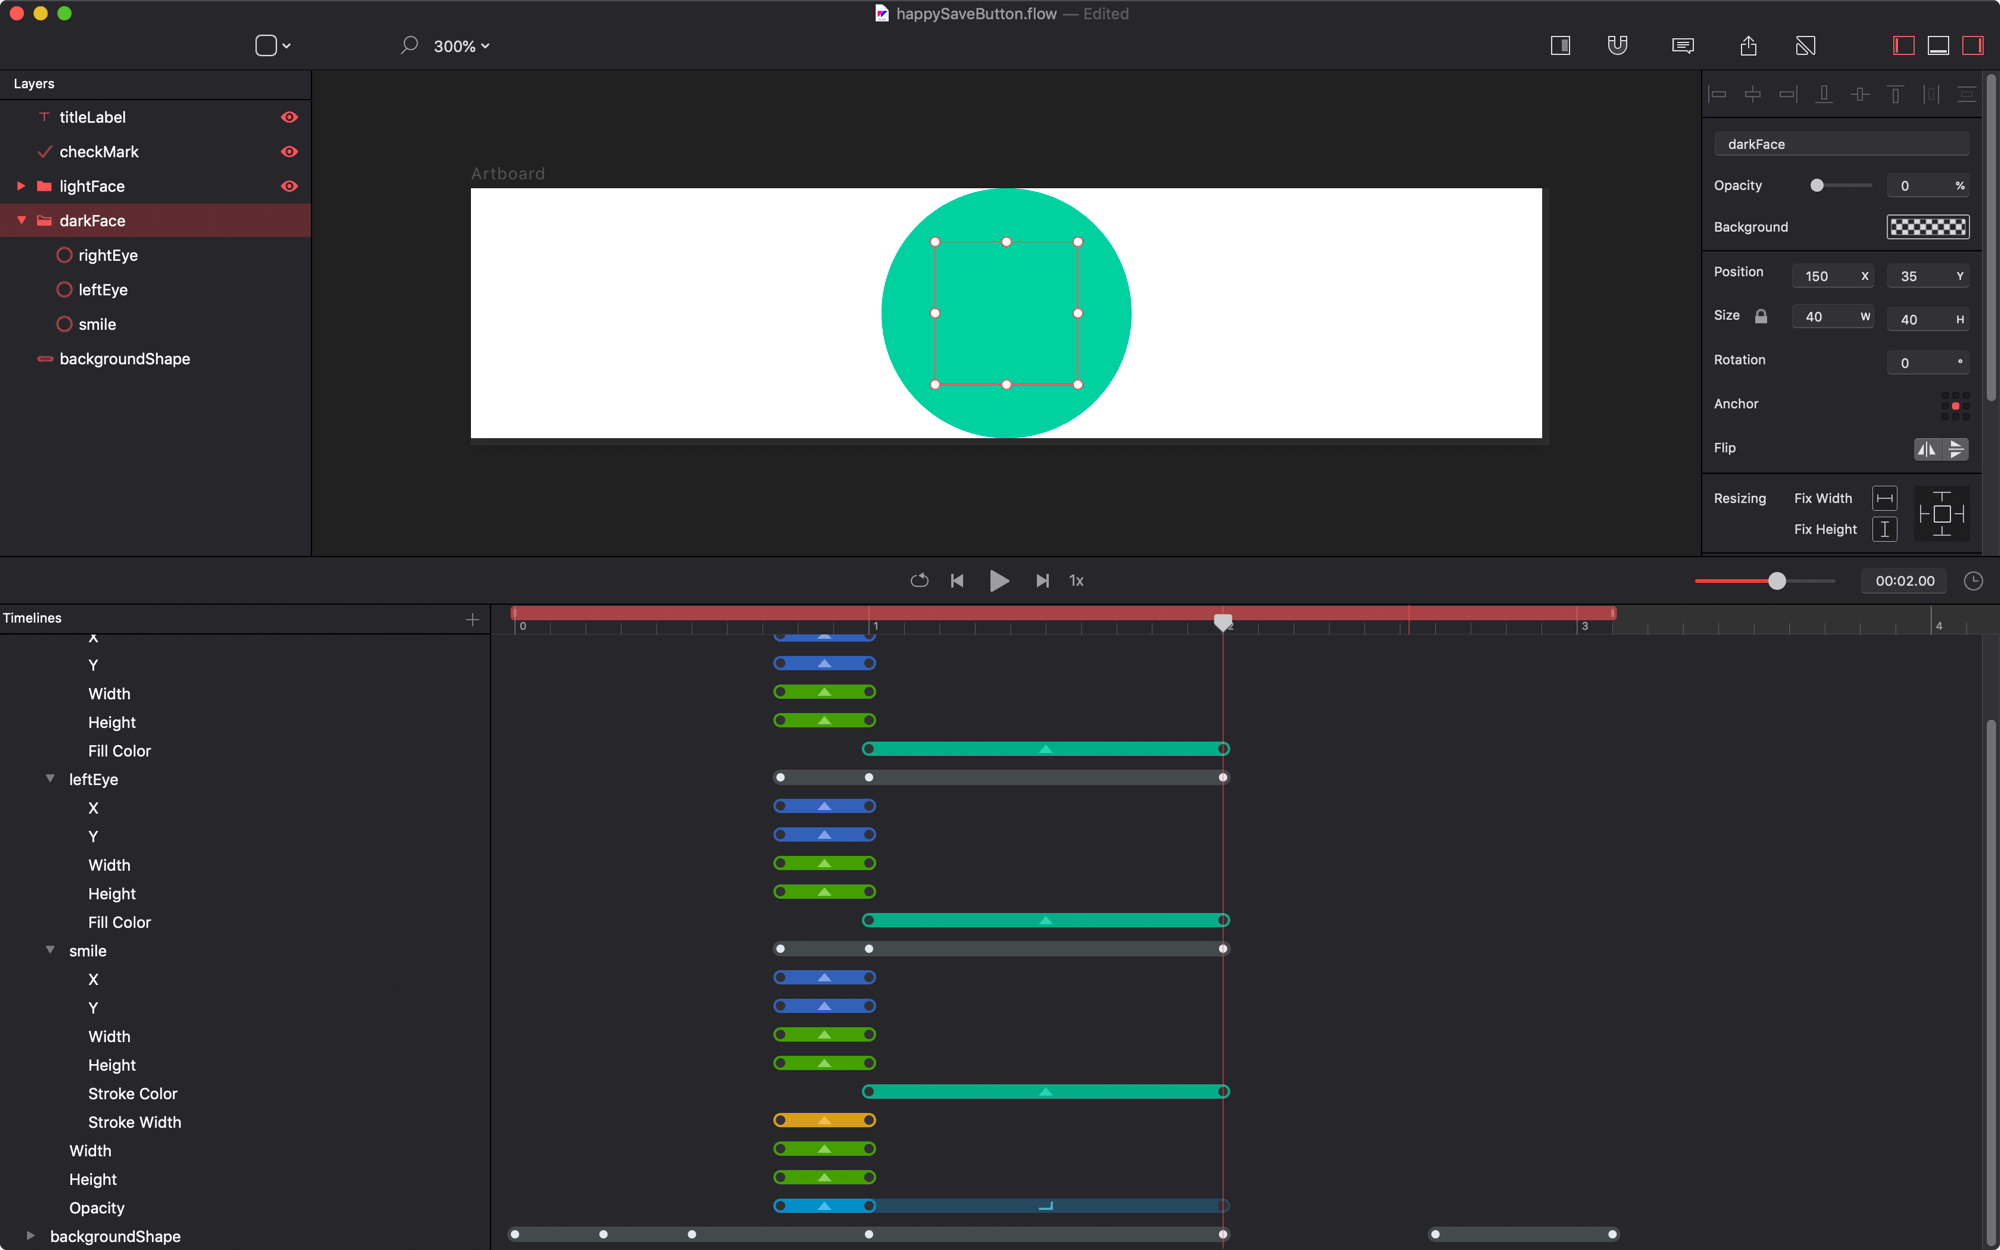
Once the face is completely filled in, we don't need to see the dark version anymore.
The
step leftanimation curve makes it so the change in value happens right at the last moment of the animation.

Now, let’s animate the filled in portion of the face.
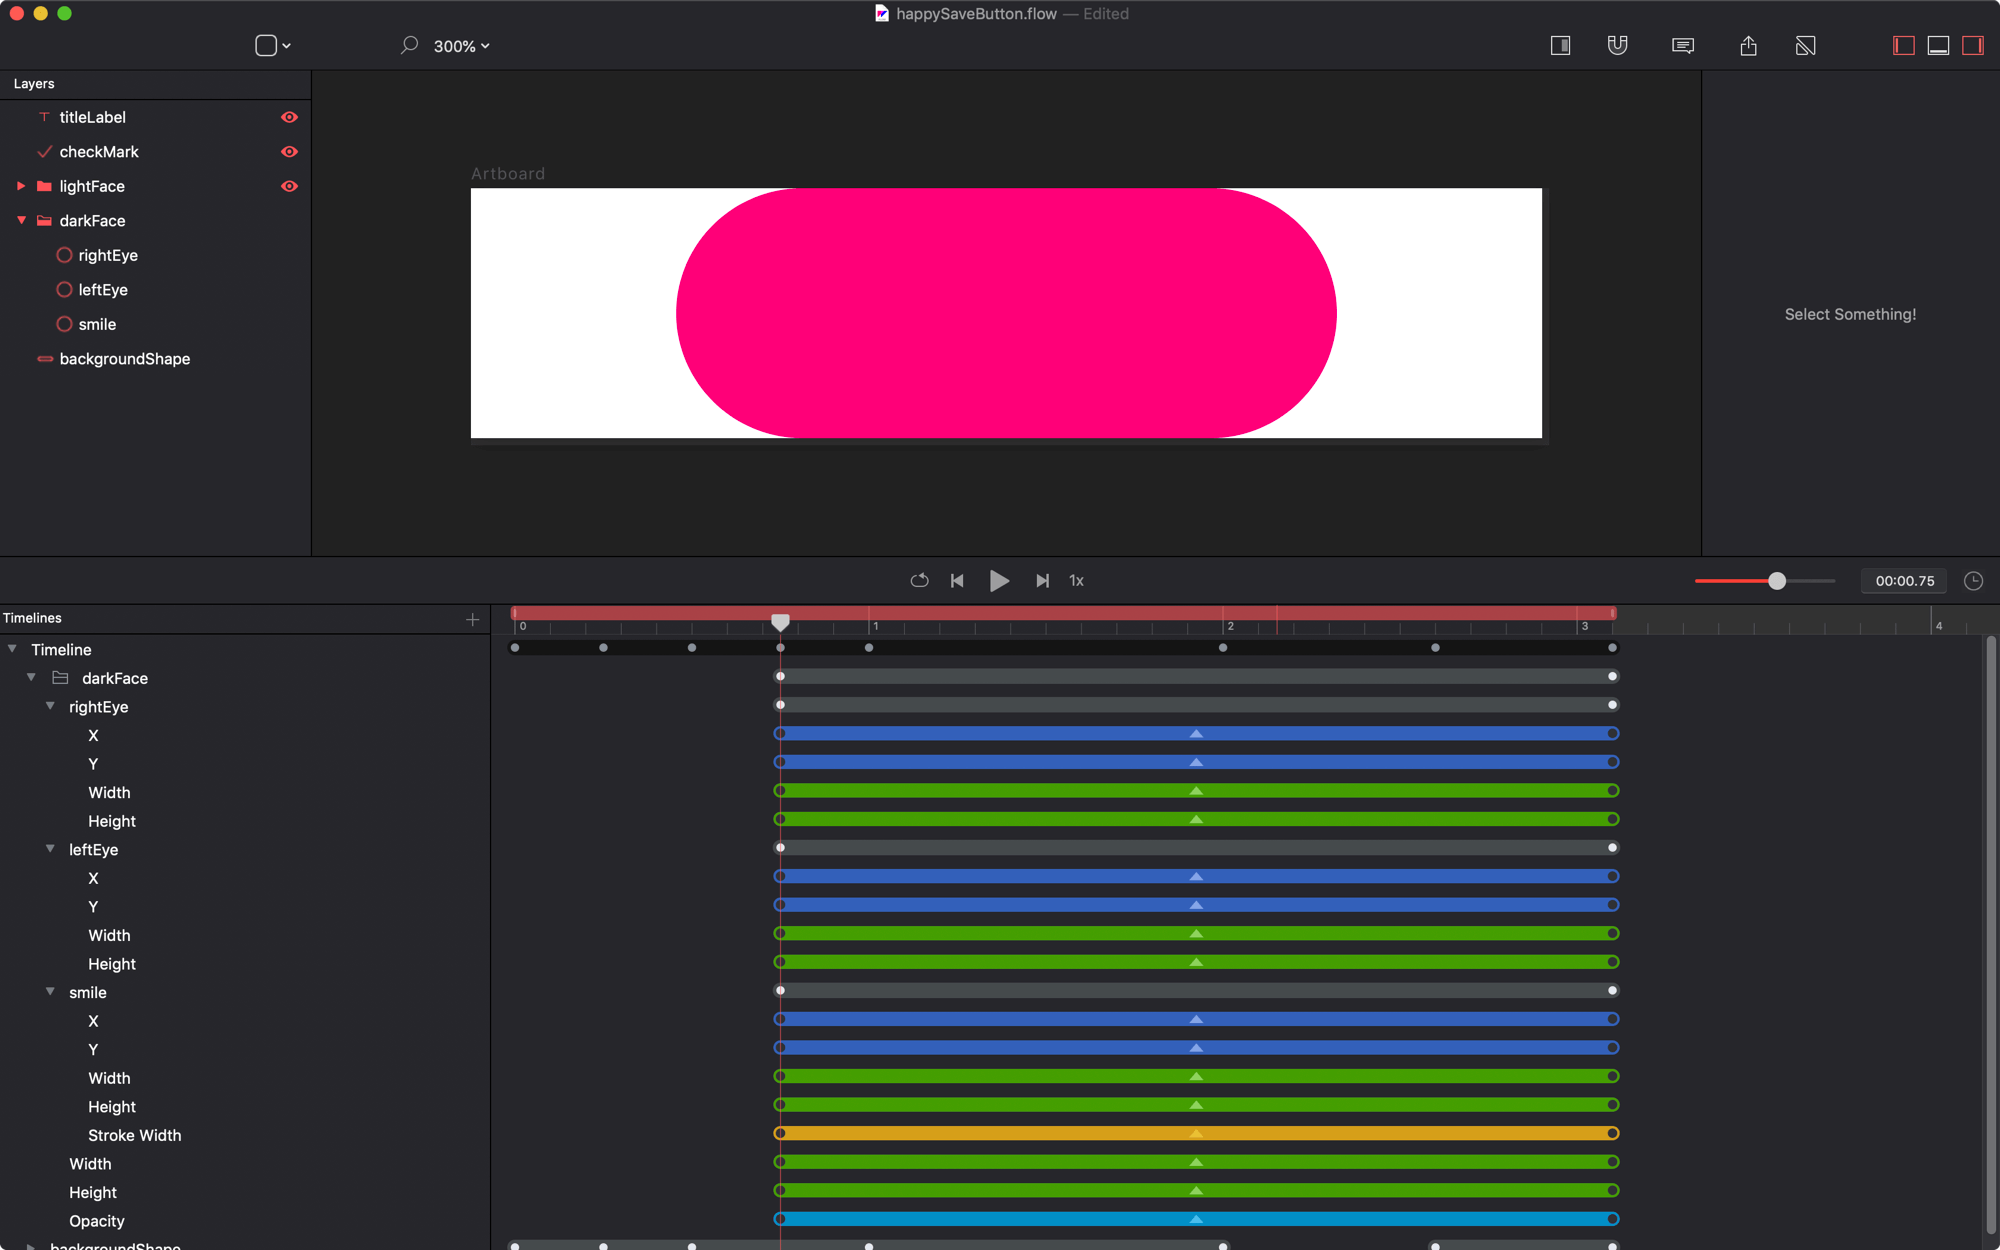
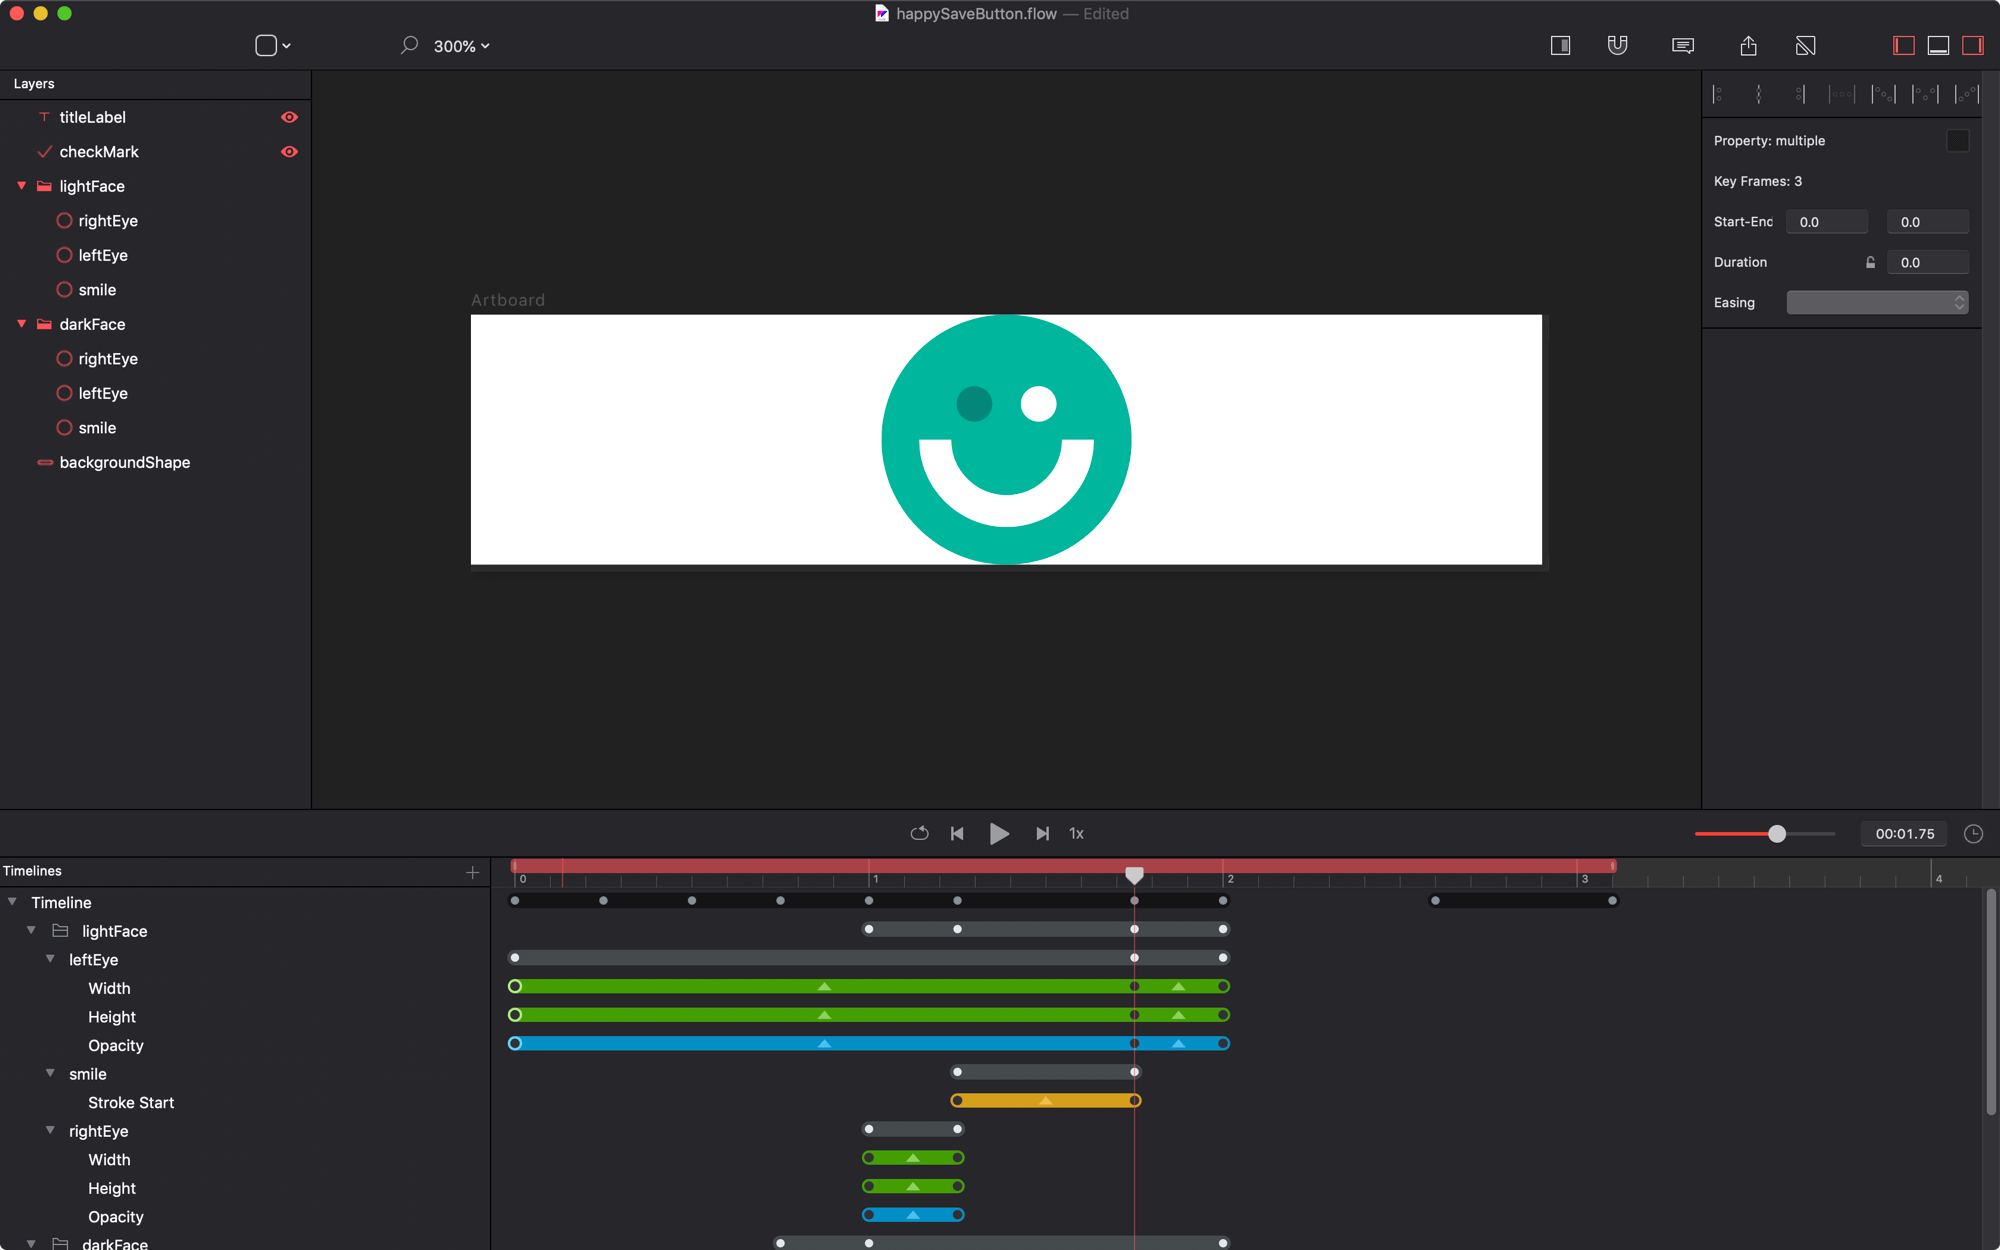
lightFace
Our next goal is to animate the filled in version of the face. Let’s start with that smile ;)
reveal the lightFace layer
turn on relative mode (⌘⌥R)
select the smile layer
rotate the shape to 90°
set the stroke end to 0.5
These were the same steps that we did to the dark version.
Animating the Face (pt2)
Now let’s animate the face. We’re going to scale and fade in the right eye, animate the smile, then scale and fade in the left eye.
- Turn off relative mode
- Move the playhead to
1.0s - Select
rightEyeand change its size to5 x 5 - Change its opacity to
0 - Delete all the new keyvalues at
t=0 - Move the all the keyvalues for
rightEyefrom the end of the timeline to1.25s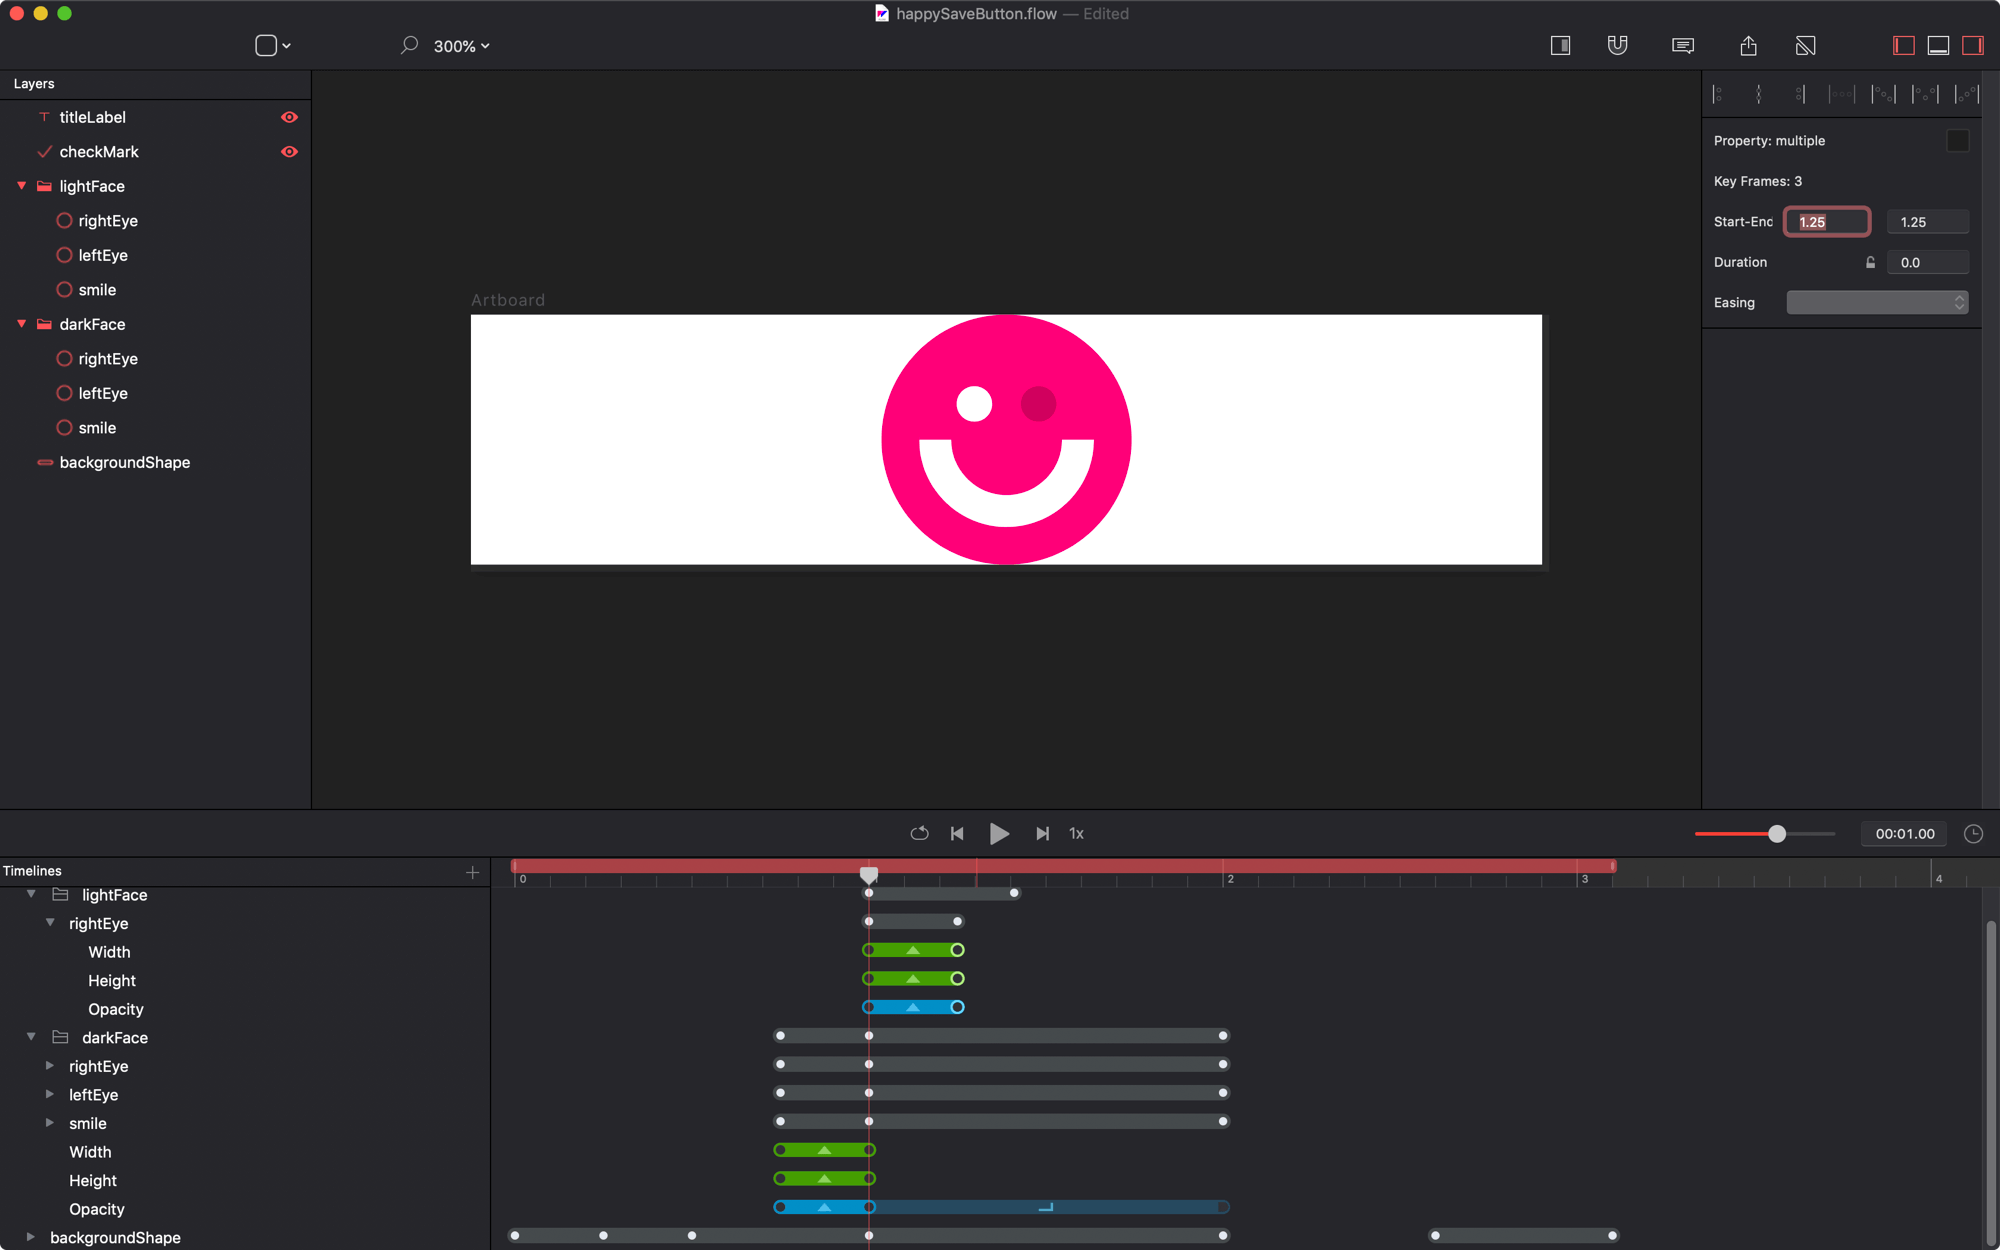
A quick 1/4s animation to scale and reveal the right eye. - With the playhead at
1.25s, change the smile strokestartto0.5 - Delete the first keyvalue from the stroke start track
- Move the last keyvalue to
1.75s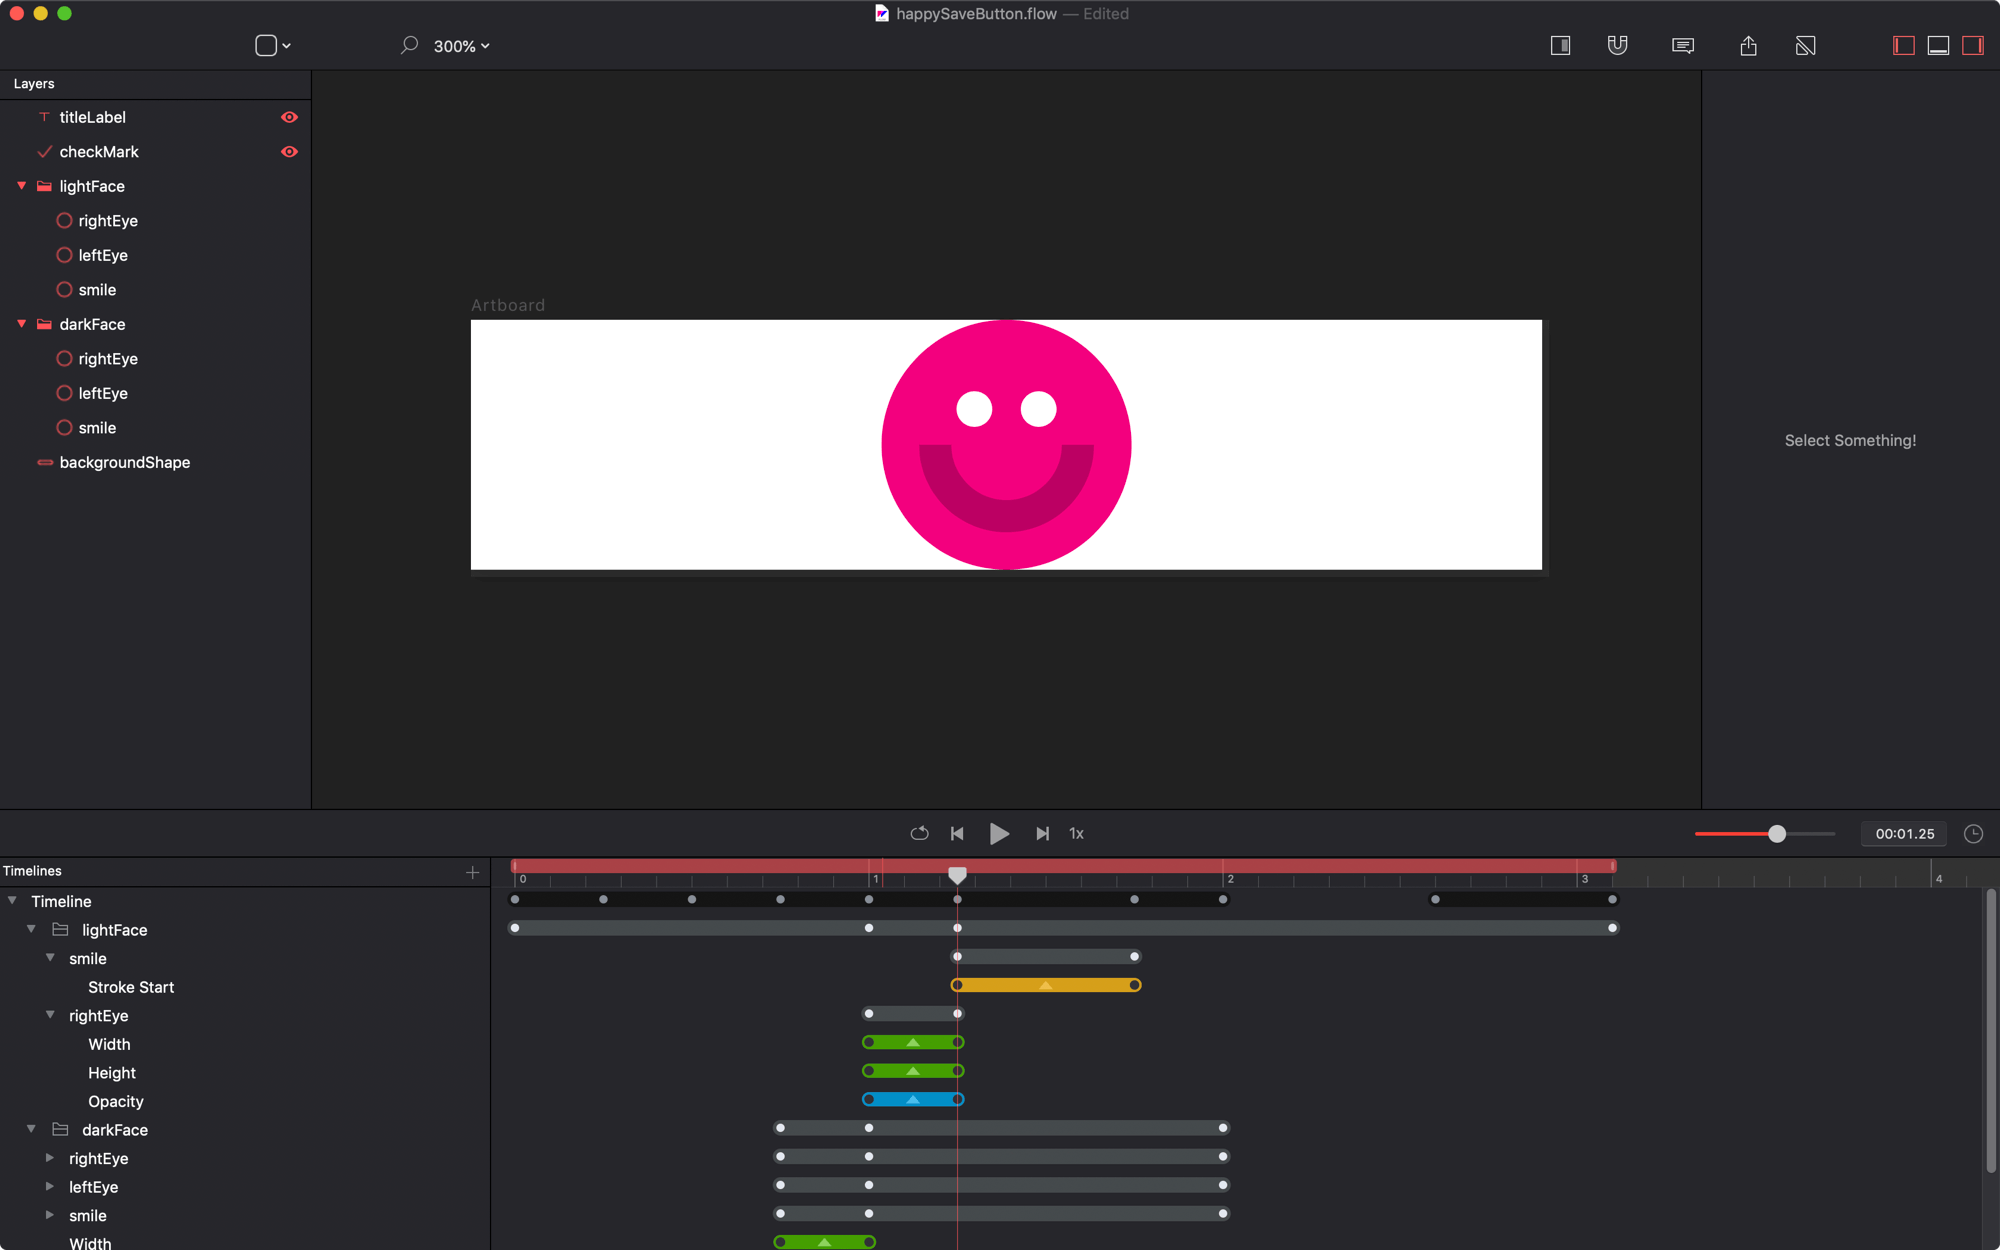
The smile isn't visible at 1.25s. - Move the playhead to
1.75s - Select all the keyvalues for the
rightEyeanimation - Copy them to the clipboard (⌘C)
- Select the
leftEye - PASTE the keyvalues onto the left eye!
Yeah baby. You can paste keyvalues. - Delete the first values that appear after pasting.
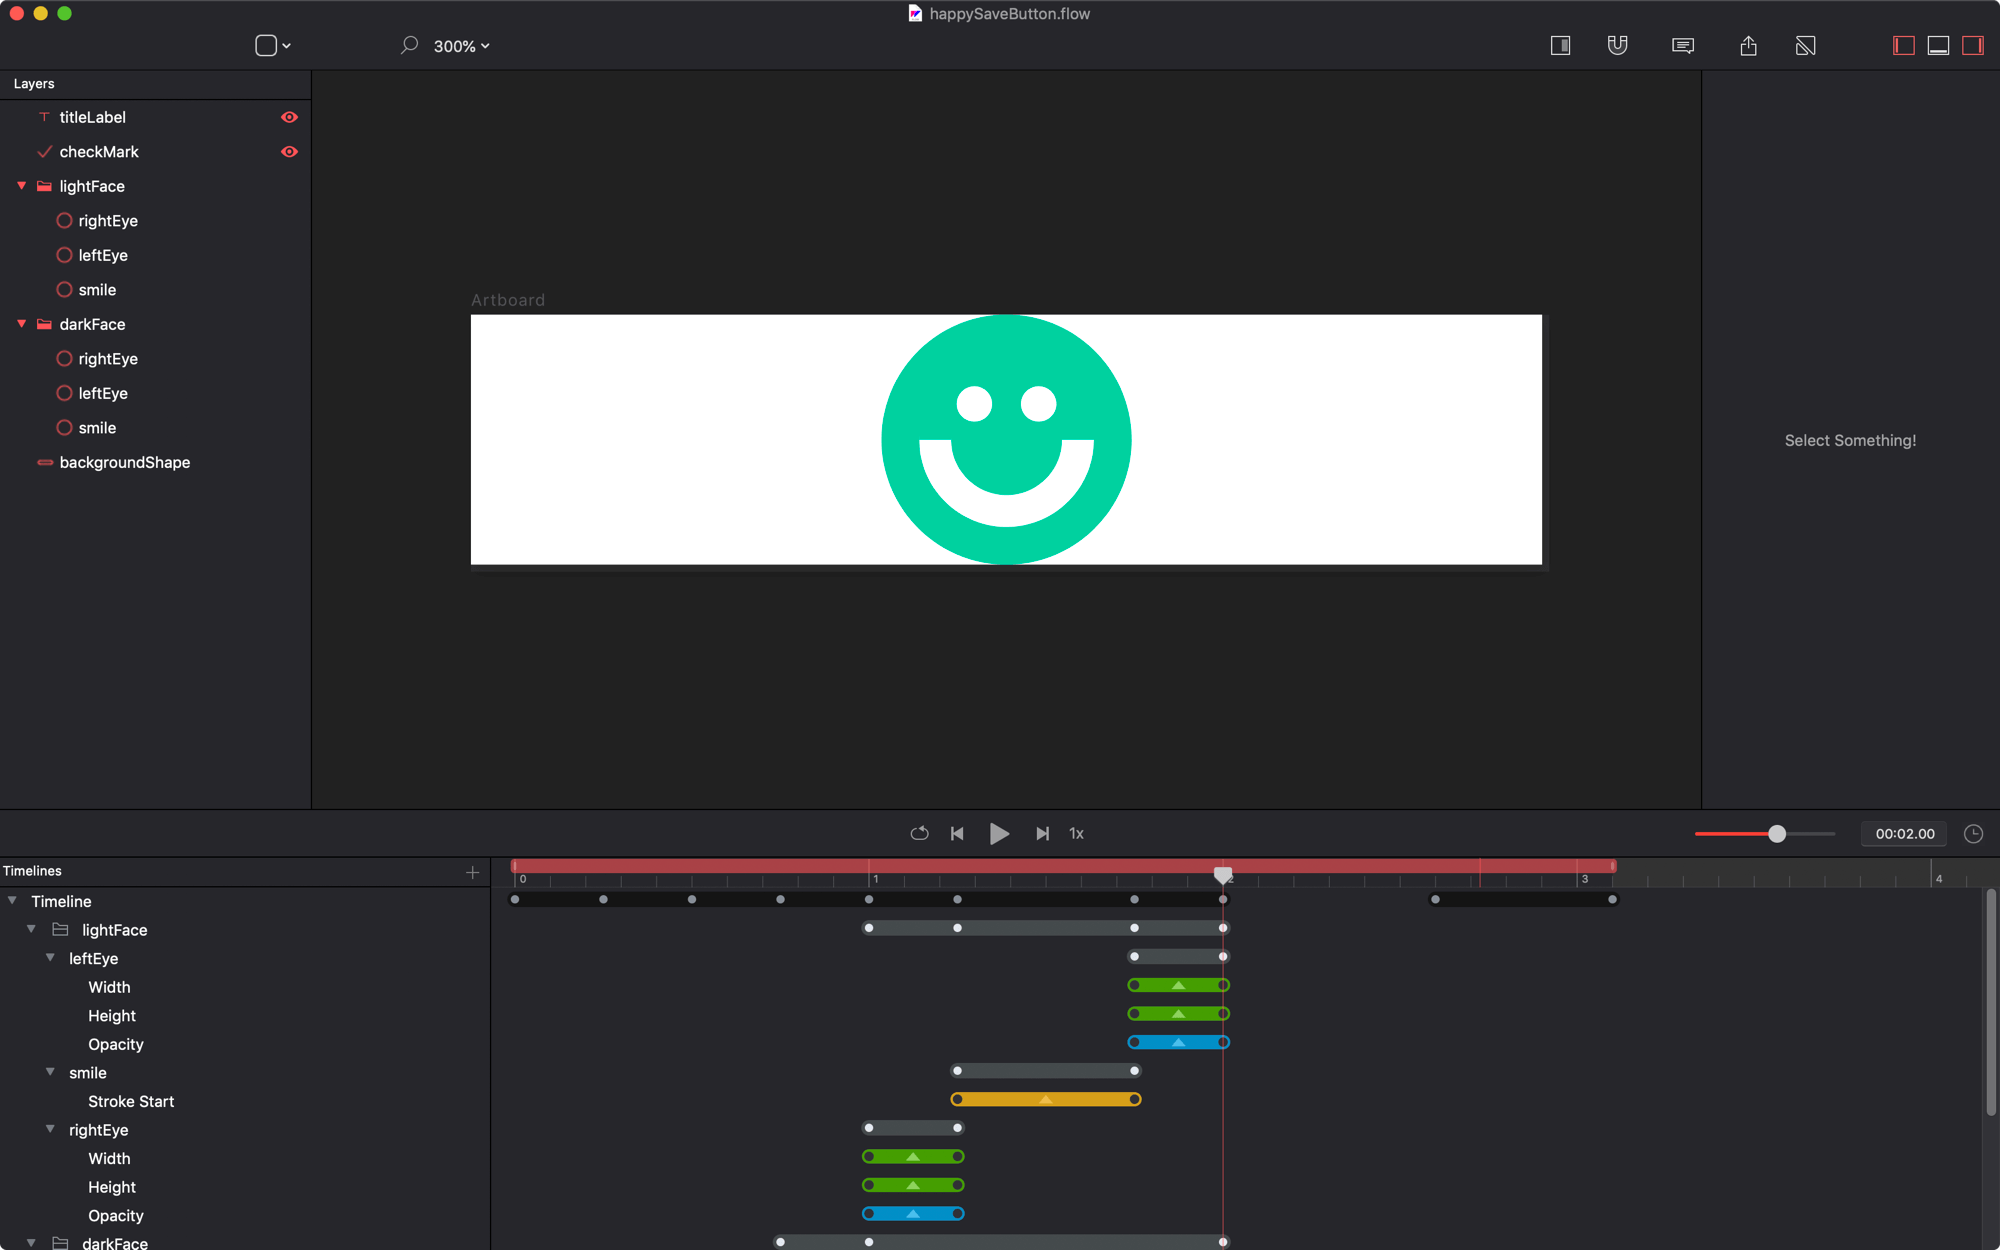
Yeah baby. You can paste keyvalues. - Move the playhead to
2.25s - Select the
lightFacegroup - Change its opacity to
0 - Move the first keyvalue to
2.0s - Delete the last keyvalue

So smiley.
checkMark
Let’s animate the checkmark now.
- Turn
ONrelative mode - Reveal the checkMark layer
- Change its stroke
endto0 - Turn
OFFrelative mode - Move the playhead to
2.60 -
Change its stroke
endto1.0 - Move the first keyvalue to
2.35s - Move the last keyvalue to
3.35s - Pressing option (⌥) drag the middle keyvalue to
3.1s
So checkey.
titleLabel
Last but not least, let’s do the title.
- Reveal the
titleLabel - Move the playhead to
3.1s - Change its opacity to
0 - Move the first keyvalue to
0.5s - Move the playhead to
0.75s - Change its opacity to
0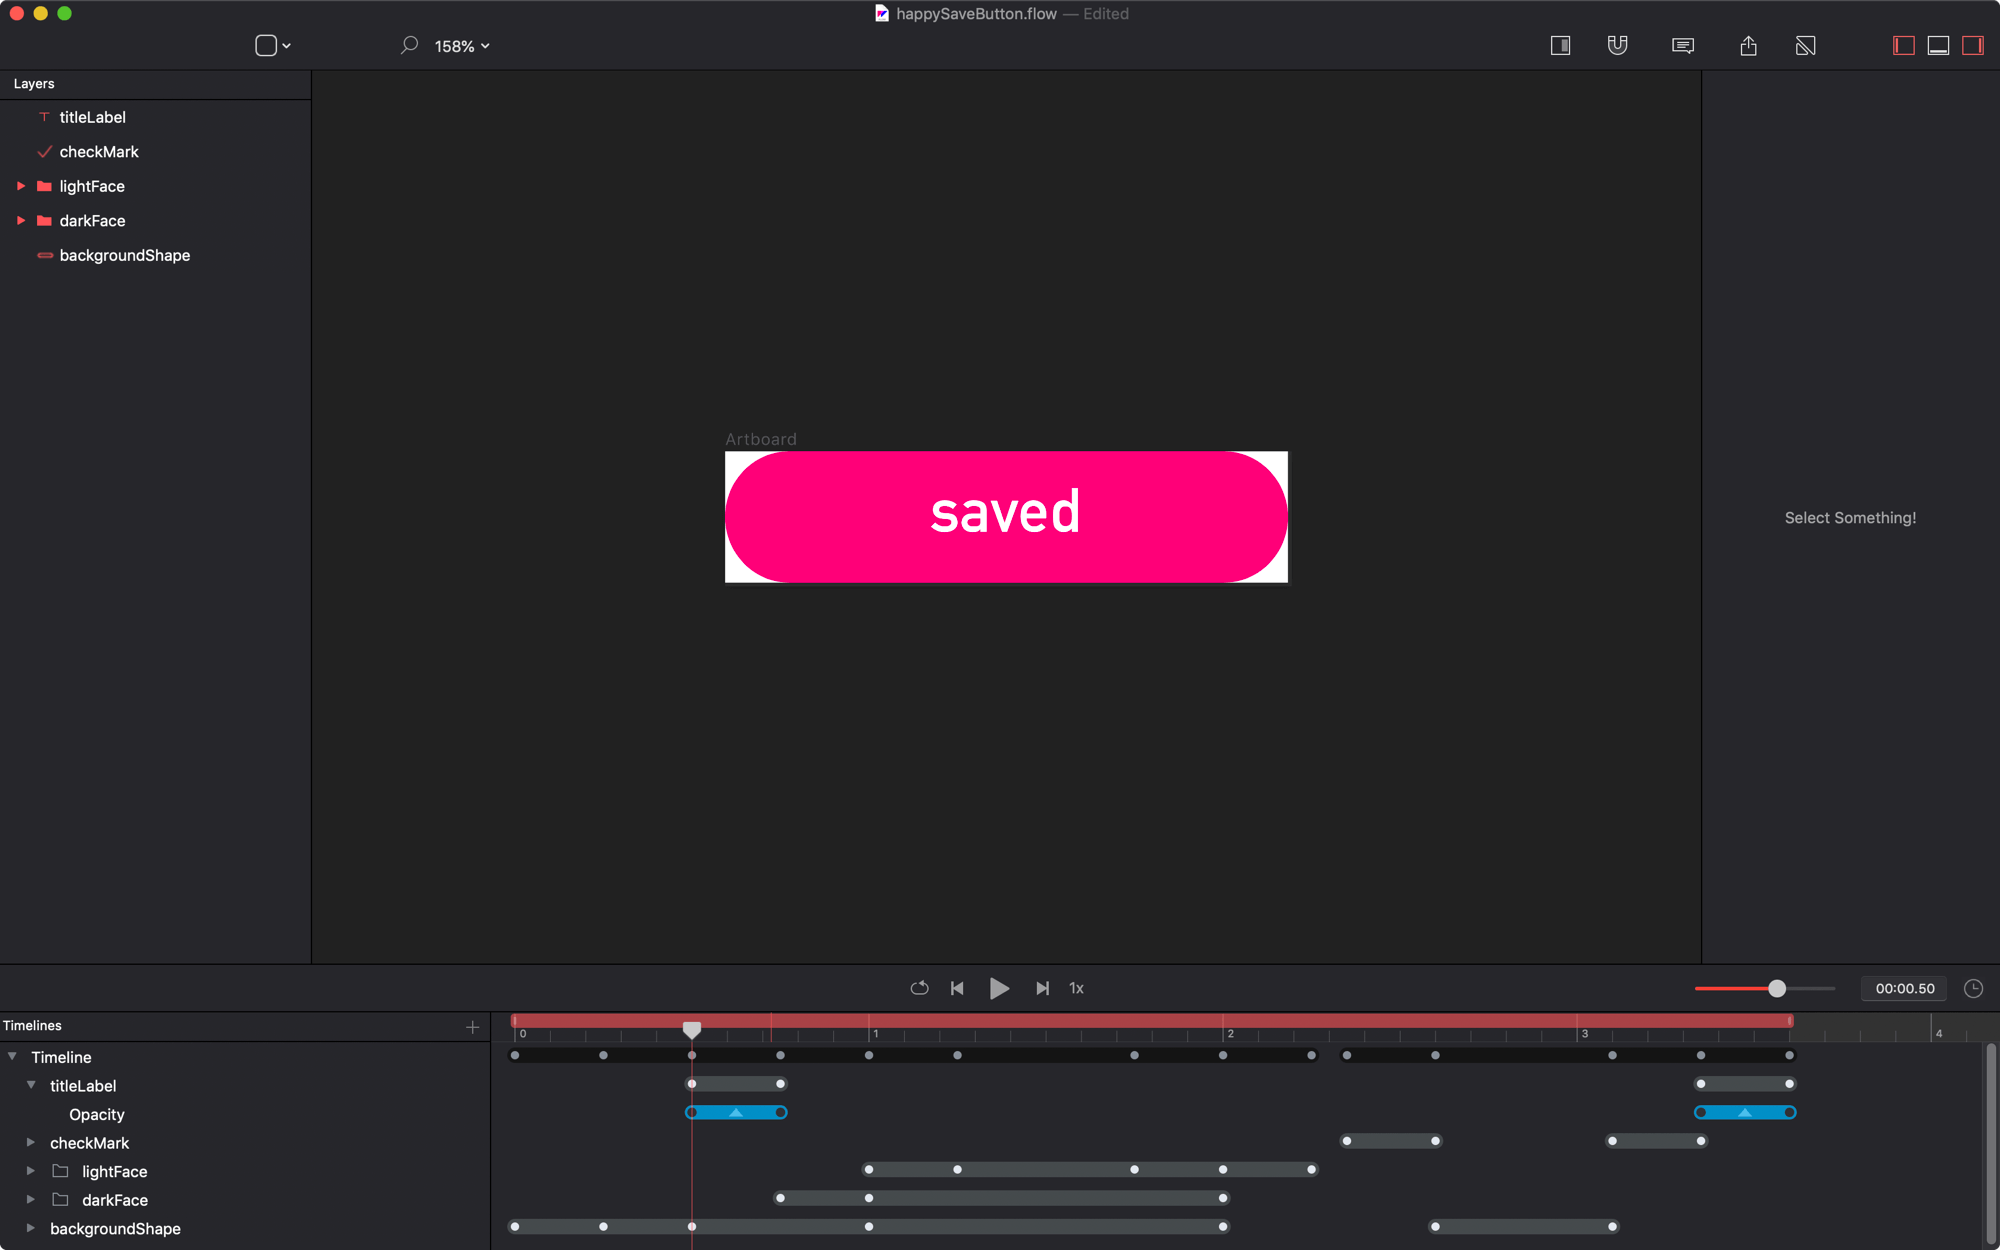
The saved should fade in and out with a big gap in the timeline now. - Keeping the playhead at
0.75s - Delete the
dfrom the layer’s text field - Delete the first keyvalue from the newly minted
Stringtrack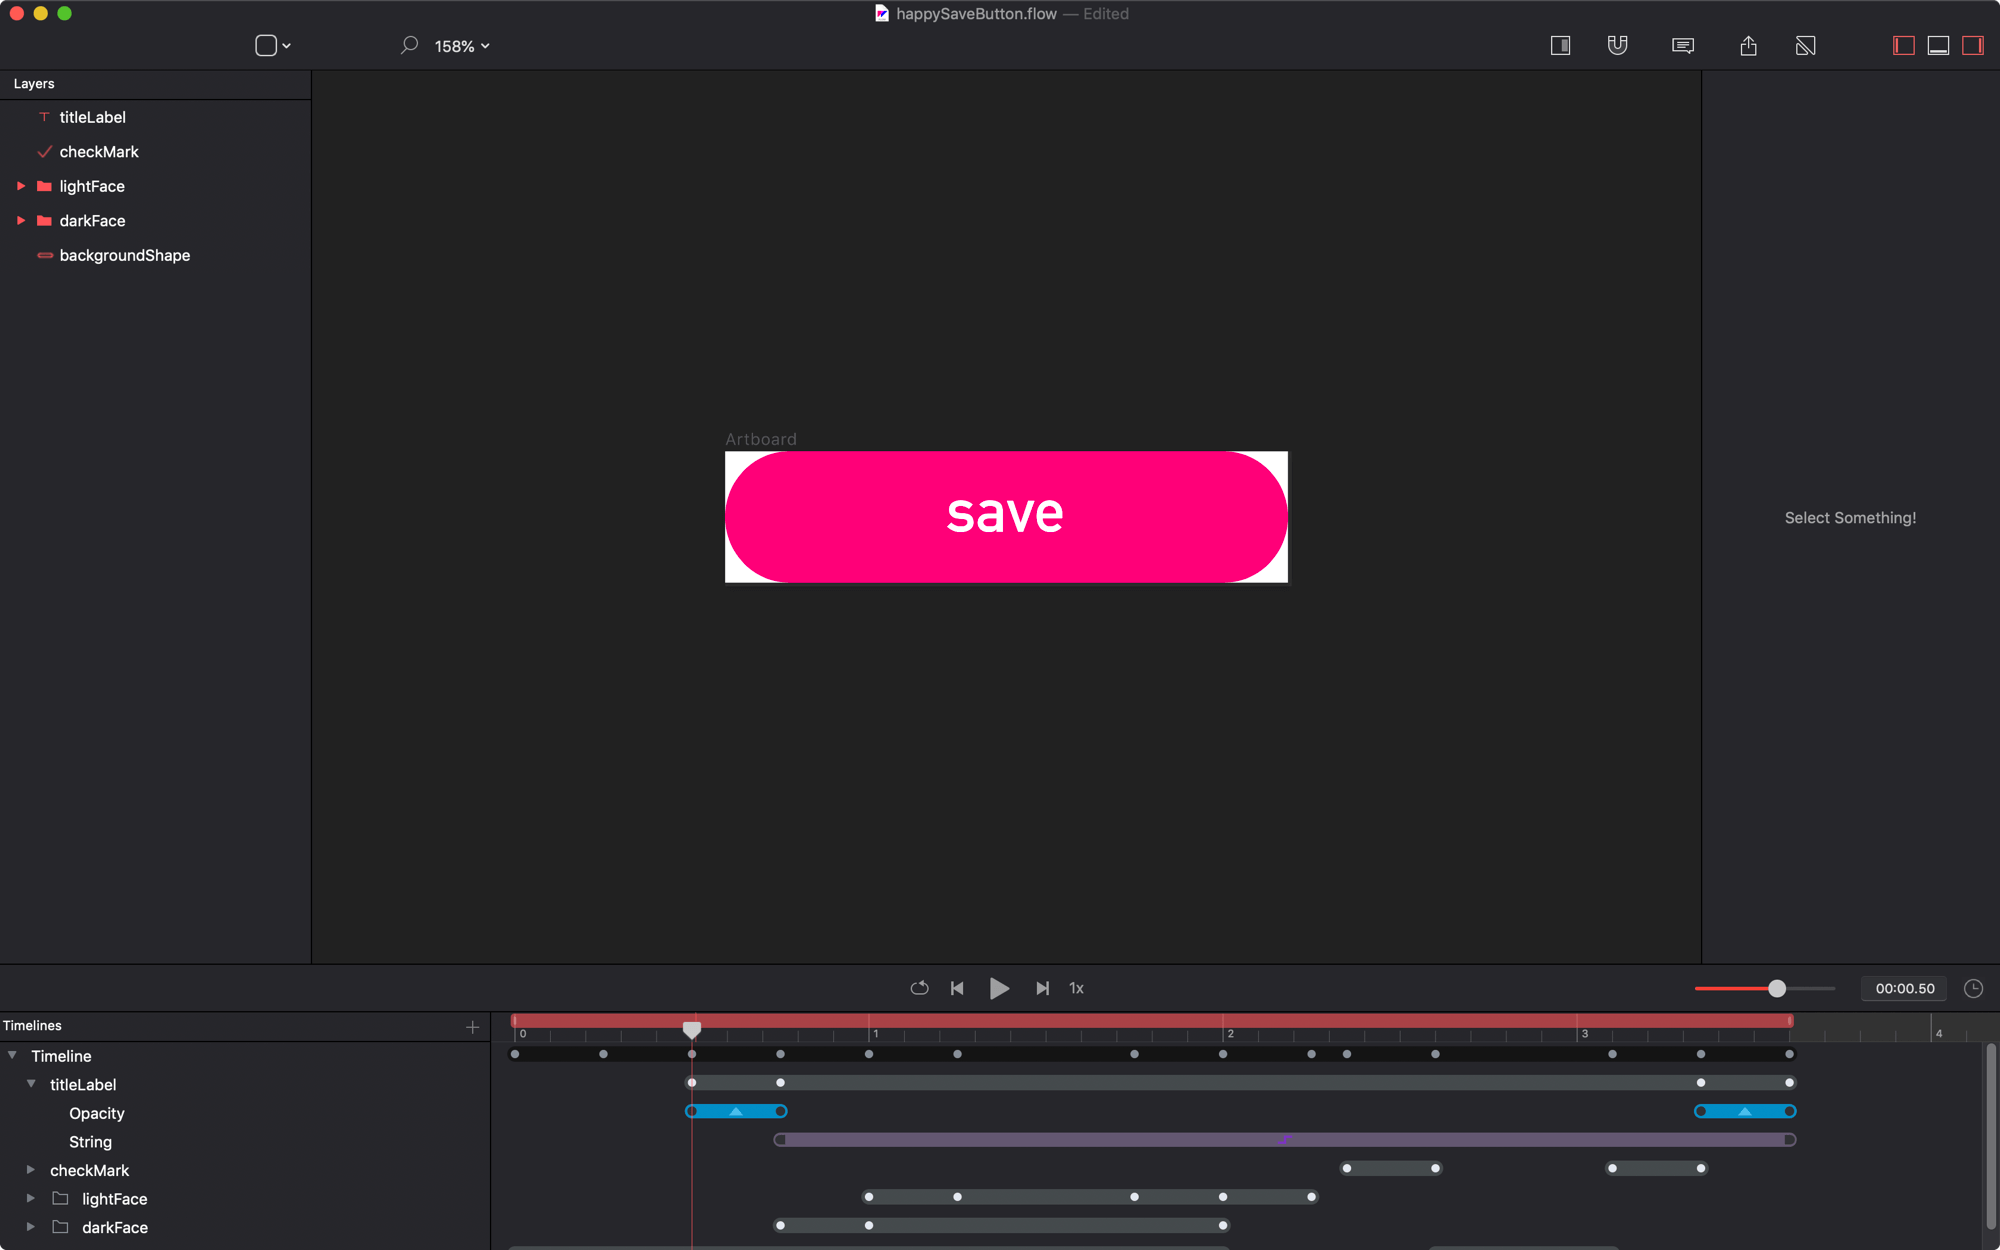
Now the text changes.
FIN.
That’s it! We’ve created a nice button animation, and learned a few things along the way like:
- How to properly structure a Sketch file for animation
- Using the path stroke end to animate along a path
- Tricks for copying / pasting keyvalues
- How to use step functions