
Export Custom Button for iOS
In this tutorial, you'll learn how to export a custom button for iOS.
Export
Your animation is ready, and with it you want to create an actual iOS UIButton with it.
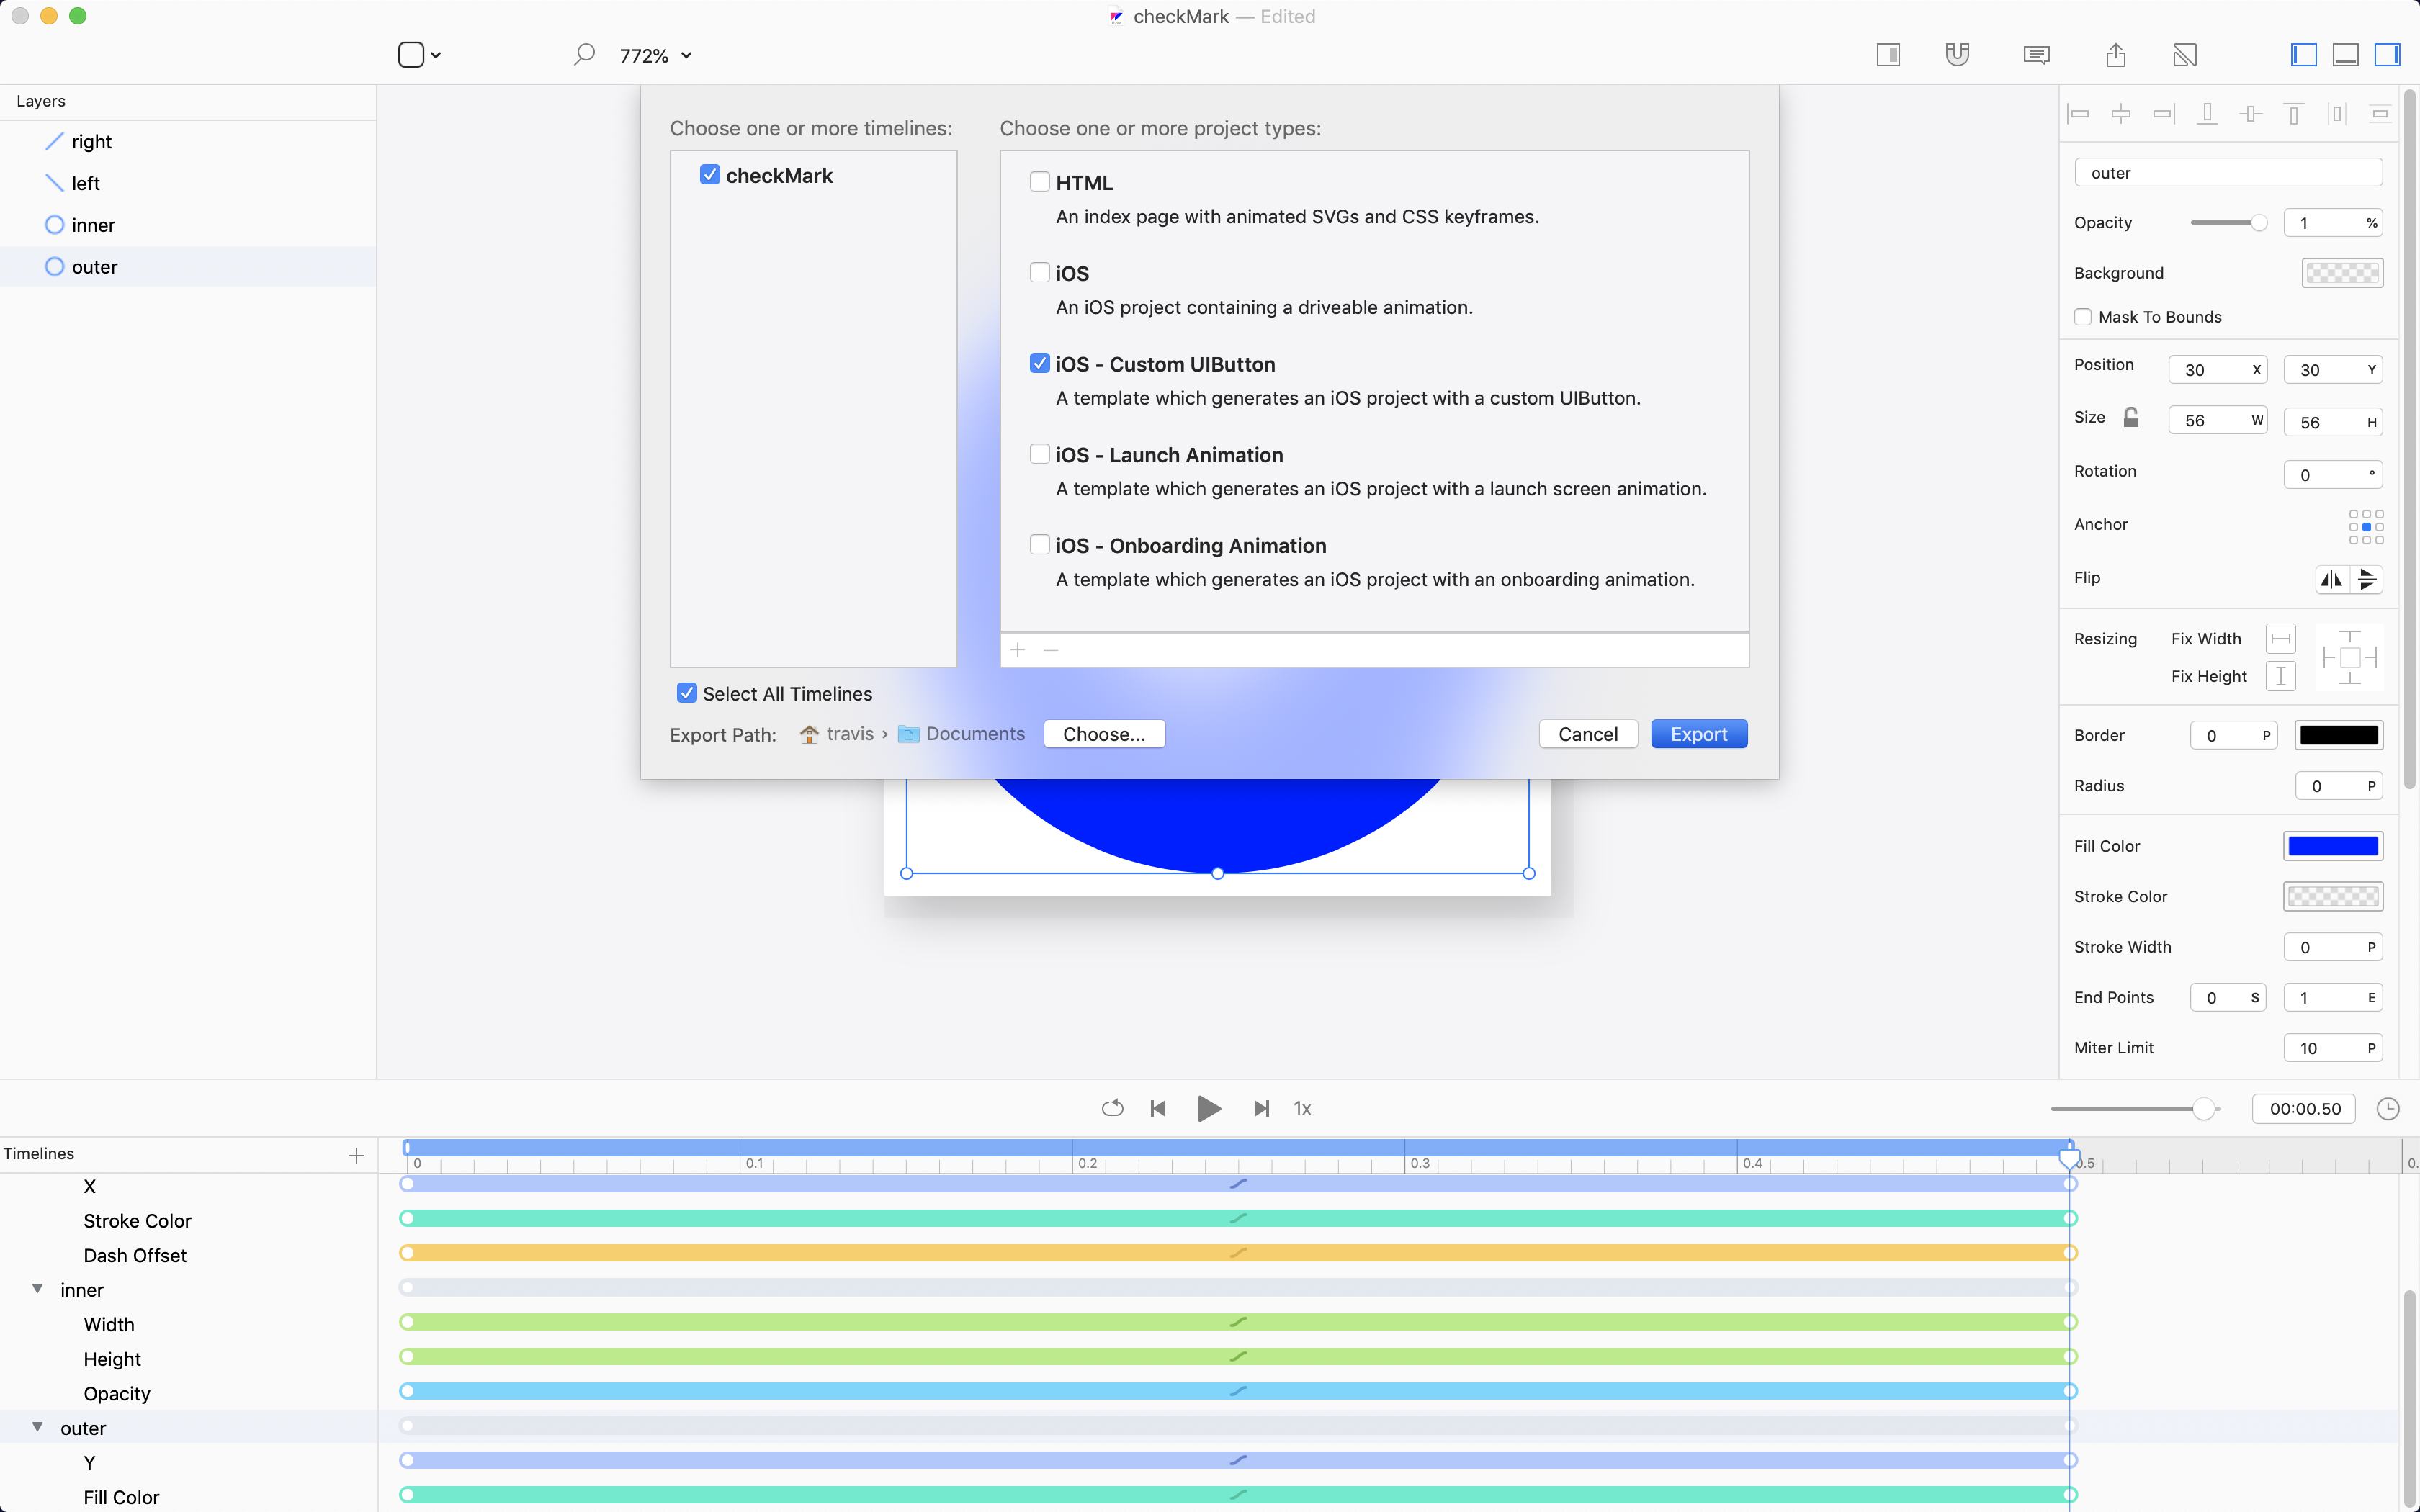
- Hit
⇧⌘E, orFile > Export > Code - Choose the
iOS - Custom Buttonoption - Select your timeline
- Hit Export
Done!
Flow’s iOS - Custom Button template will take a selected timeline and build it into a basic iOS app that has a UIButton driving the animation. It will also reverse the animation so that when the button toggles off, it plays backwards to the original state.
That’s it, really.
You can go home now.
And all your apps can have custom buttons.
Check Mark Demo
If you don’t already have an animation prepared, you can use ours:
The animation looks like this:

The Flow file looks like this:

Key Concepts
Animating a button is a style choice and you, as the designer, are the best person to judge the quality of an animation in the context of the work you’re producing. There are many possibilities to create buttons.
The iOS - Custom Button option produces a toggle button.
- The
offstate is the first frame your animation. - The
onstate is the last frame of your animation. - Animations should be short, in the vicinty of
0.25s-0.5s. - The
UIButtonexported can be reused throughout your app.
The animation we provided above is
0.5slong, and44x44pt
Xcode Project
Exporting an iOS onboarding animation from Flow generates a clean Xcode project that looks like this:
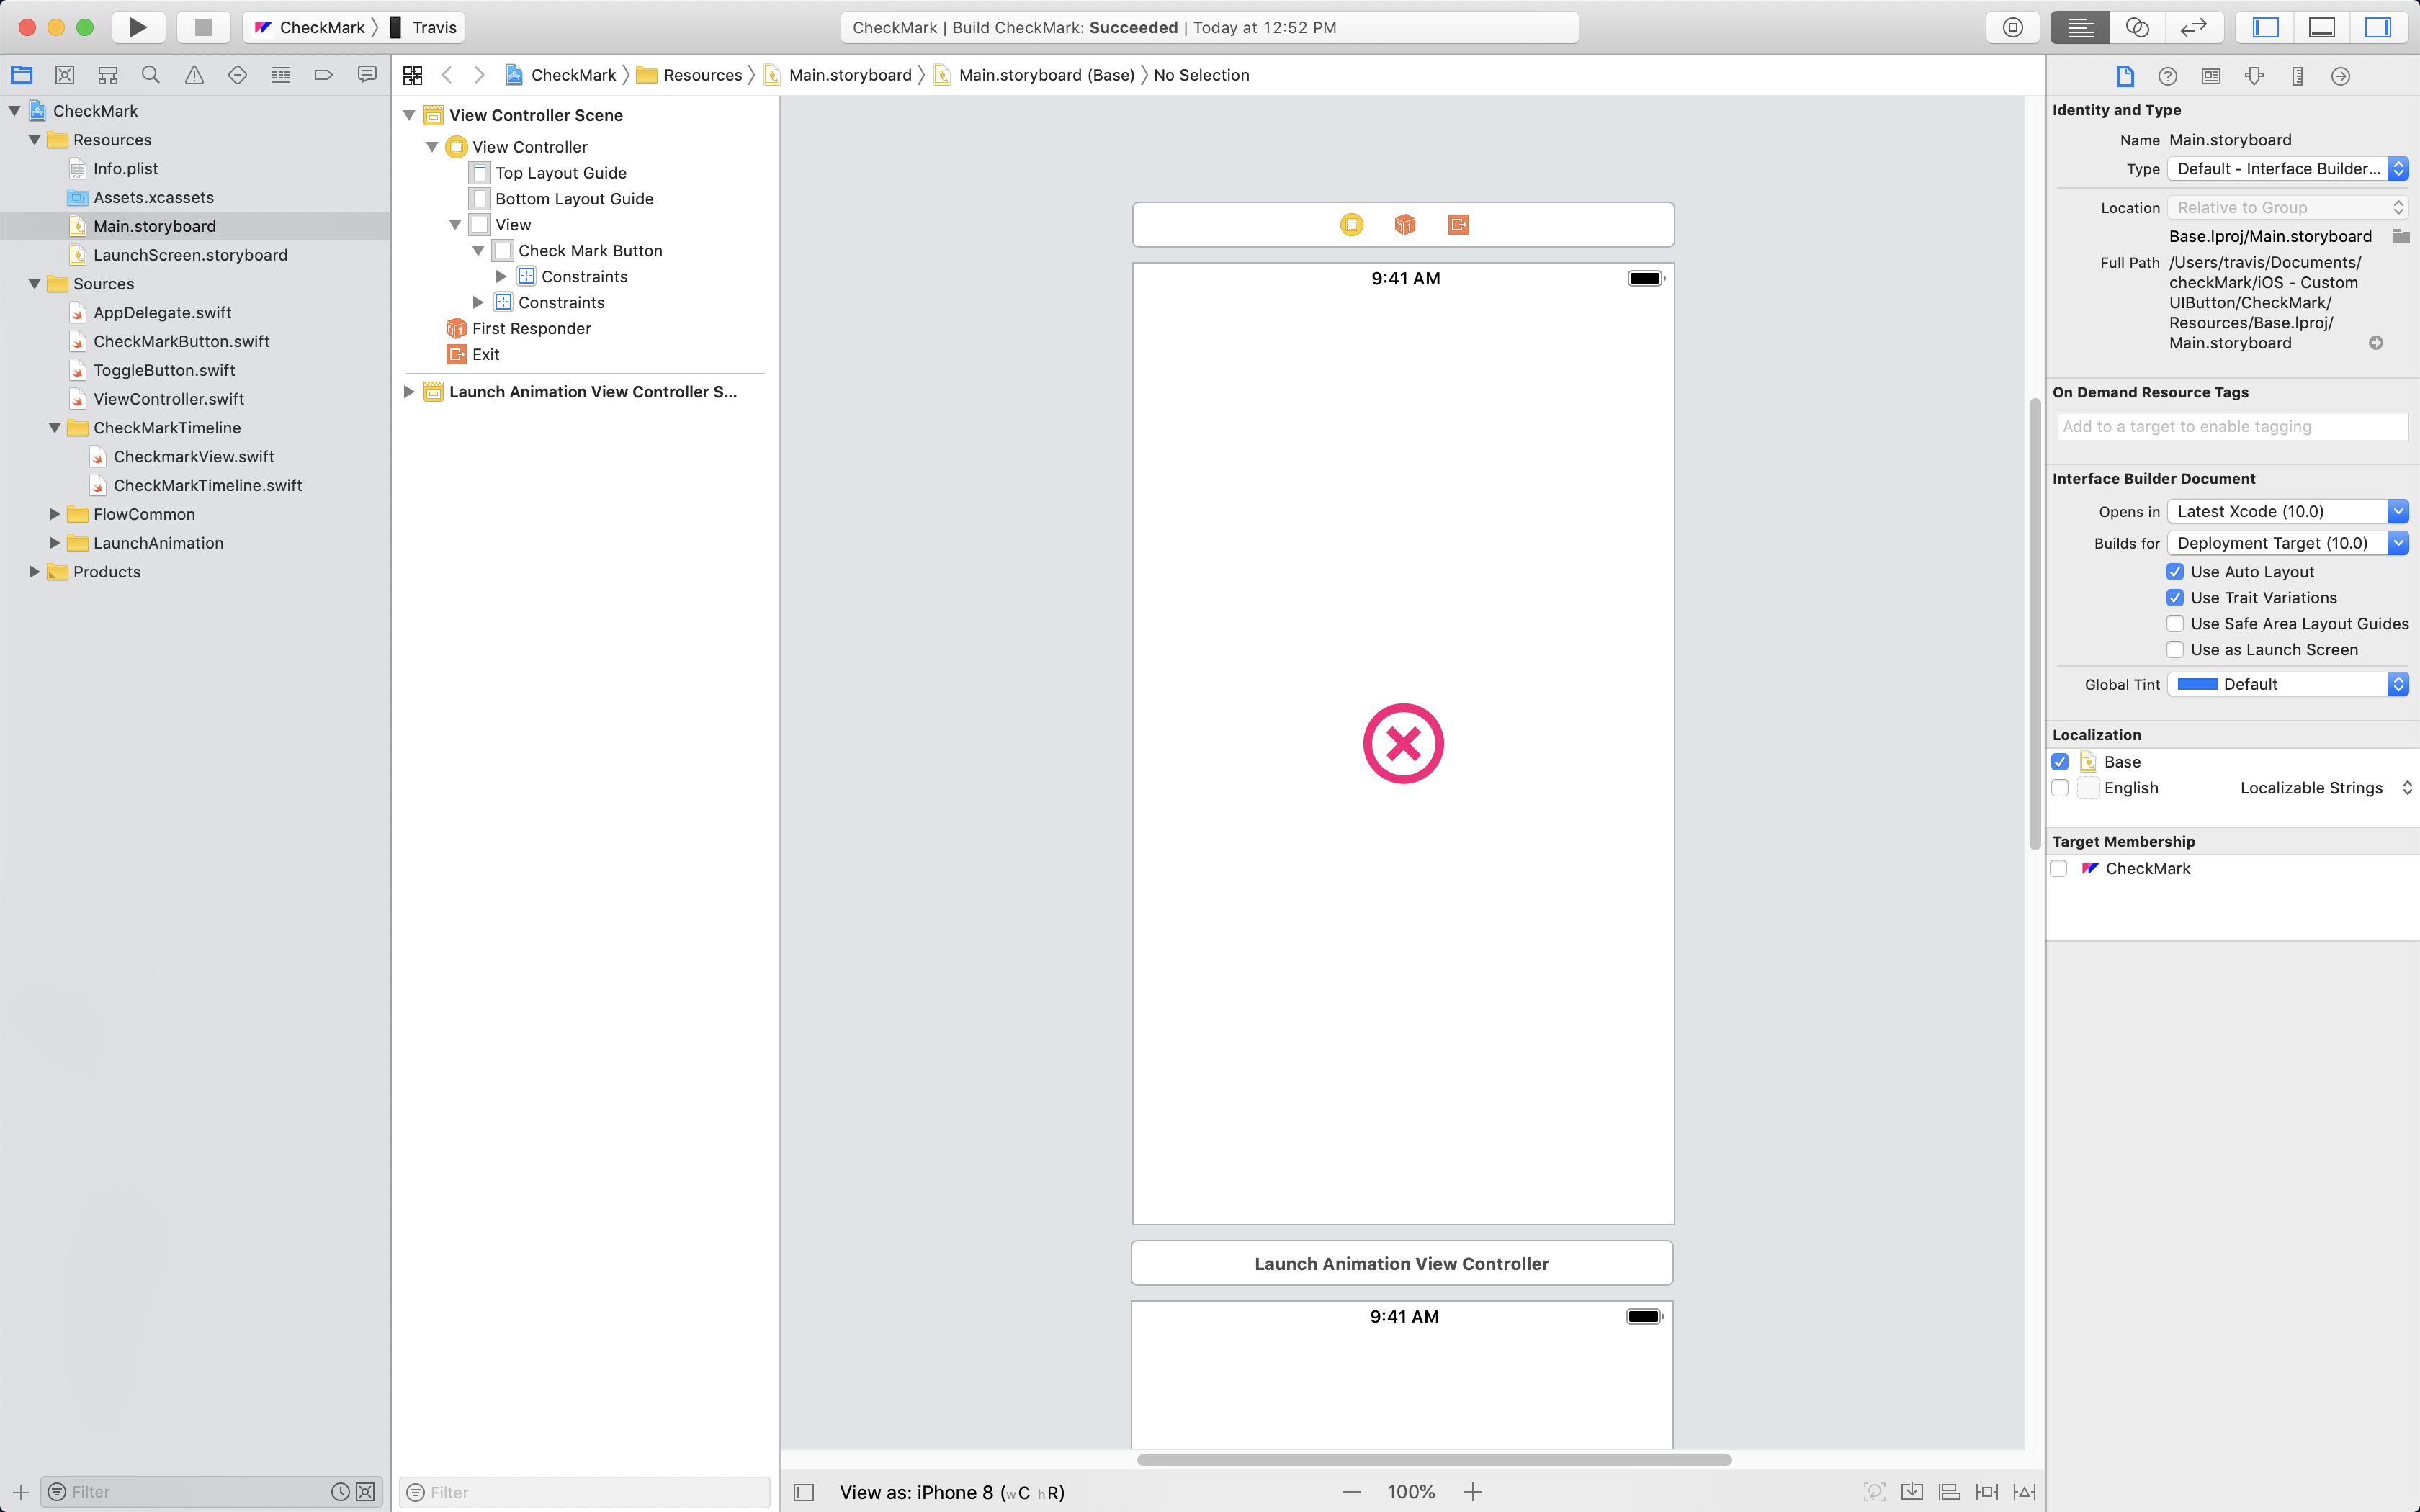
For more detail, check out: Xcode Project Breakdown for Custom Buttons