Export & Integration | Check Box (3/3)
Learn how to export multiple timelines and integrate them into a single iOS project.
If you completed the previous tutorial, you should already have a flow file to work with. Otherwise…
This is a dev-heavy tutorial, so you’ll need to break out Xcode.
Your Animations
The file we’re working with has 4 timelines:
- checkMarkForward
- checkMarkReverse
- backgroundForward
- backgroundReverse
The file looks like this:
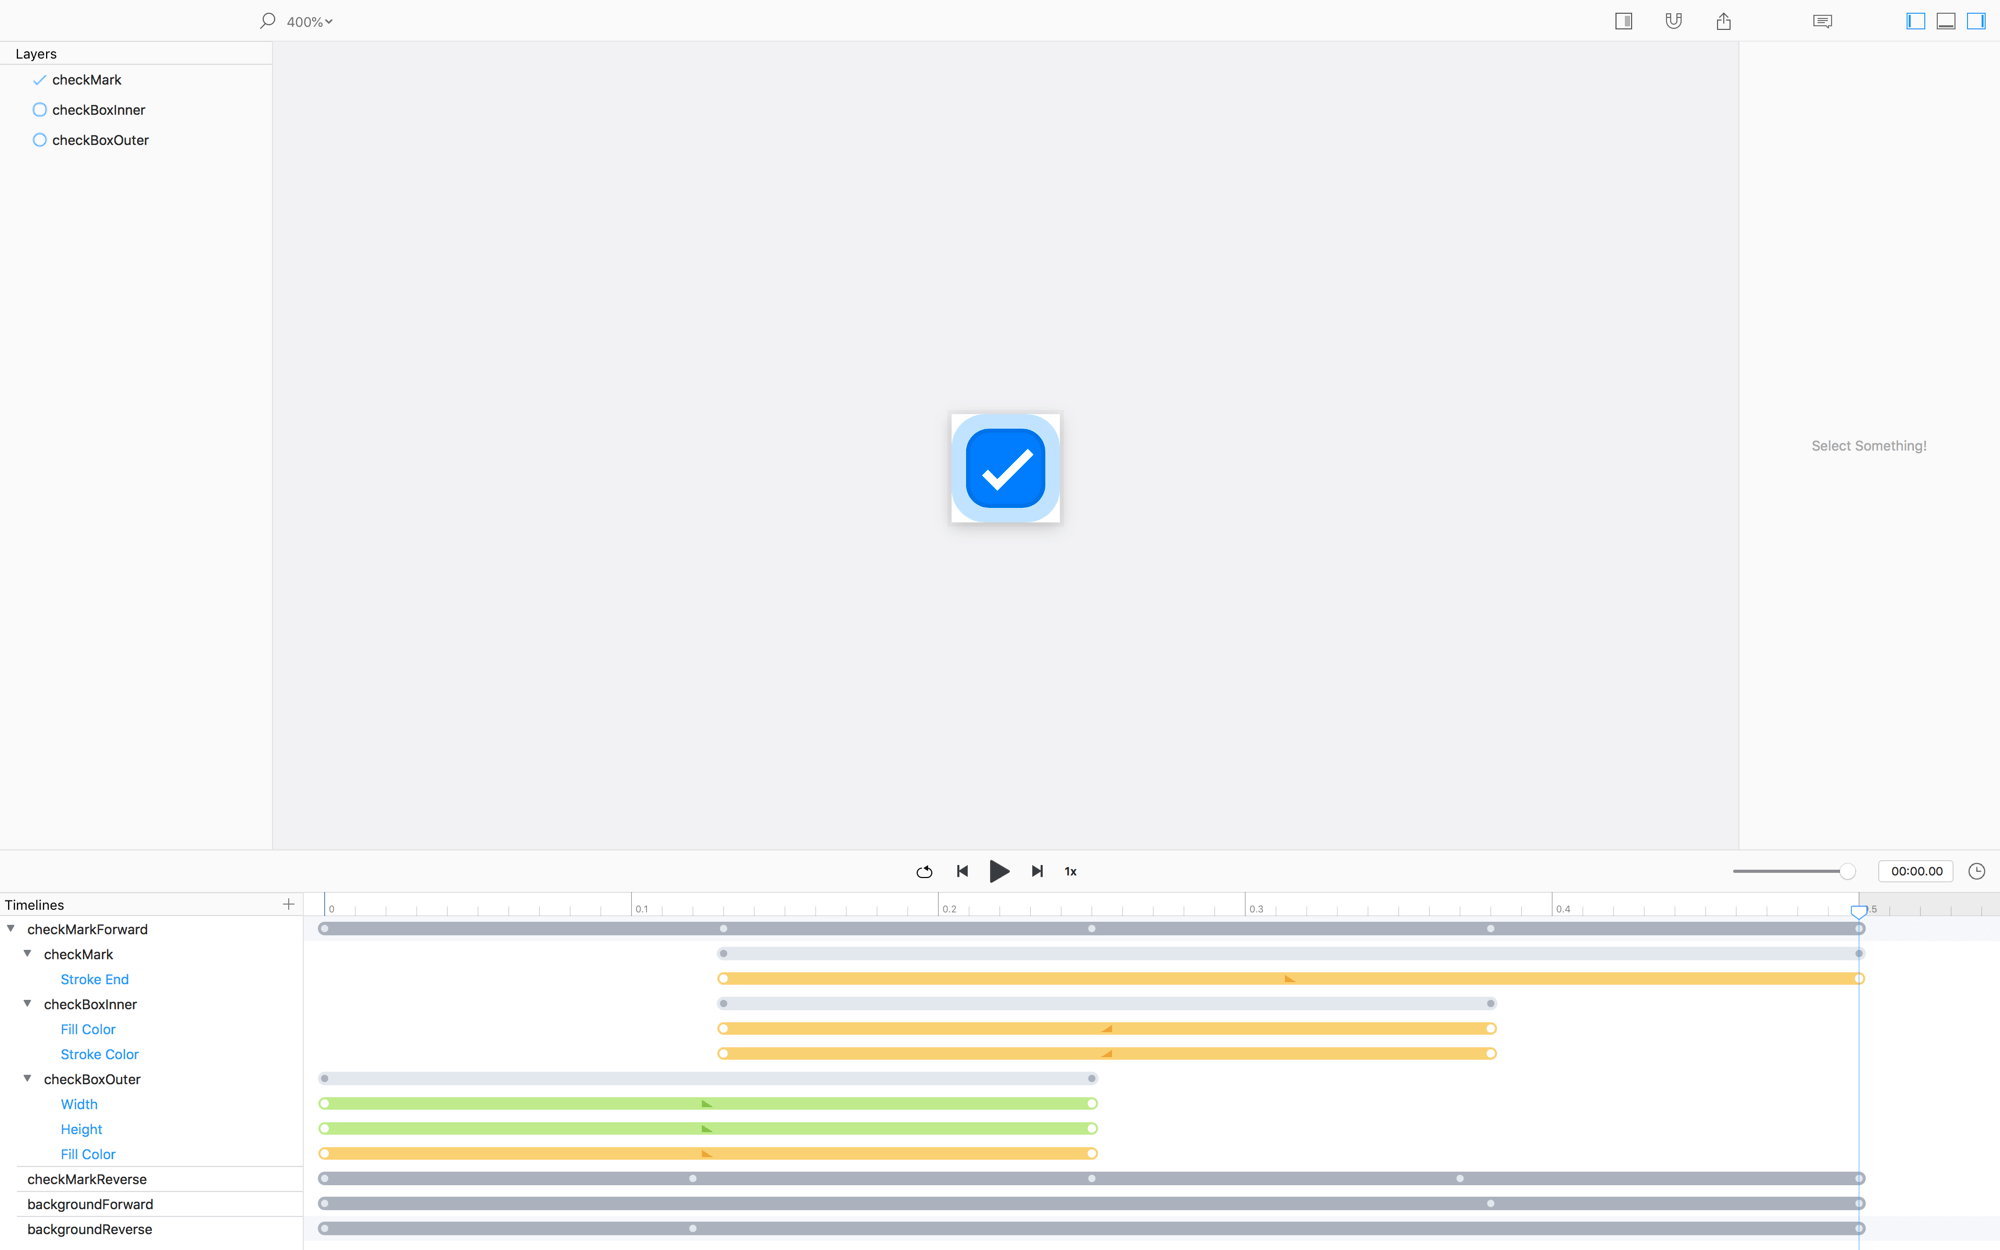
To recap, we are creating an effect for a button that animates a checkbox while at the same time animating the background color of that button. Since it is a toggle button, we have animations for both components that go forward and backward – we will trigger two animations at the same time depending on the state of the buttton.
There are a lot of ways to go about structuring and building apps, components, etc. However, for this approach we’ve decided to decouple the background animation and the checkbox animation.
It’s cleaner this way.
Export Everything
Let’s start by exporting our 4 timelines to their own Xcode project.
Export checkBoxForward
With the flow file open…
File > Export > Codeor press⬆︎⌘E
You will be presented with an export window that has a few options in it…
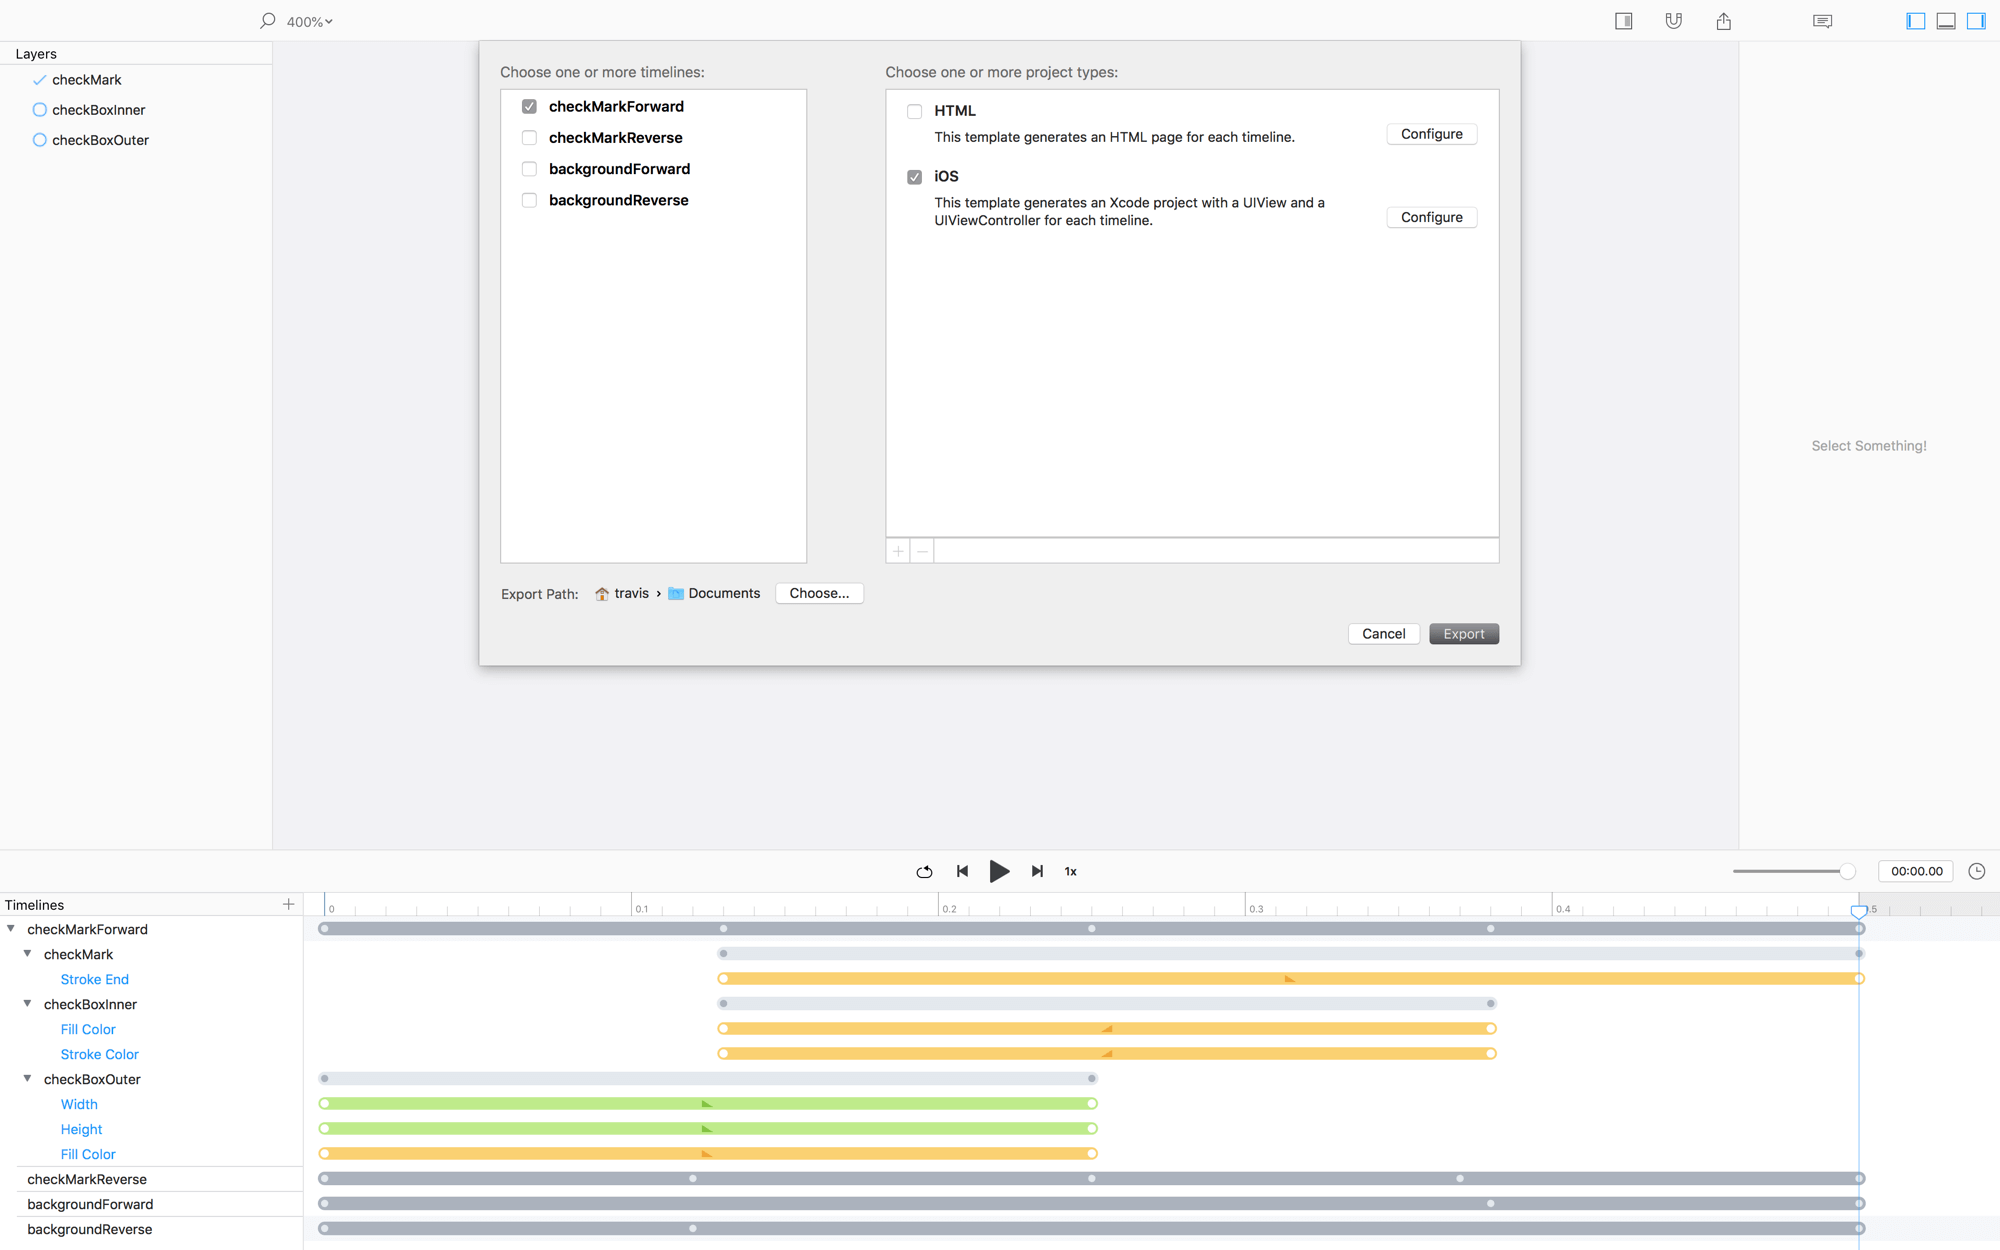
Select the
checkMarkForwardandiOSoptions
Change the location for saving by tapping the Choose button at the bottom of the panel.
Now, we want to configure the Xcode project a bit…
Click
Configurenext to the iOS option
You should now see the project configuration panel.
Change the project name to
CheckMarkForward
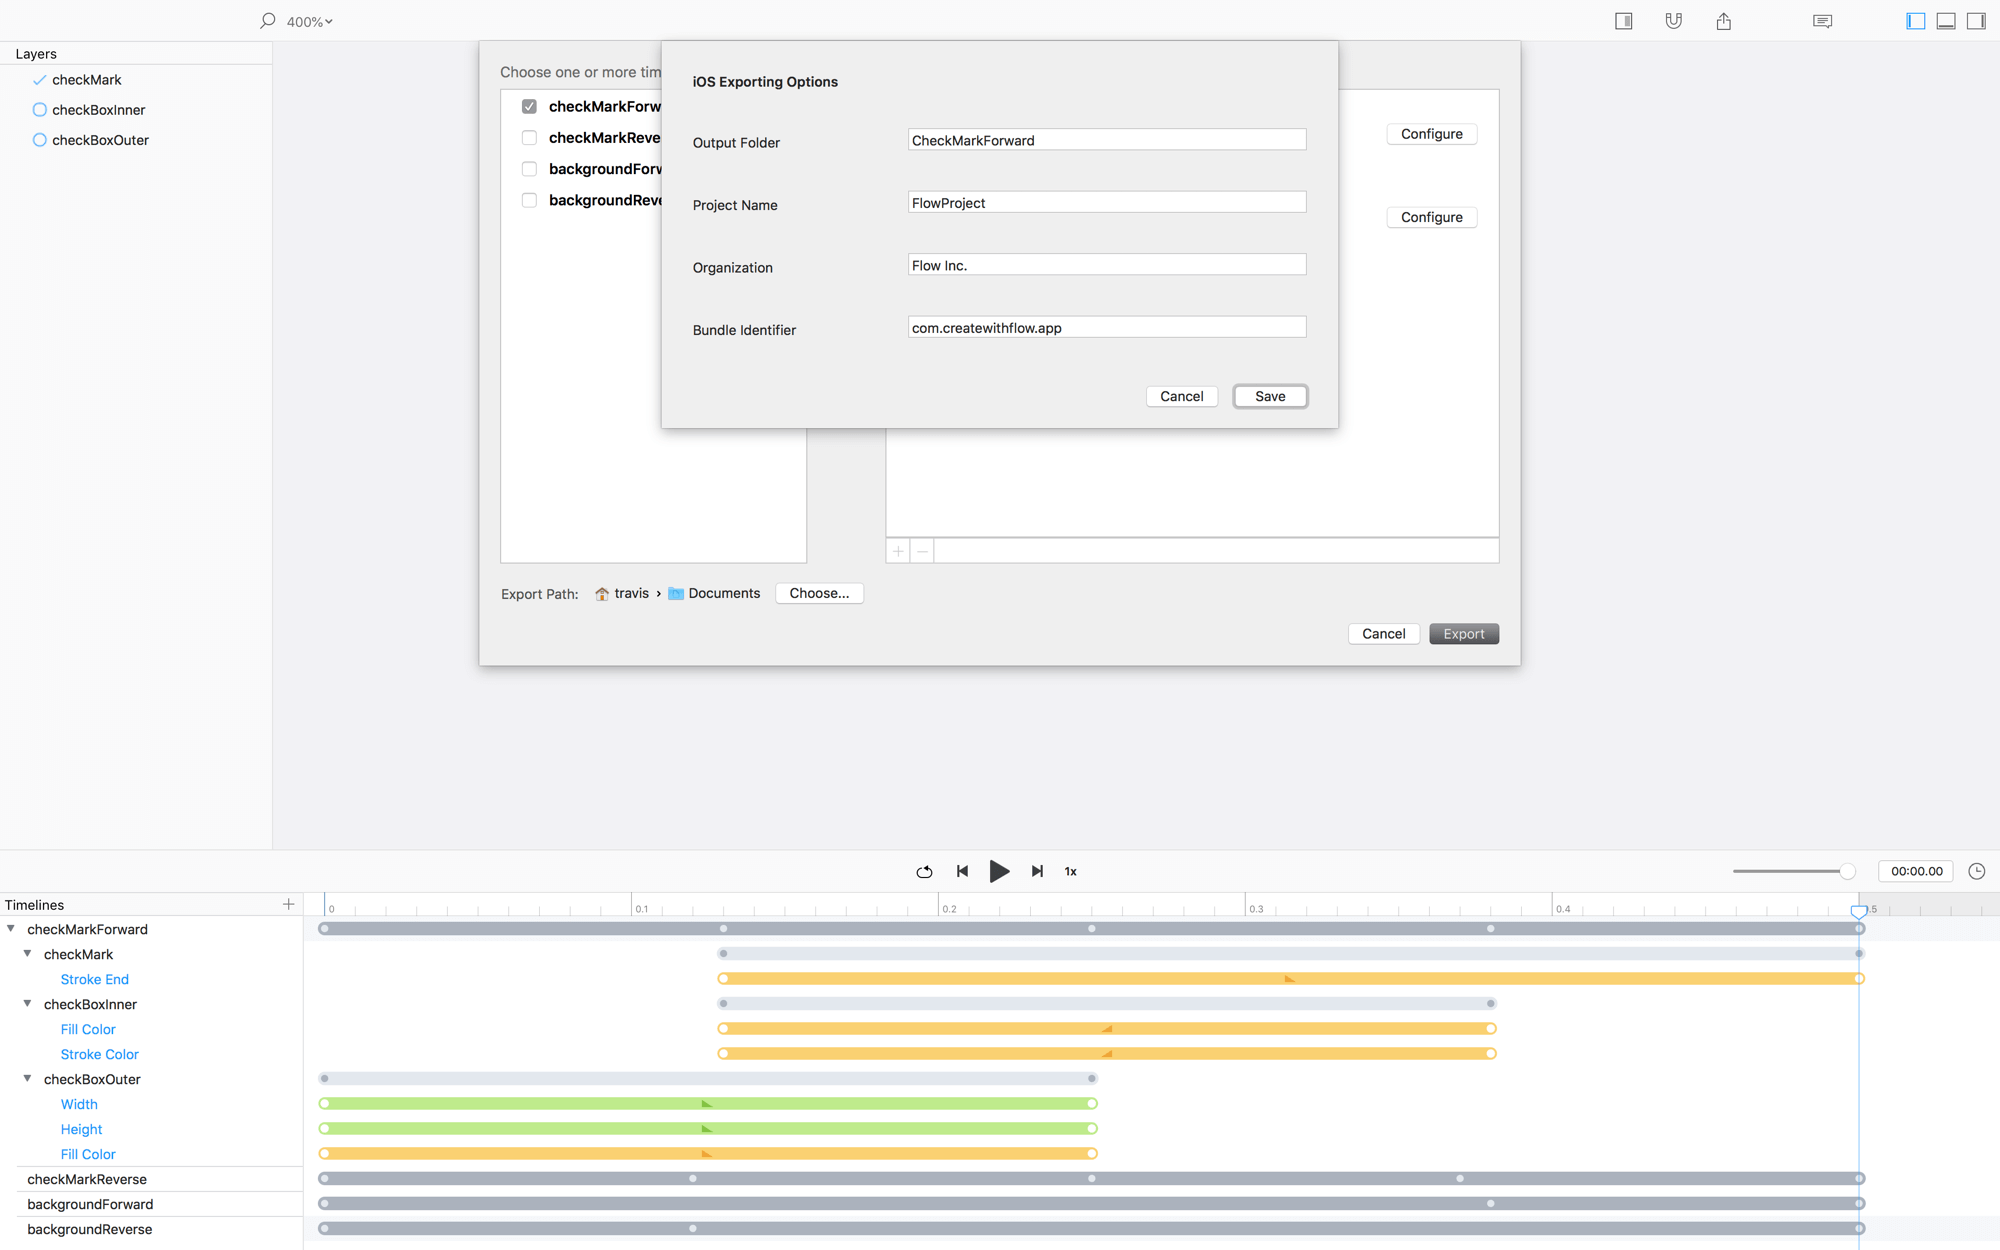
Press
Save
Press
Export
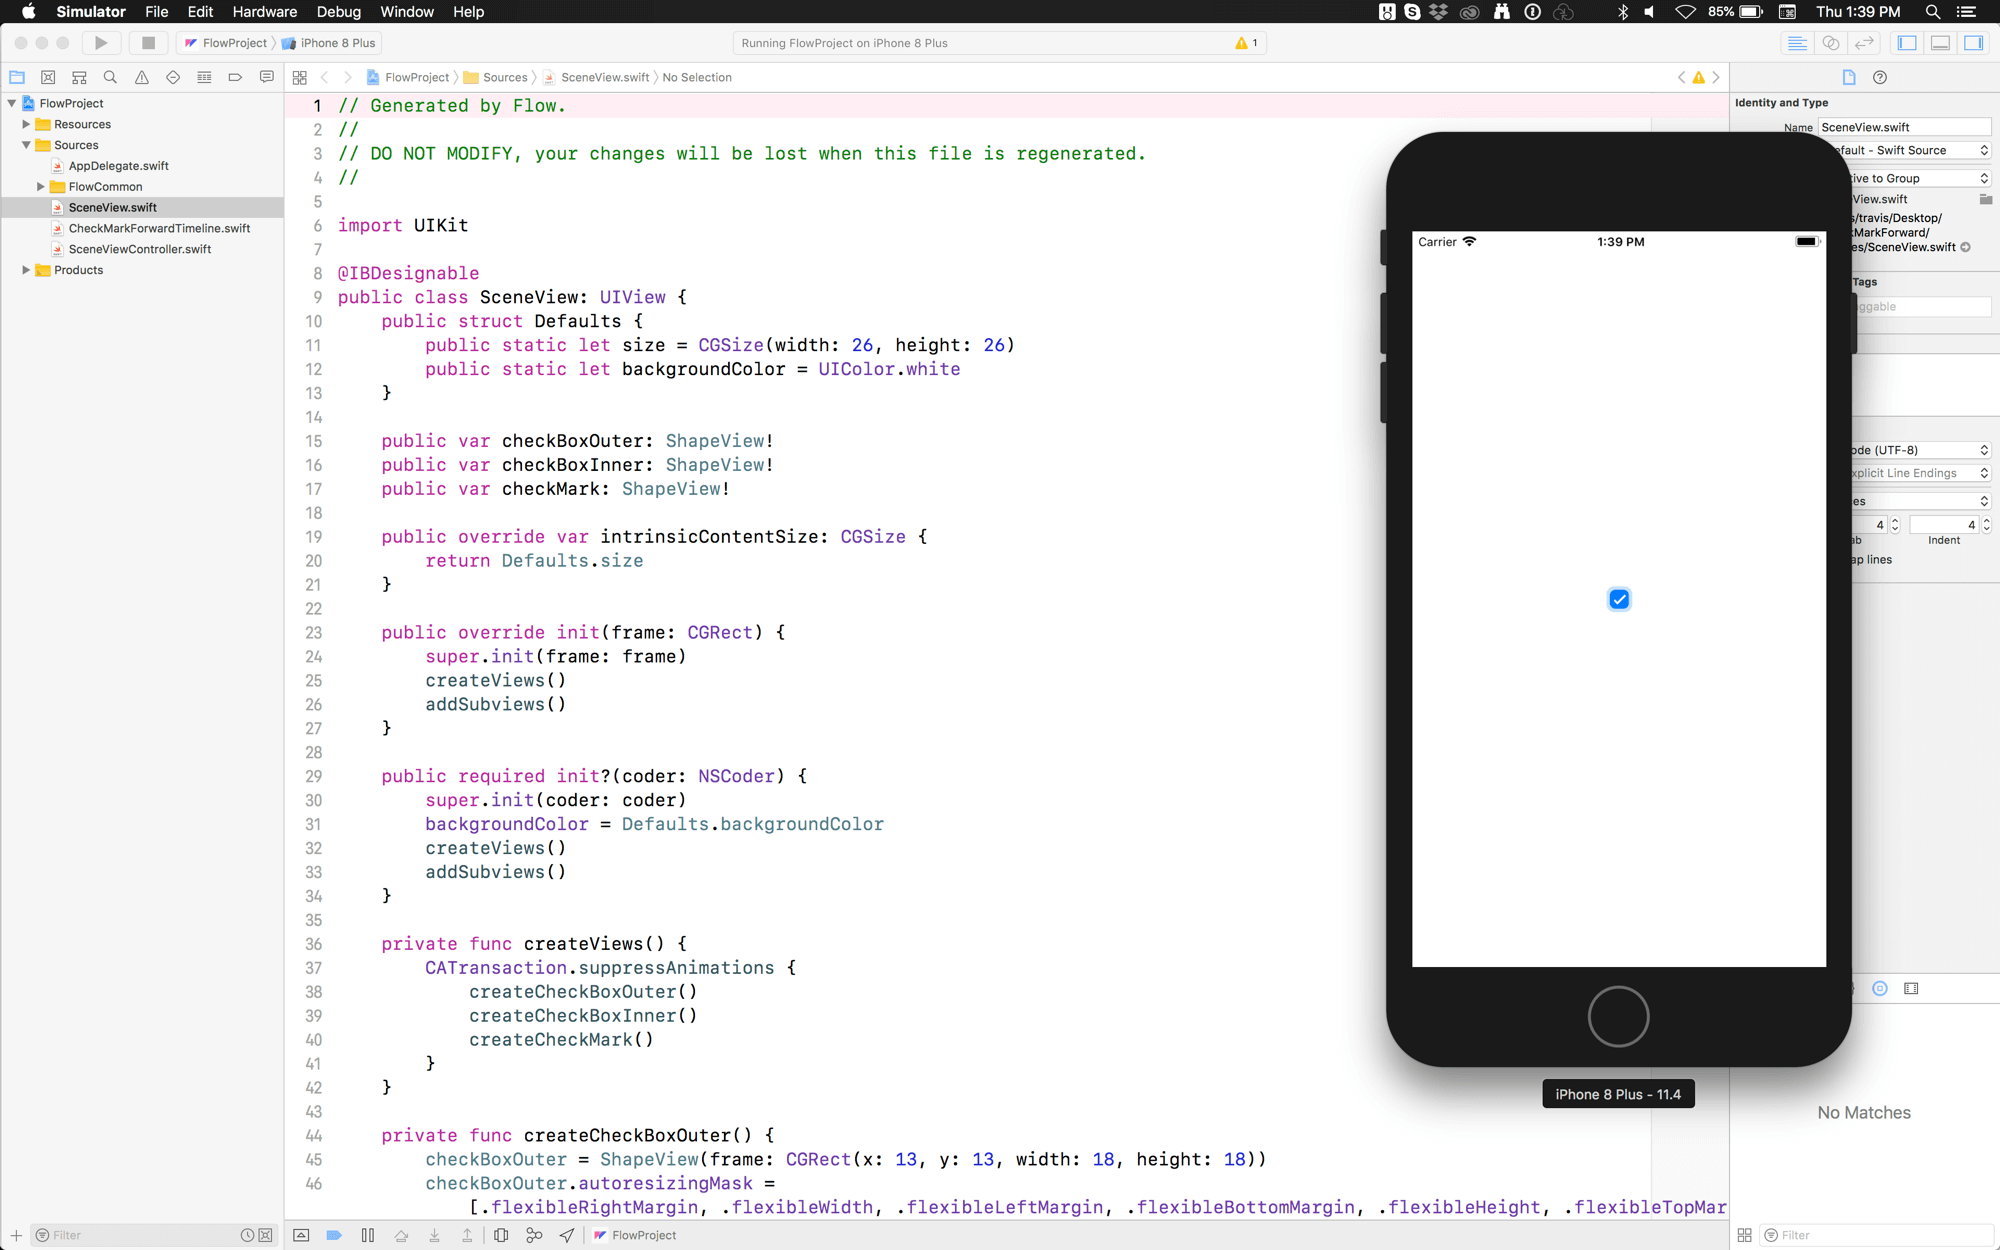
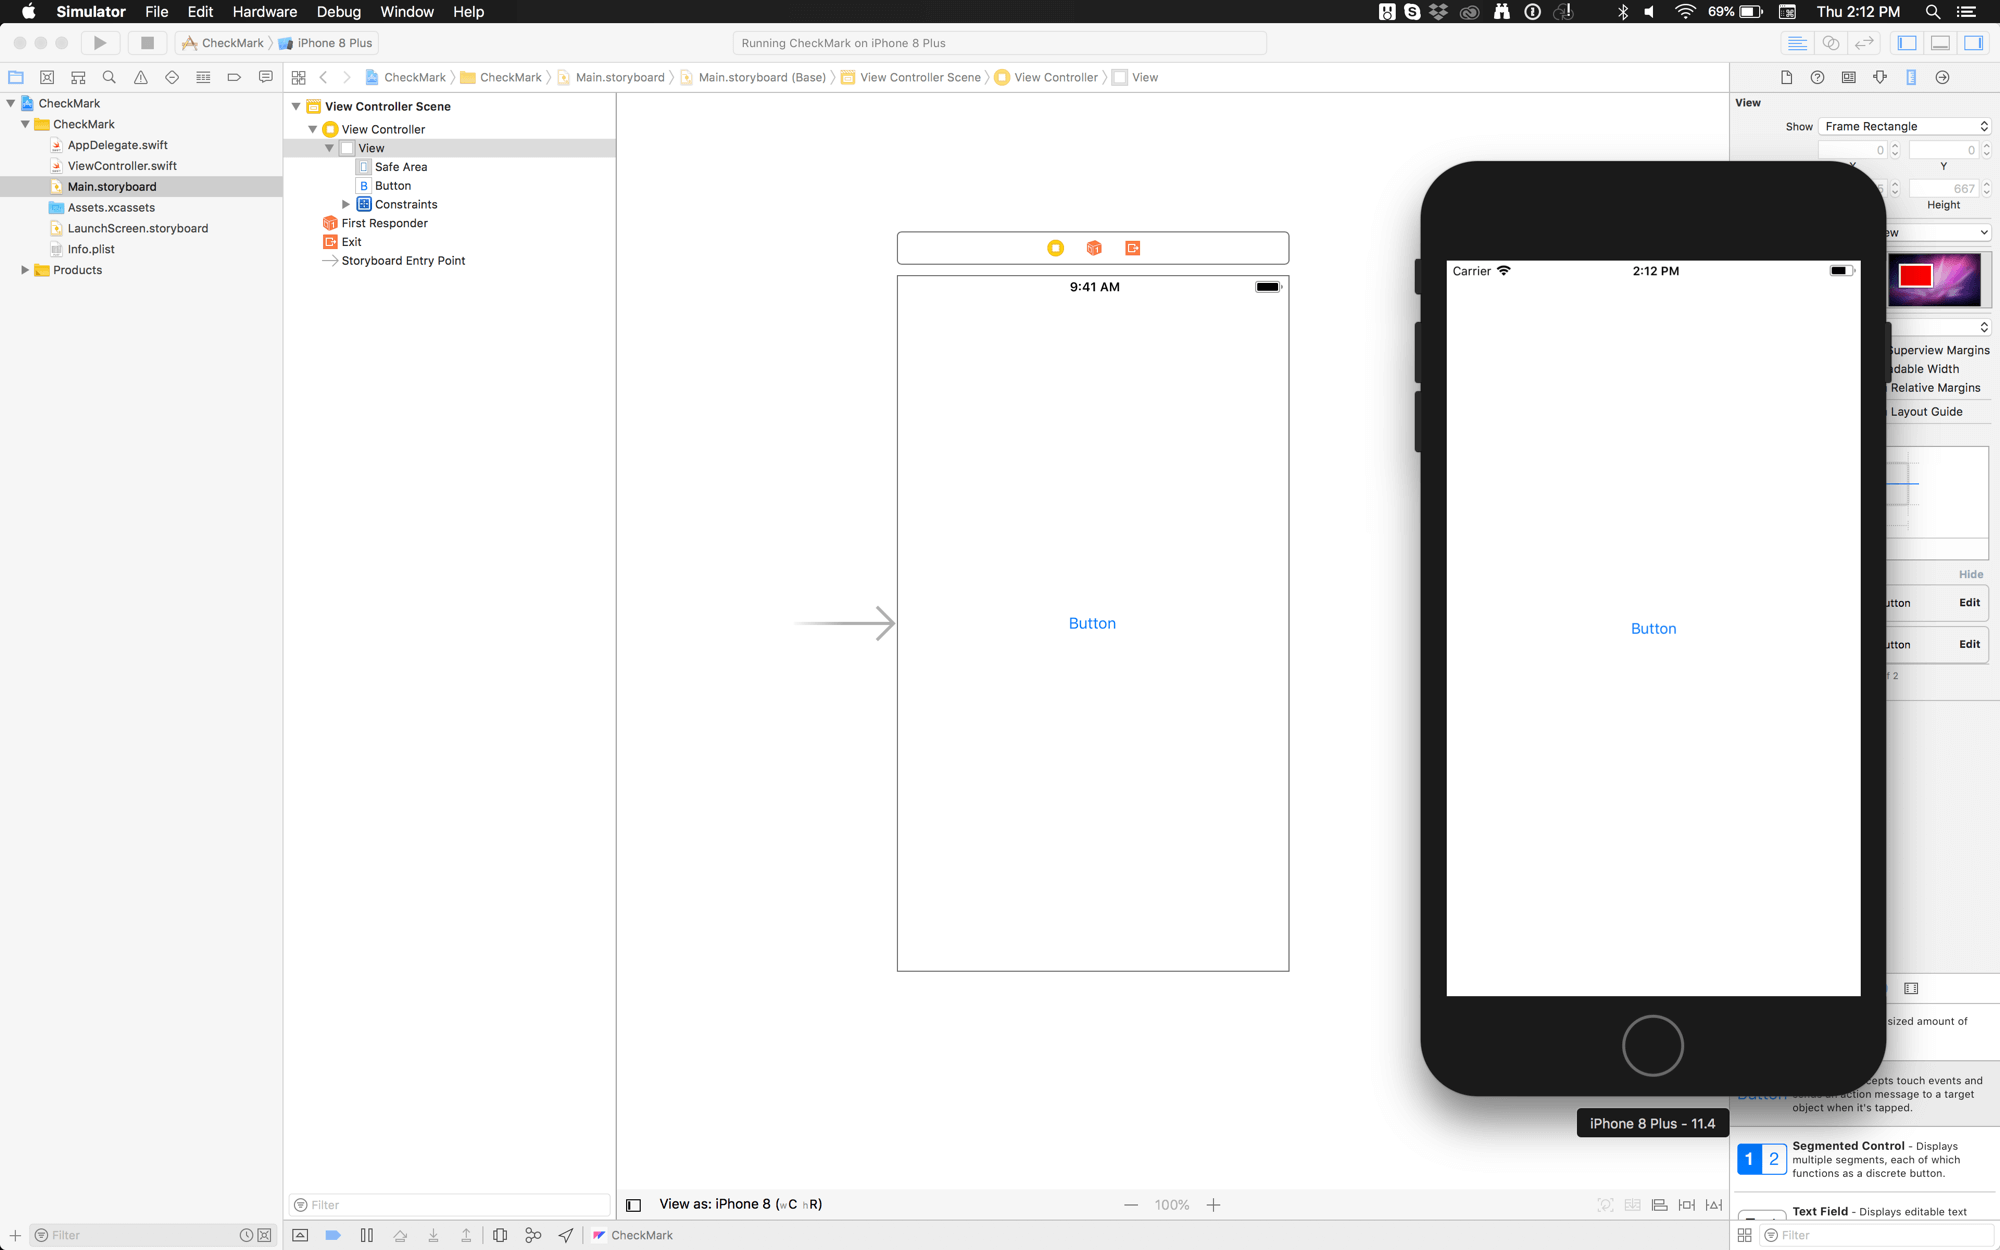
Now, you can open the Xcode project and run it in the iOS simulator. Once the project launches, you can tap the simulator to trigger the animation. You should see:
Export checkMarkReverse
Follow the same steps above, except when you…
Configure the iOS project name to be
CheckMarkReverse
Export backgroundForward
Follow the same steps above, except when you…
Configure the iOS project name to be
BackgroundForward
Export backgroundReverse
Follow the same steps above, except when you…
Configure the iOS project name to be
BackgroundReverse
Refactoring + Renaming
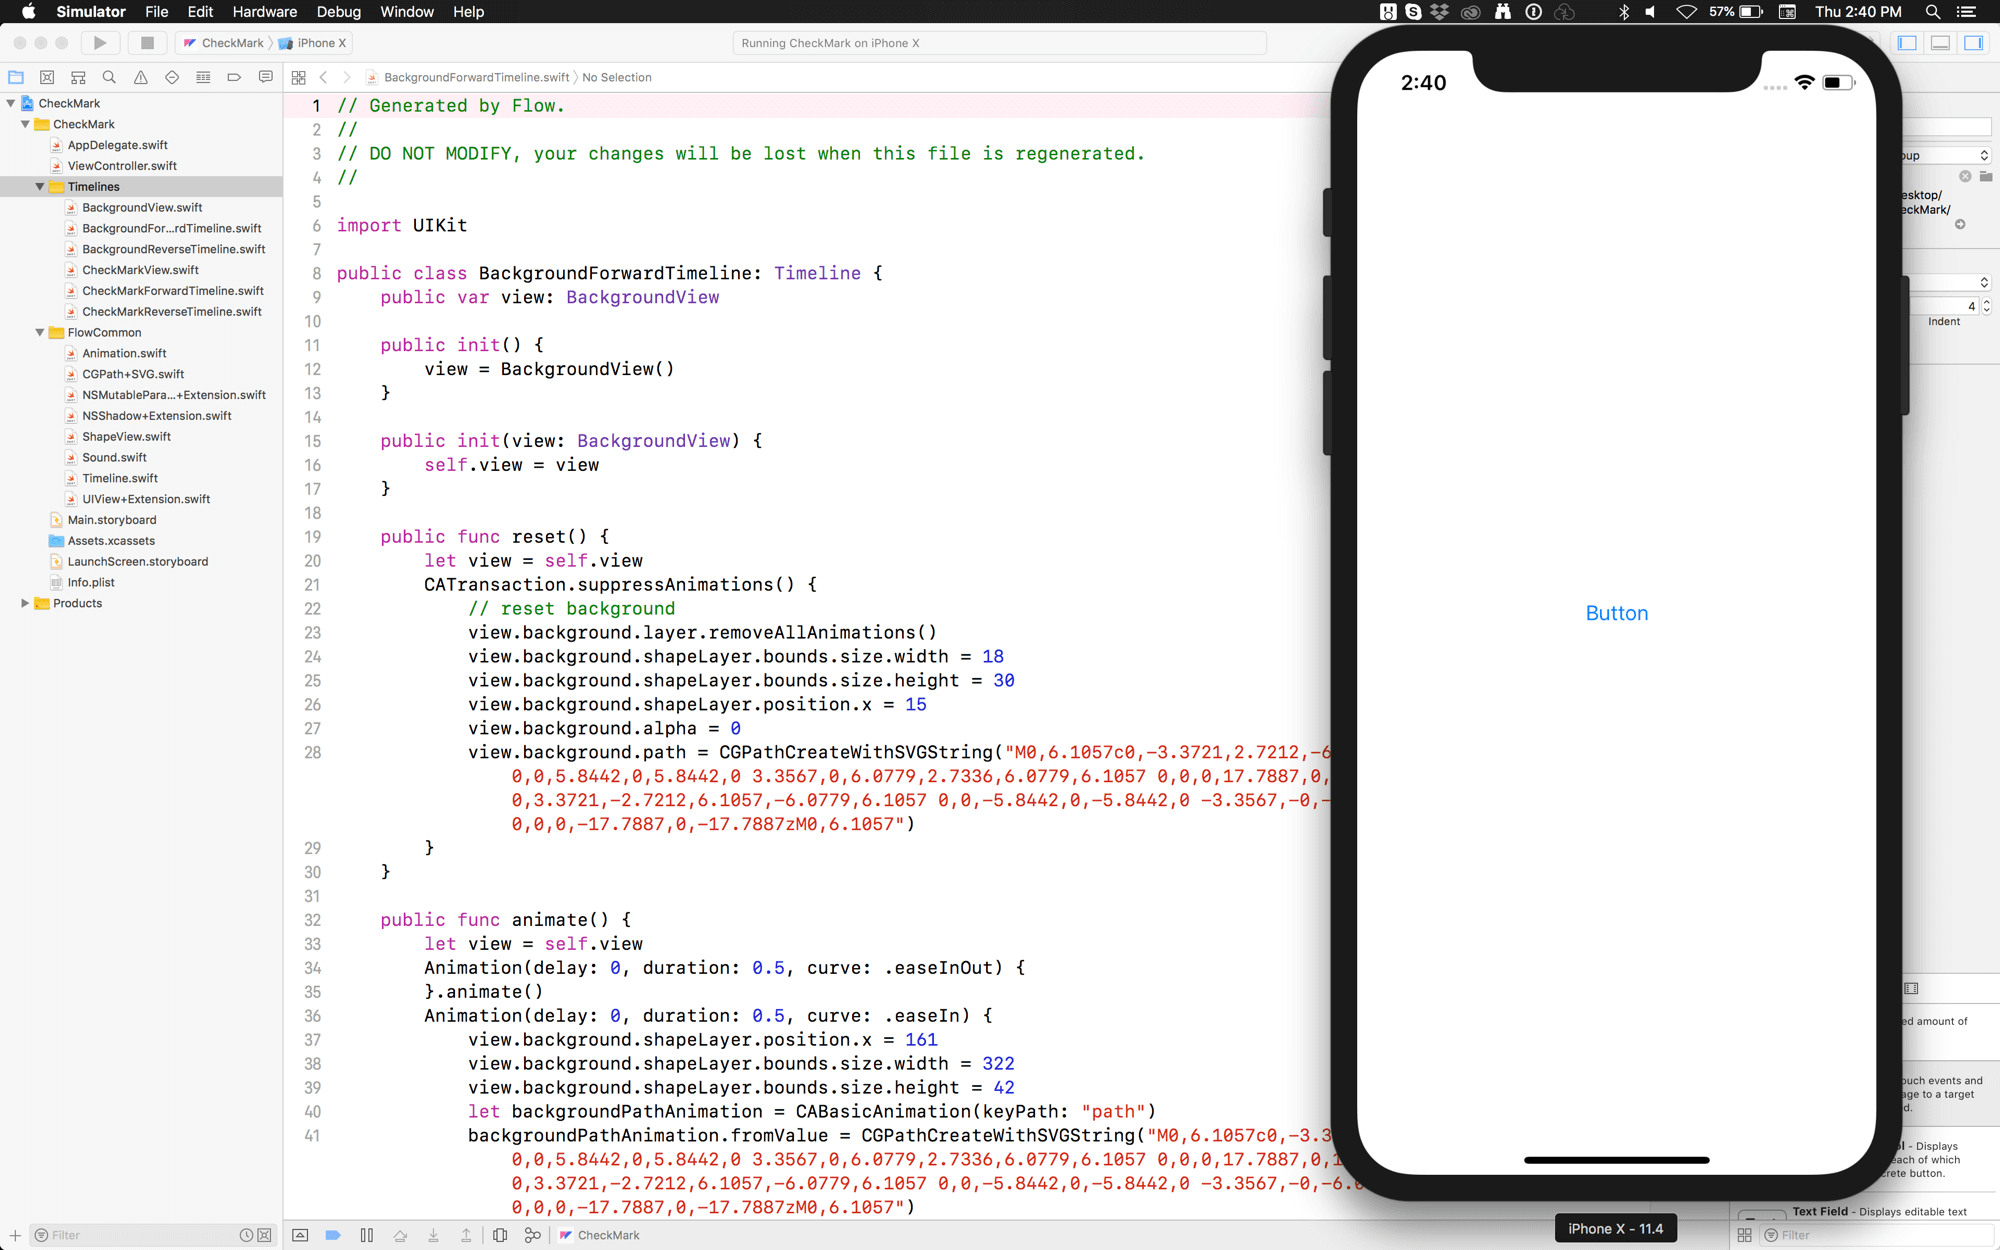
When Flow exports a Timeline, it names the main class SceneView.
In each Xcode project you just exported there will be a class called SceneView.swift. Now, when we go to integrate all these classes into a single project, Xcode will yell at us. Refactoring the classes in each exported project will allow us to drop them into the final project without any complications.
So, let’s get to some renaming.
Rename CheckMarkForward
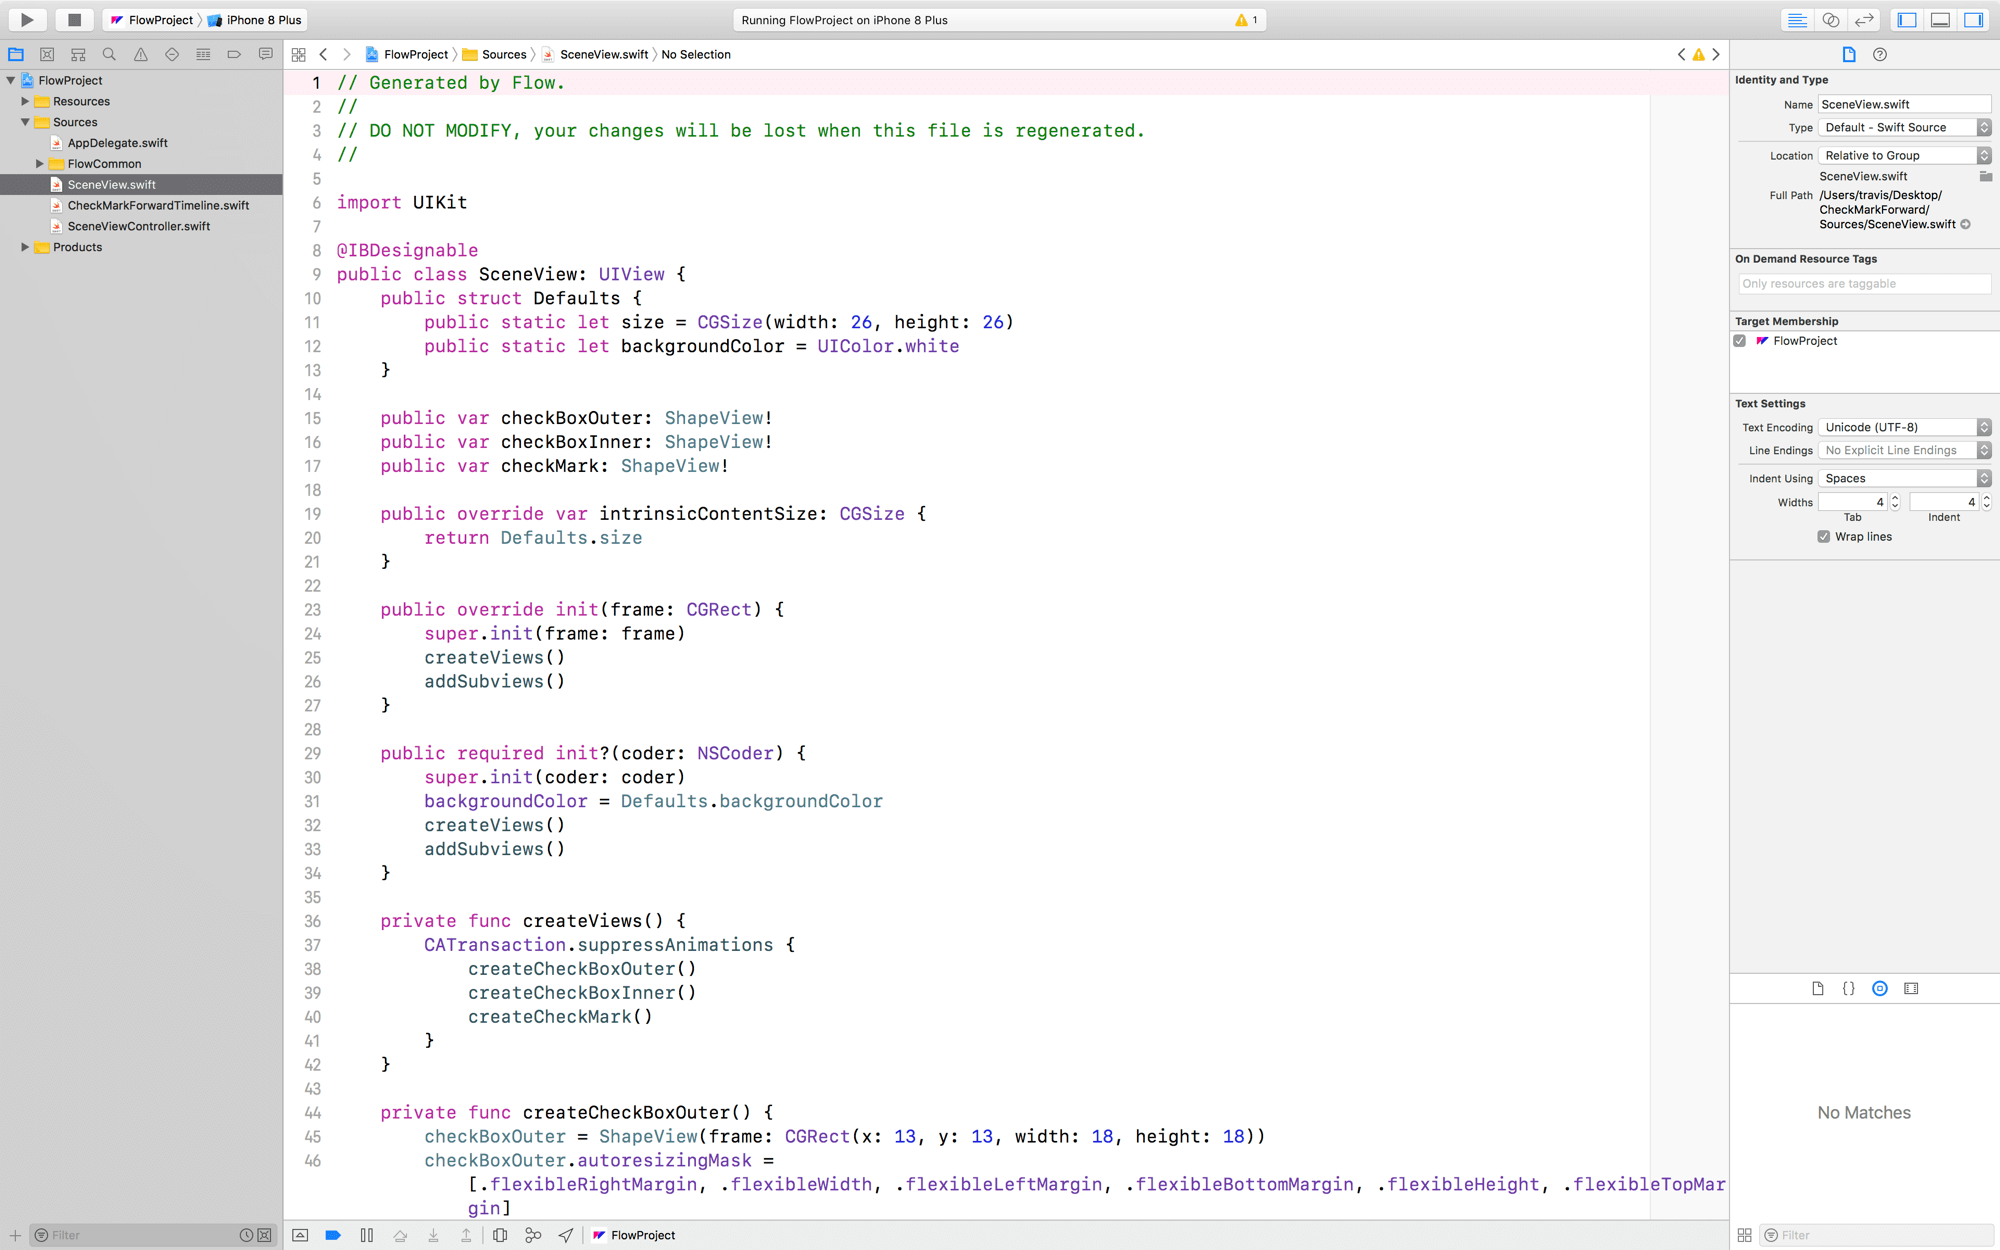
Open the CheckMarkForward project and navigate to the SceneView.swift class.
Select the name of the class, right click and choose
Refactor > Rename...
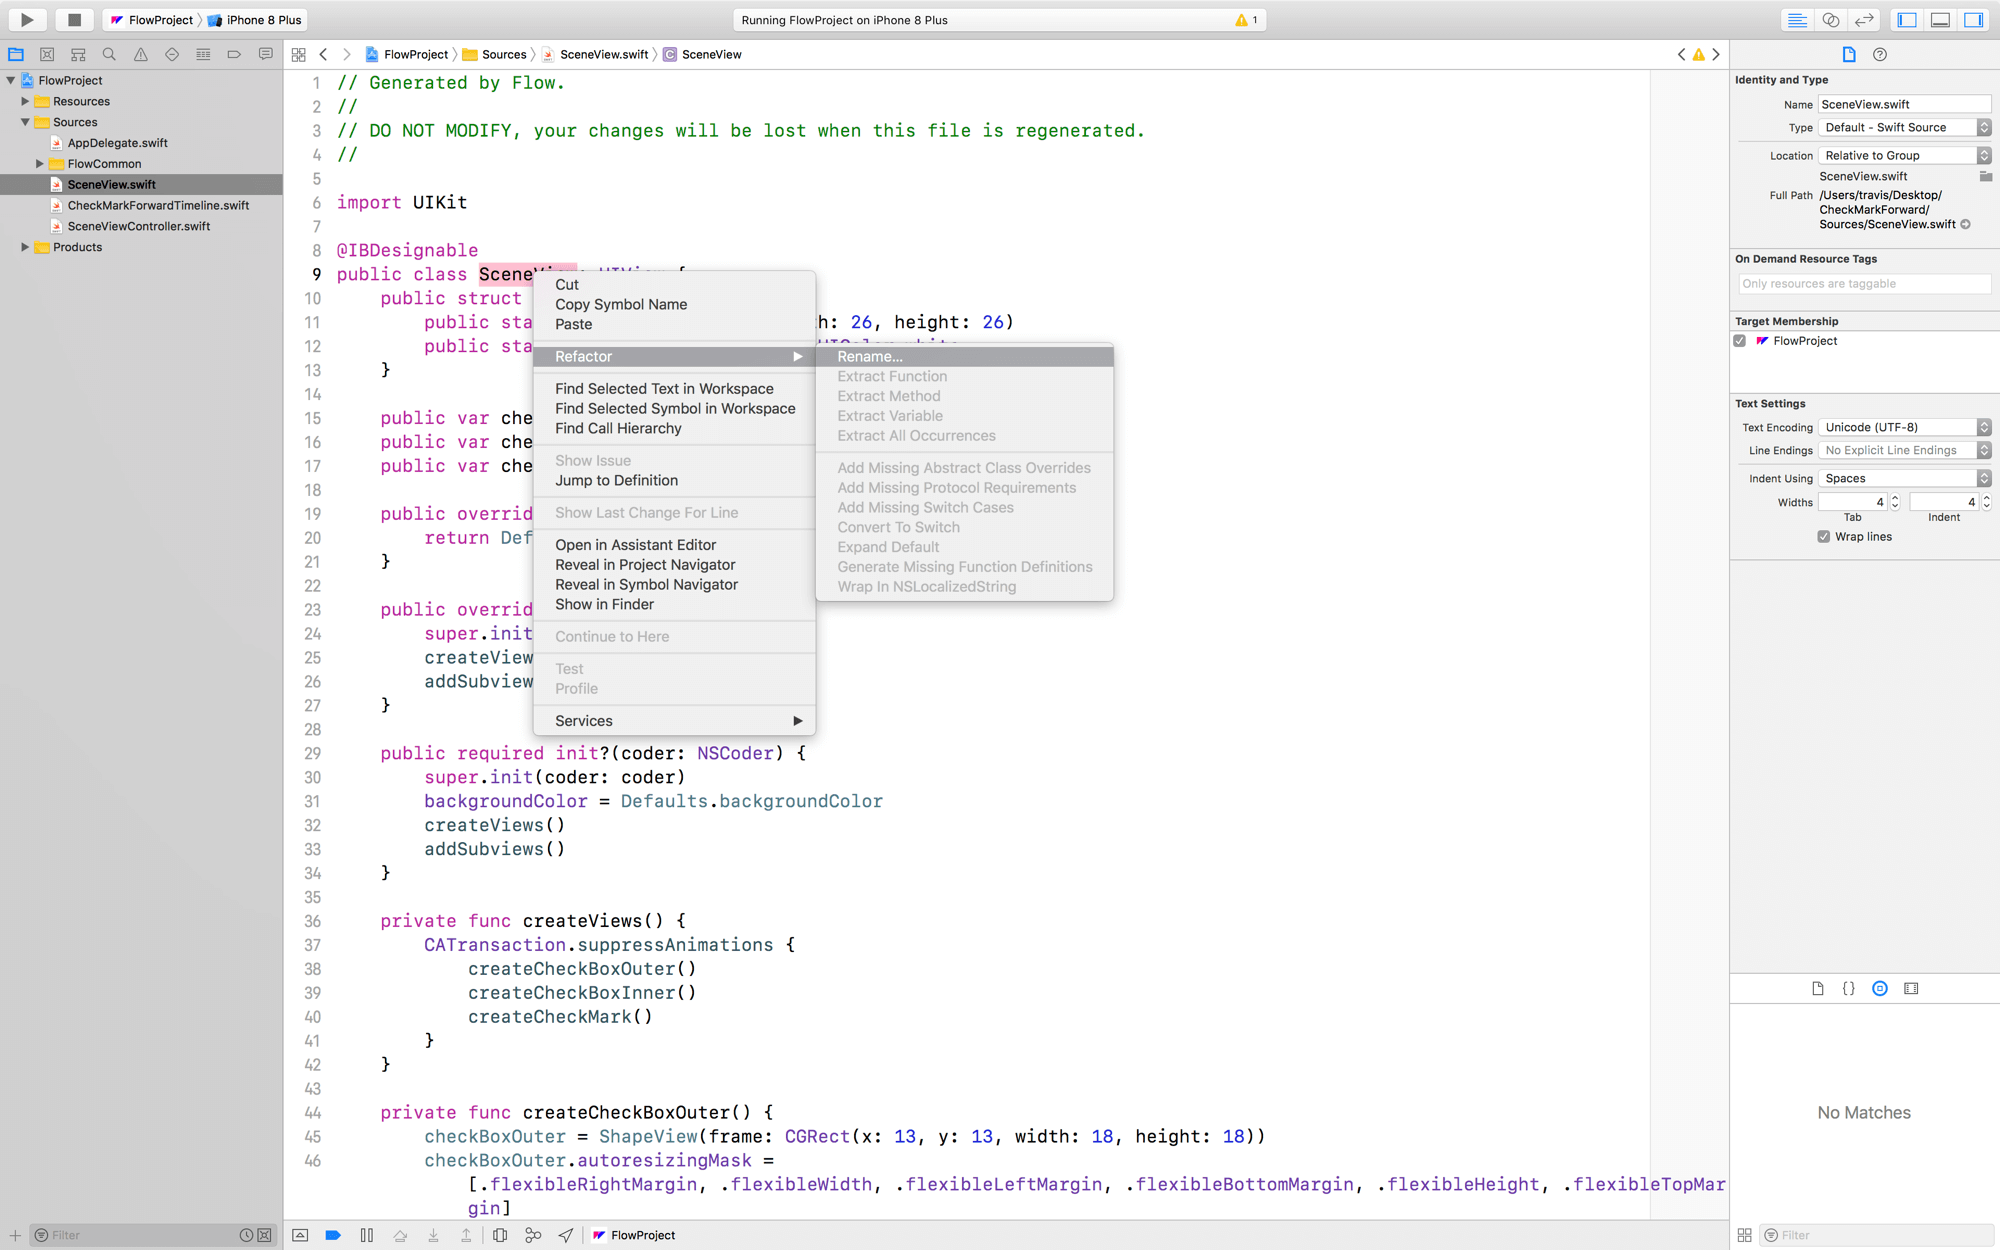
Rename
SceneViewtoCheckMarkView
You should now see…
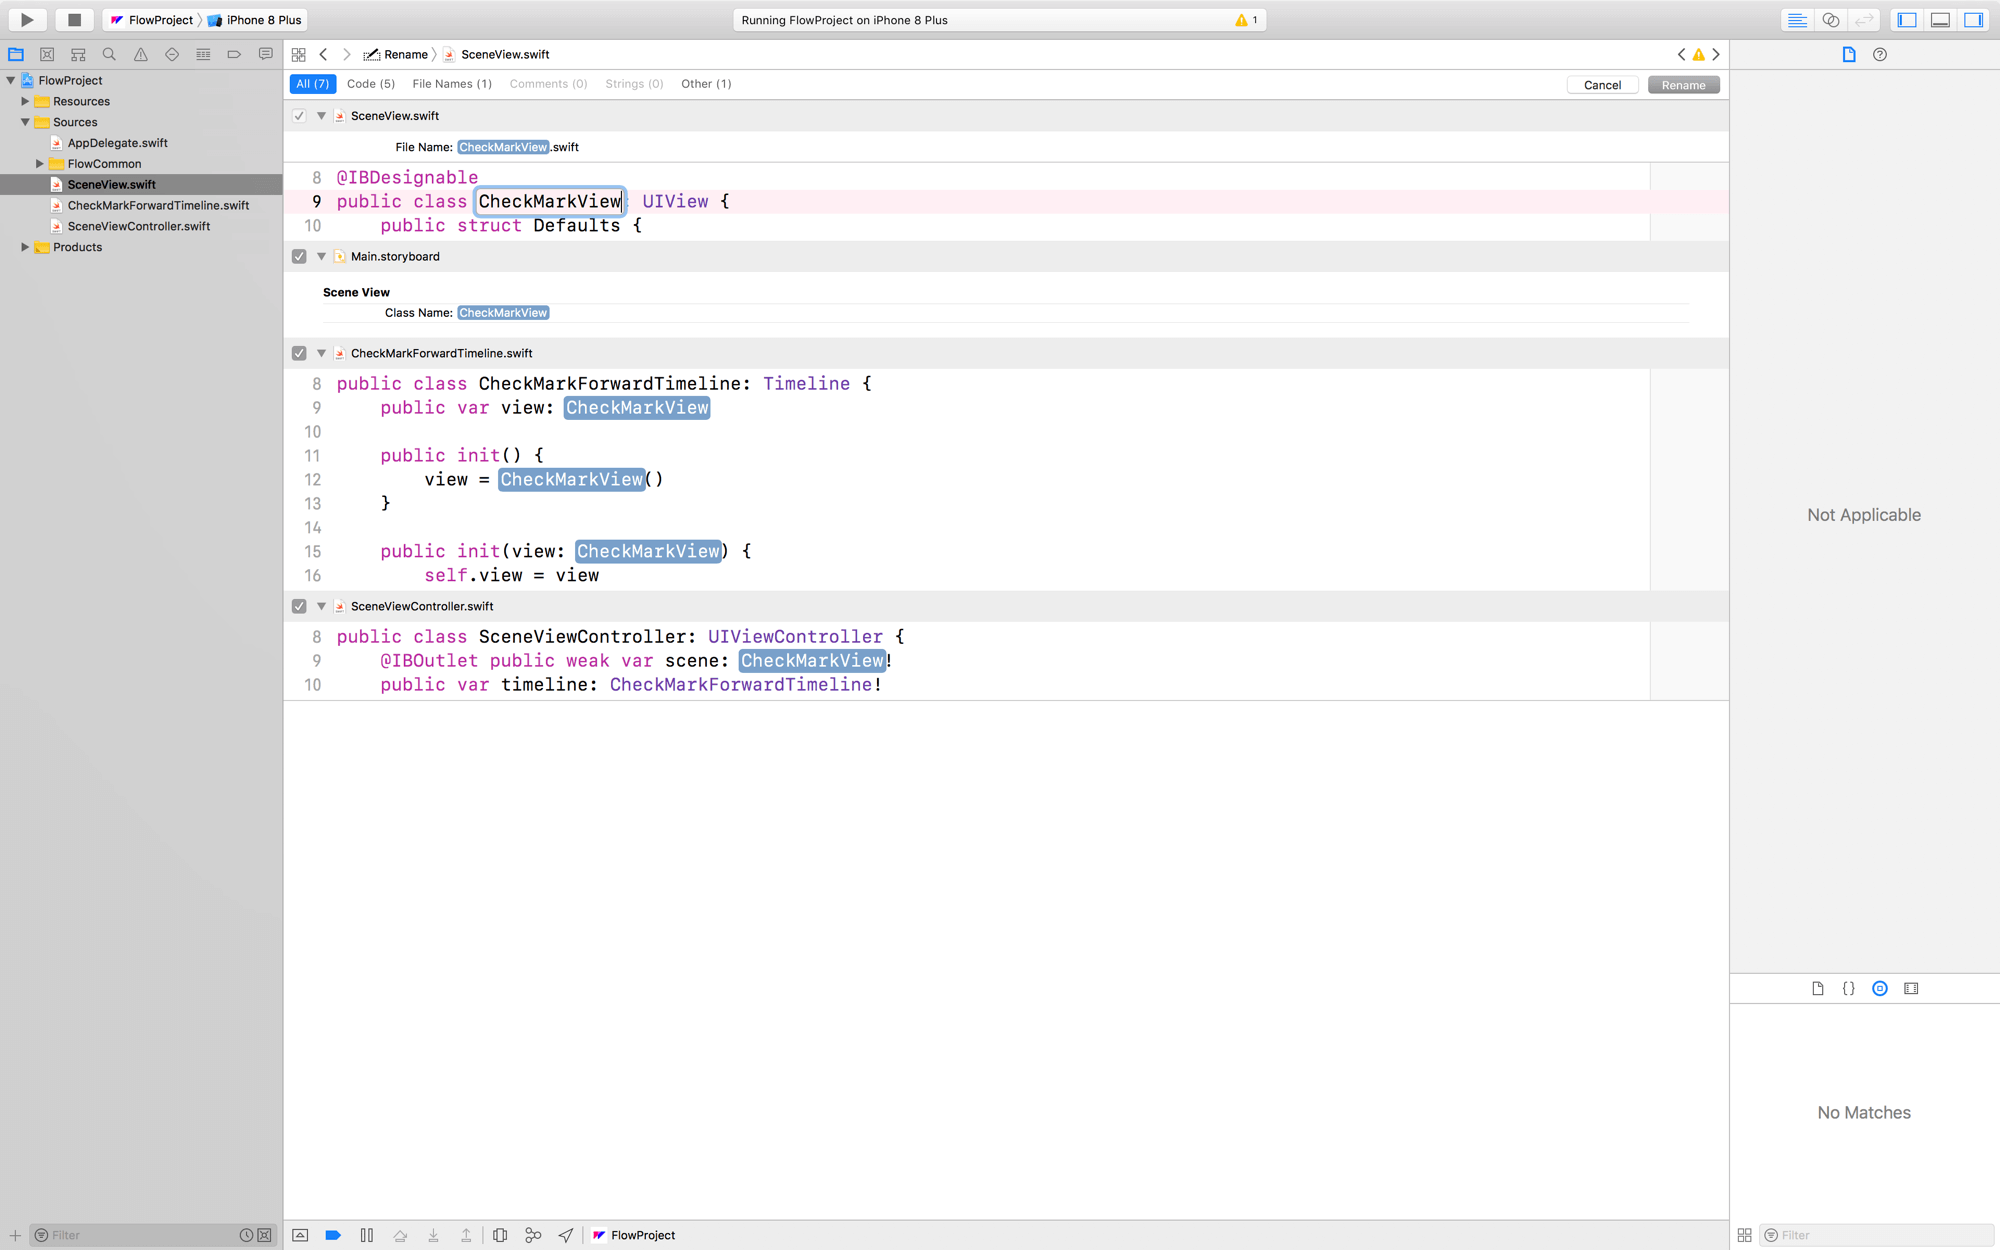
Hit
Enterto commit the changes.
Rename CheckMarkReverse
Follow the exact same steps as above…
Why that? You wonder...
The reason we want the two projects CheckMarkForward and CheckMarkReverse to have the same class names is because they will actually use the same class. When we integrate files we will copy in the CheckMarkView only one time… so it should be the same for both projects.
Also, we will only bring in the timeline from the CheckMarkReverse project.
Rename BackgroundForward
Follow the same steps as above, except…
Rename
SceneViewtoBackgroundView
Rename BackgroundReverse
Follow the exact same steps you took for BackgroundForward…
The Xcode Project
You can create a new Xcode project from scratch, or use one we’ve prepped for you.
If You So Choose…
… to create the project yourself, or you have one you want to try modifying.
- Create a
Single View App - Drop a
UIButtonintoMain.storyboard - Add new Alignment Constraints to the button:
Horizontally in ContainerVertically in Container
Import Files
Now, we’re going to import a whack of stuff.
Flow Common
To trigger animations created in Flow, your project will require a set of common files that get generated each time you export a timeline.
First,…
In
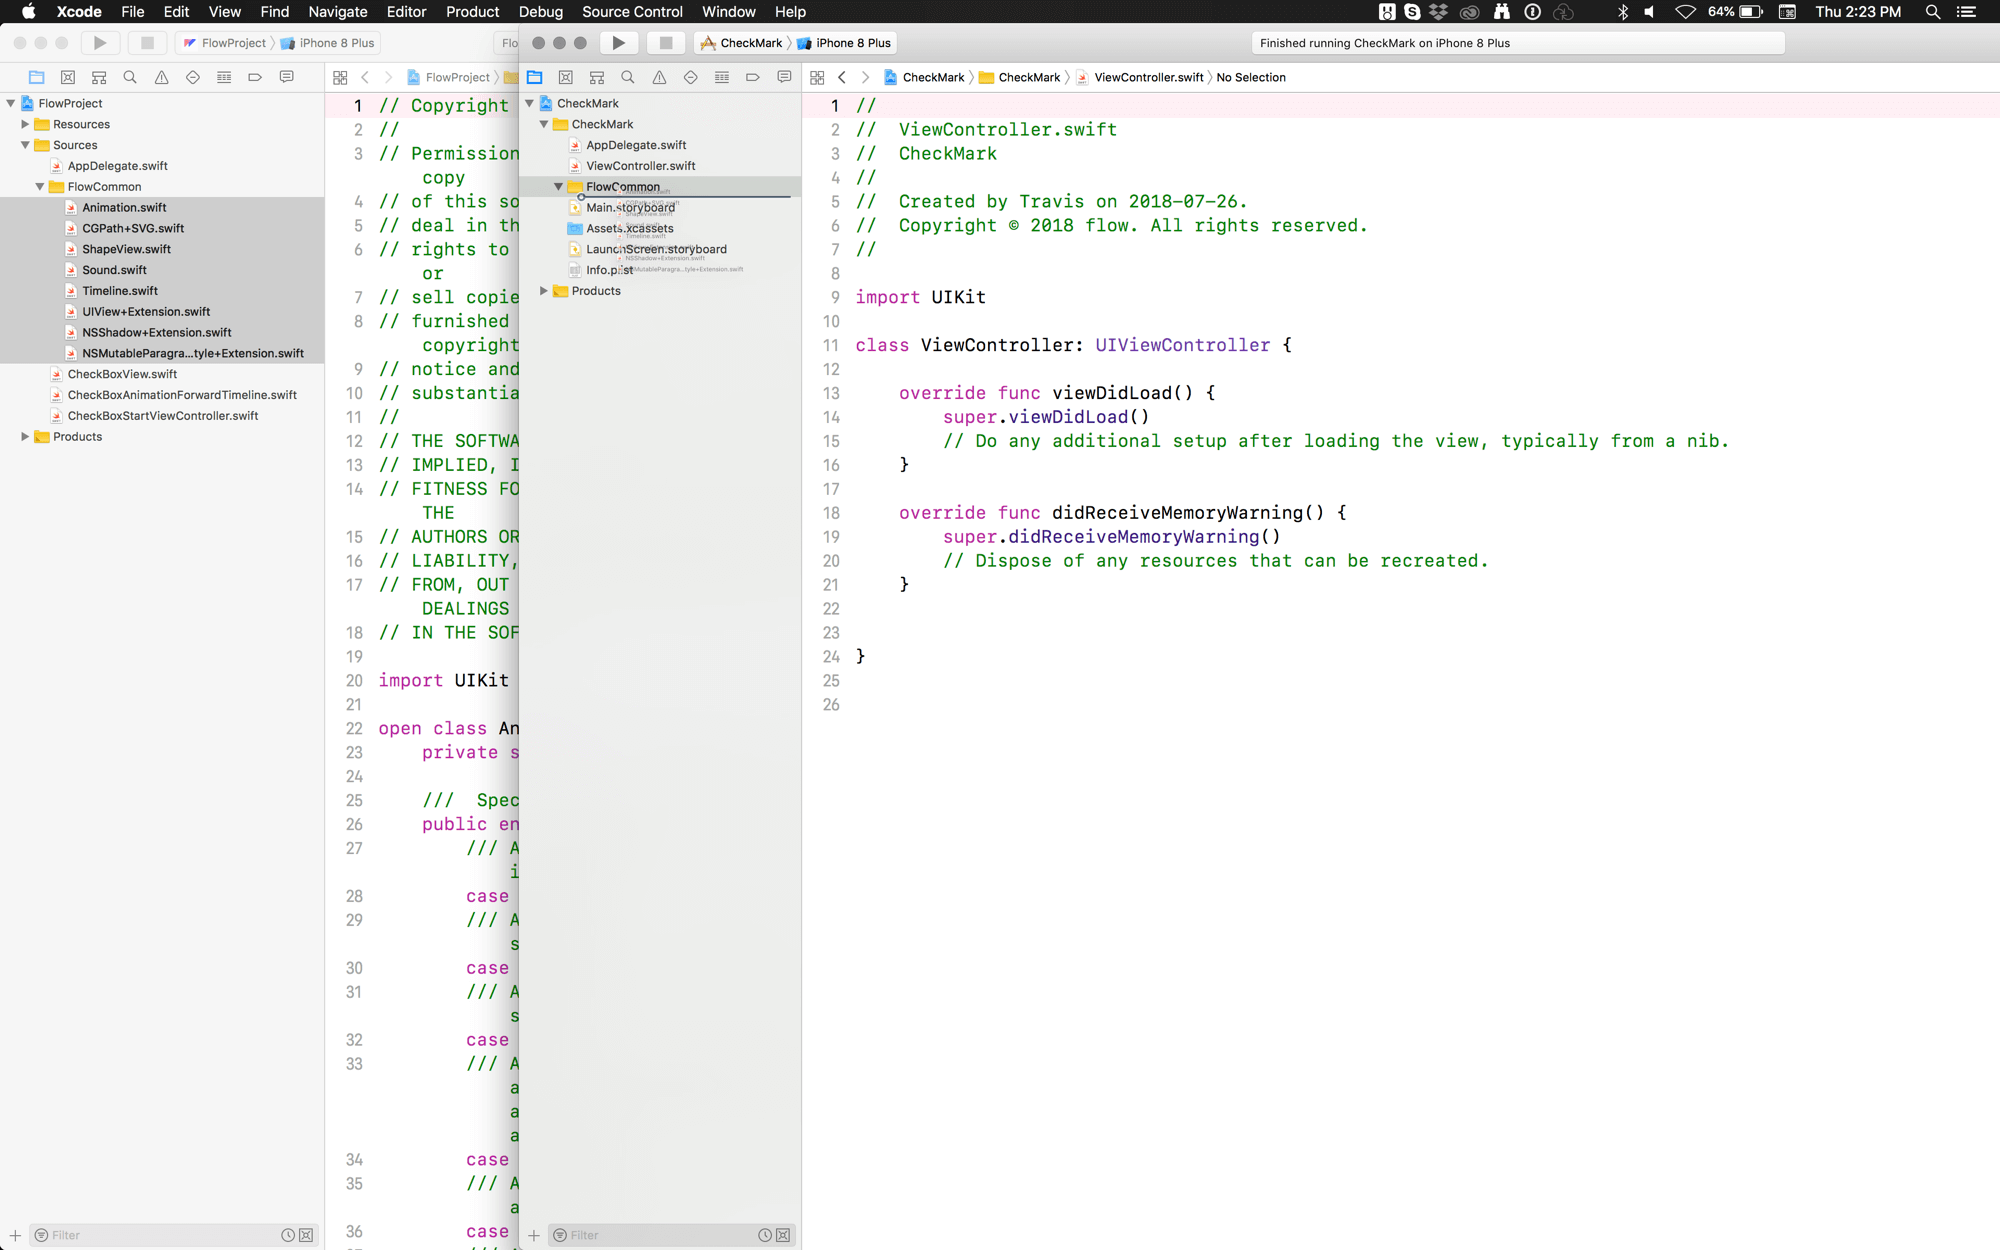
CheckMark.xcodeprojcreate a new group calledFlowCommon
Then from any of the 4 projects we exported earlier, we’re going to move…
Select all the common files and drag them into the group in
CheckMark.xcodeproj
Make sure to add all the files to the project's target
Now, we’ve got our common files ready to go. Next, we integrate the classes and timelines from the other exported projects.
CheckMarkForward
From the CheckMarkForward project…
Drag
CheckMarkView.swiftandCheckMarkForwardTimeline.swiftintoCheckMark.xcodeproj
CheckMarkReverse
From the CheckMarkReverse project…
Drag
CheckMarkReverseTimeline.swiftintoCheckMark.xcodeproj
See how we didn't need to bring in the CheckMarkView.swift here? That's because it's identical to the one we already imported from the CheckMarkForward project.
BackgroundForward
From the BackgroundForward project…
Drag
BackgroundView.swiftandBackgroundForwardTimeline.swiftintoCheckMark.xcodeproj
BackgroundReverse
From the BackgroundReverse project…
Drag
BackgroundReverseTimeline.swiftintoCheckMark.xcodeproj
Group The Files
To keep your project tidy, you can group the files you just imported.
Select the new files, right-click, choose
New Group From Selectionand rename the group
Fonts
Don’t forget about the fonts! Your Sketch and Flow files probably used custom fonts for the button label. We’ll want to get access to those, and we’ll want to integrate them properly into our new project.
Flow Layout Timeline
In your Flow project, create a new timeline and with the start and end artboards.
Export the timeline
Remember to configure the output folder name – Layout – while exporting
Font File
When Flow exports text it also packs up the fonts and bundles them properly into the Xcode project.
Drag the font file from
Layout.xcodeprojand drop it intoCheckMark.xcodeproj
Plist
Now, the Xcode project needs to know that it’s going to use a custom font file.
Navigate to the
info.plistfile ofLayout.xcodeproj
In this file look for an entry called Fonts provided by application
Select the entry and copy it (
⌘C)
We want to add this to our new project.
In
CheckMark.xcodeprojnavigate toinfo.plistand paste (⌘V) the entry you just copied

Now, we’re good to go for integrating everything into a button.
Build
It’s high time we get to building. Our approach will be to:
- create a new button class
- customize the location of the button title
- customize the font for the button
- integrate check mark and background views
- integrate check mark and background timelines
- build a method into the button that handles toggling the animations
Easy, right? Let’s get started
Subclass UIButton
First, we want to subclass UIButton.
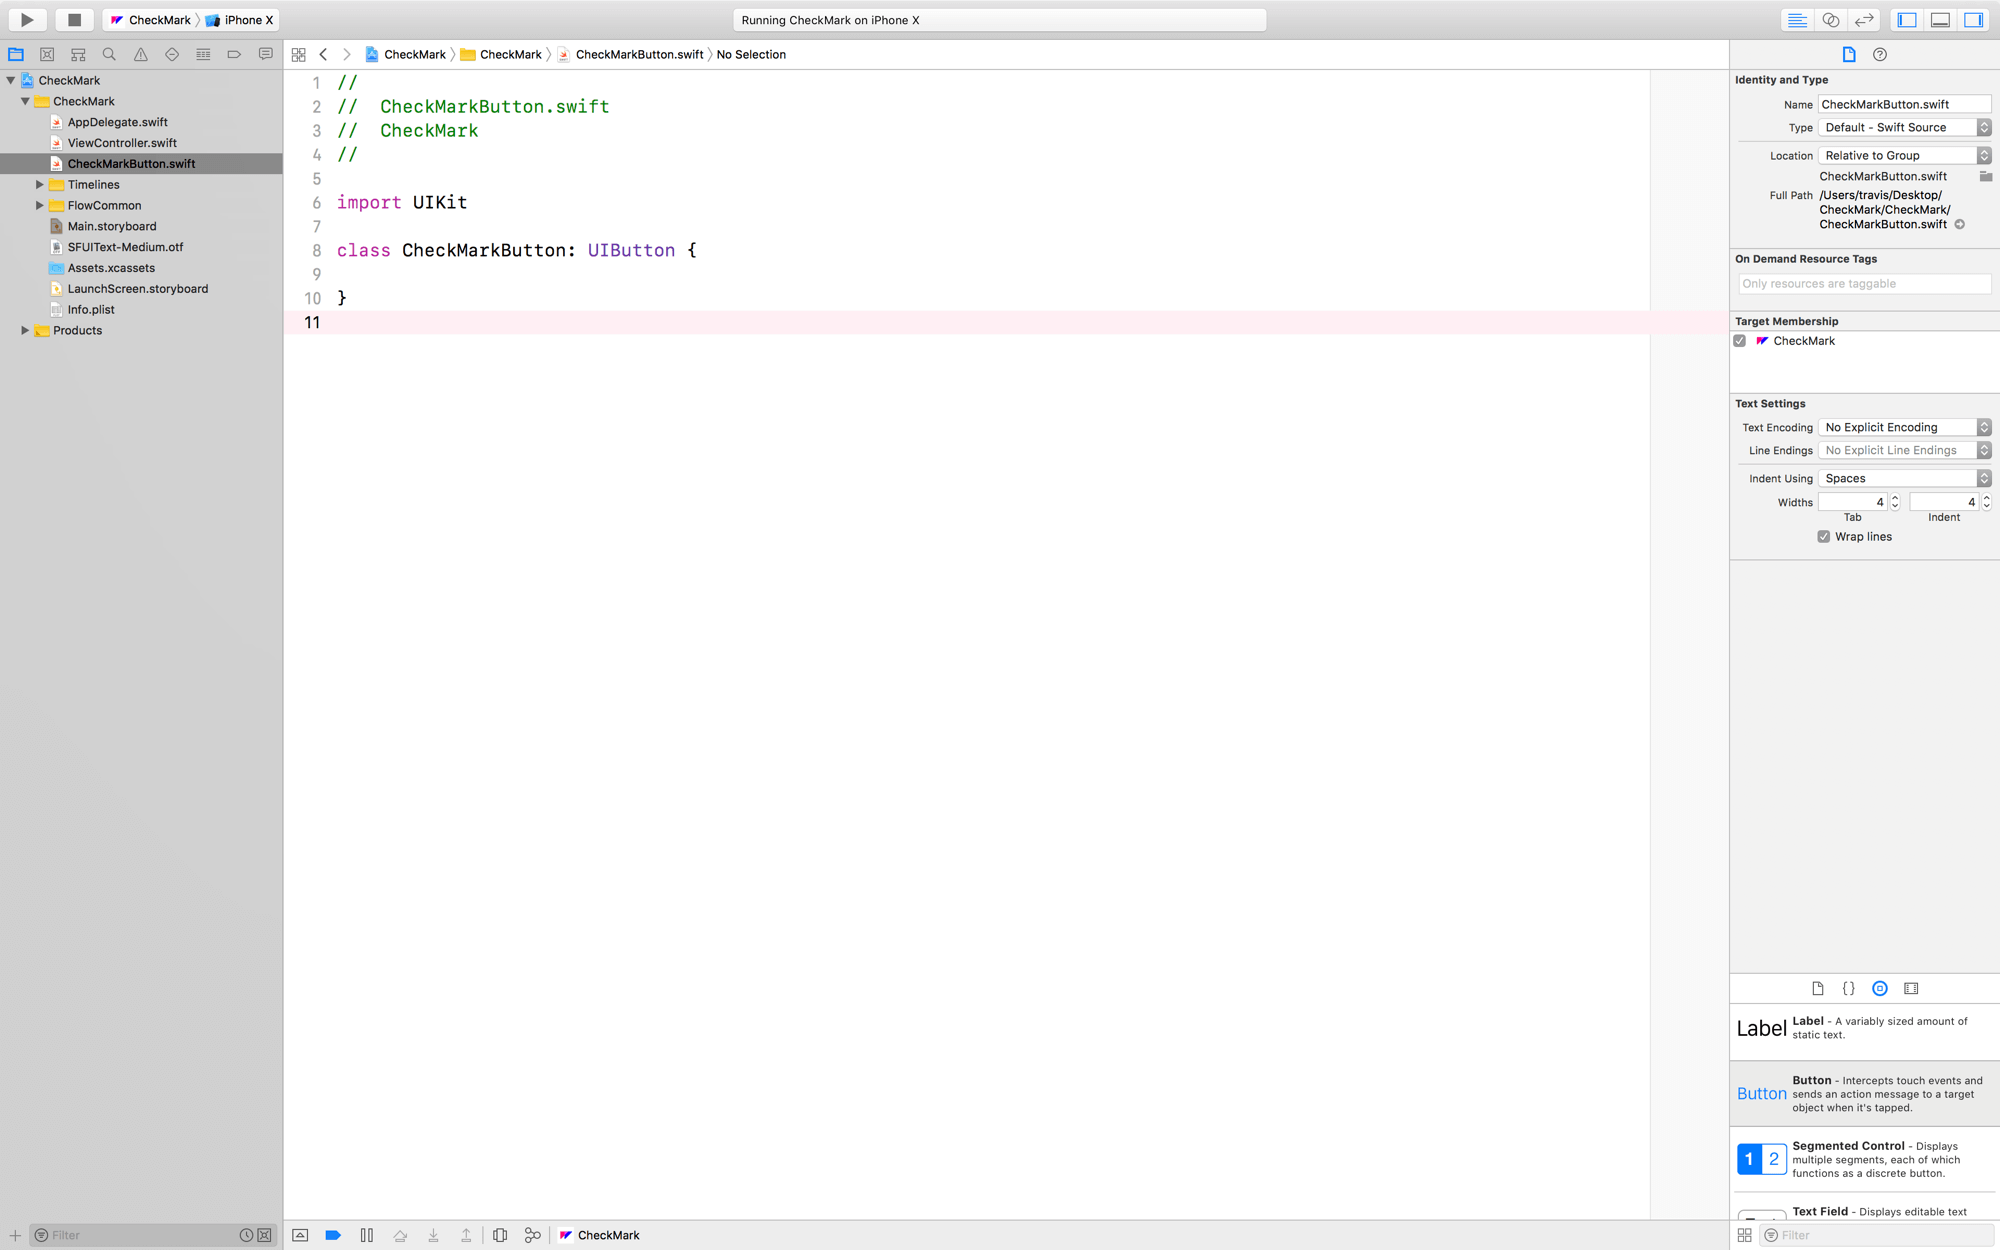
Create a new file called
CheckMarkButton.swiftand give it the following class code:
1
2
3
4
5
import UIKit

class CheckMarkButton: UIButton {

}
setupButton
There’s some basic setup we need to do to the button.
Create a function called
styleButton, call itawakeFromNiband fill it with the following code:
1
2
3
4
5
6
7
8
9
10
11
override func awakeFromNib() {
    super.awakeFromNib()
    styleButton()
}

func styleButton() {
    titleLabel?.font = UIFont(name: "SFUIText-Medium", size: 14)
    titleLabel?.textColor = UIColor(red: 0.149, green: 0.149, blue: 0.149, alpha: 1)
    contentHorizontalAlignment = .left
    titleEdgeInsets = UIEdgeInsetsMake(0.0, 49, 0.0, 0.0)
}
You can get the edge inset position from the Sketch file
This code does three things:
- Makes sure the button label uses a custom font
- Changes the text color of the button
-
Anchors the button label to the left, then pads it to the right by
49ptYou can find the font and textColor code in the StartView file of Layout.xcodeproj
Update Button Class
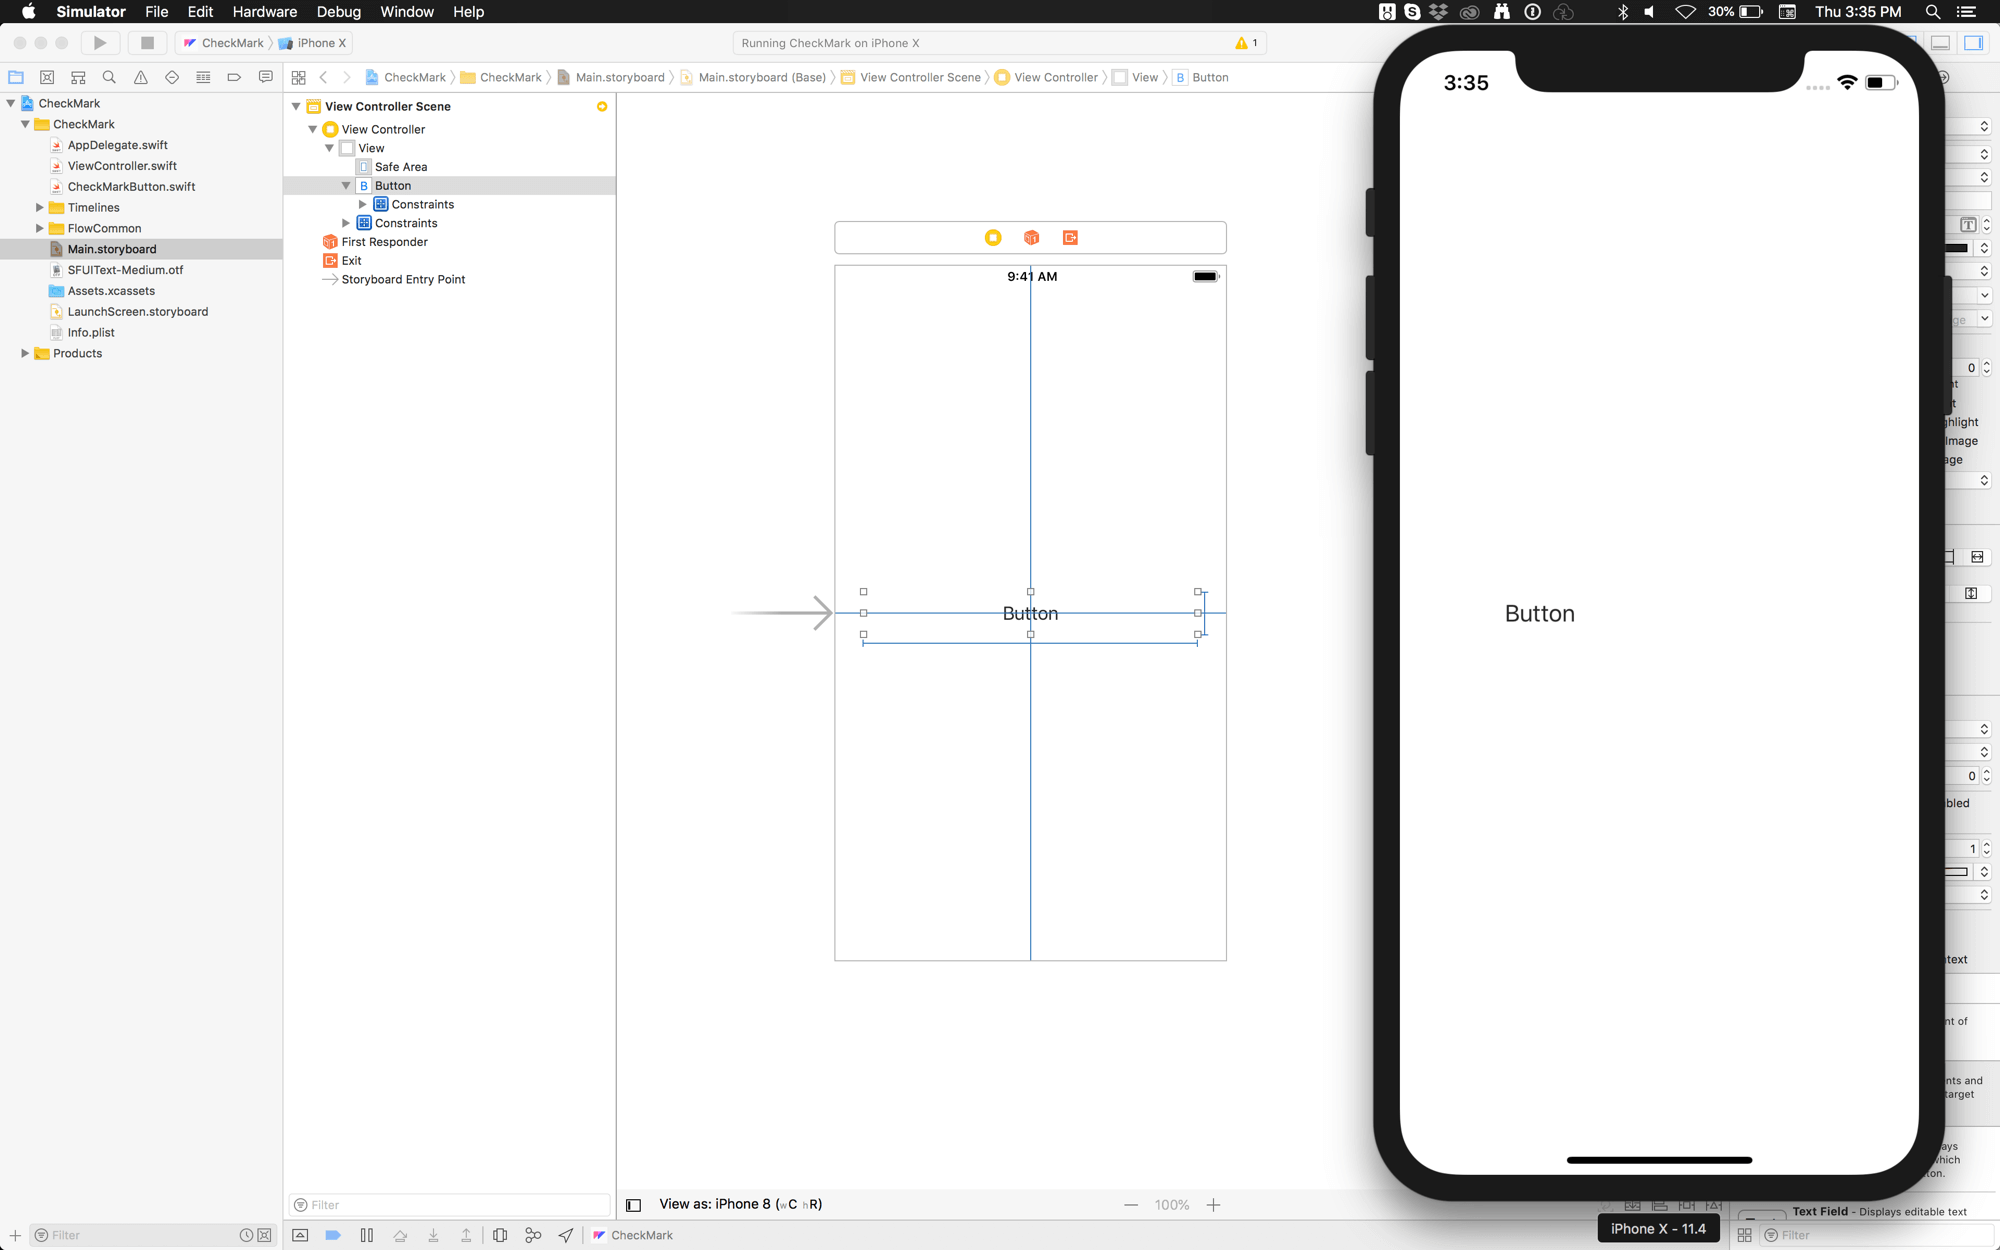
In Main.storyboard select the button.
Change the button’s class to
CheckMarkButton
Then…
Change the button’s size to
width: 322andheight: 42
Then…
Change the button’s type to
Custom
Finally…
Add fixed width and height contraints to the button
Now run the app in the simulator.
You many need to set the button's Text Color directly in the Main.storyboard file.
Add CheckMarkView
Back in the CheckMarkButton class, it’s time to add the CheckMarkView.
Add a variable
1
var checkMark: CheckMarkView!
Create a new method called
createCheckBox
1
2
3
4
5
func createCheckMark() {
    checkMark = CheckMarkView(frame: CGRect(origin: CGPoint(x: 8, y: 8),
                                            size: CheckMarkView.Defaults.size))
    addSubview(checkMark)
}
You can get the {x,y} position from the Sketch file
Call that method in
awakeFromNib
Your whole class should now look like this:
1
2
3
4
5
6
7
8
9
10
11
12
13
14
15
16
17
18
19
20
21
22
23
class CheckMarkButton: UIButton {
    var checkMark: CheckMarkView!

    override func awakeFromNib() {
        super.awakeFromNib()
        styleButton()
        createCheckMark()
    }

    func styleButton() {
        titleLabel?.font = UIFont(name: "SFUIText-Medium", size: 14)
        titleLabel?.textColor = UIColor(red: 0.149, green: 0.149, blue: 0.149, alpha: 1)
        titleLabel?.textAlignment = .left
        contentHorizontalAlignment = .left
        titleEdgeInsets = UIEdgeInsetsMake(0.0, 49, 0.0, 0.0)
    }

    func createCheckMark() {
        checkMark = CheckMarkView(frame: CGRect(origin: CGPoint(x: 8, y: 8),
                                                size: CheckMarkView.Defaults.size))
        addSubview(checkMark)
    }
}
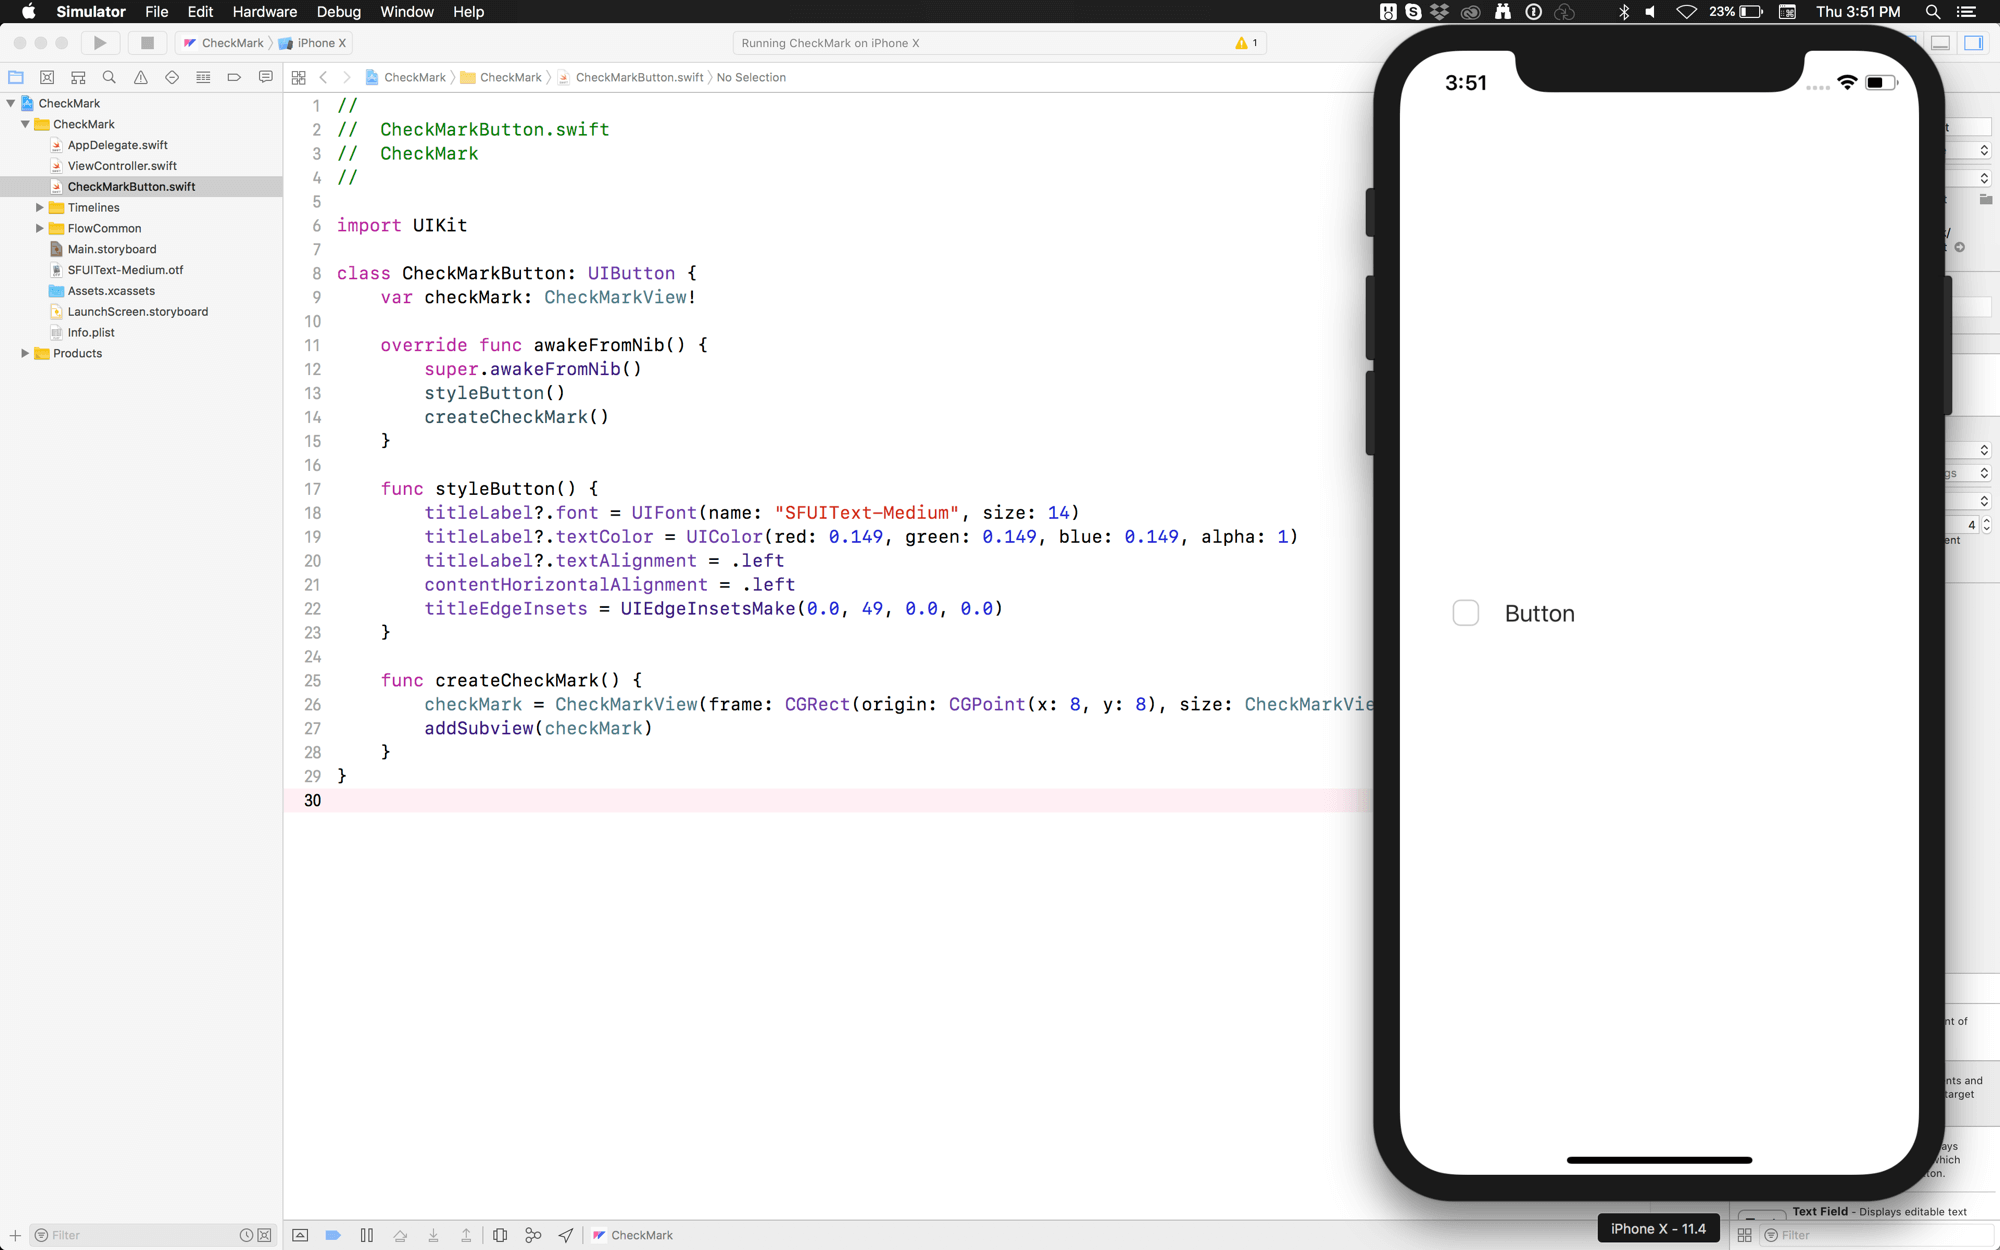
Getting there…
Add BackgroundView
The process for adding the background to our button is identical to the previous steps, with two exceptions
First, the background should be the same size as our button, so we set its frame like so:
1
background = BackgroundView(frame: bounds)
Second, we need to send the view behind all the other views in the button with a call such as:
1
sendSubview(toBack: background)
Your code should now look like this:
1
2
3
4
5
6
7
8
9
10
11
12
13
14
15
16
17
18
19
20
21
22
23
24
25
26
27
28
29
30
31
32
class CheckMarkButton: UIButton {
    var checkMark: CheckMarkView!
    var background: BackgroundView!

    override func awakeFromNib() {
        super.awakeFromNib()
        styleButton()
        createCheckMark()
        createBackground()
    }

    func styleButton() {
        titleLabel?.font = UIFont(name: "SFUIText-Medium", size: 14)
        titleLabel?.textColor = UIColor(red: 0.149, green: 0.149, blue: 0.149, alpha: 1)
        titleLabel?.textAlignment = .left
        contentHorizontalAlignment = .left
        titleEdgeInsets = UIEdgeInsetsMake(0.0, 49, 0.0, 0.0)
    }

    func createCheckMark() {
        checkMark = CheckMarkView(frame: CGRect(origin: CGPoint(x: 8, y: 8),
                                                size: CheckMarkView.Defaults.size))
        addSubview(checkMark)
    }

    func createBackground() {
        background = BackgroundView(frame: bounds)
        background.isUserInteractionEnabled = false
        addSubview(background)
        sendSubview(toBack: background)
    }
}
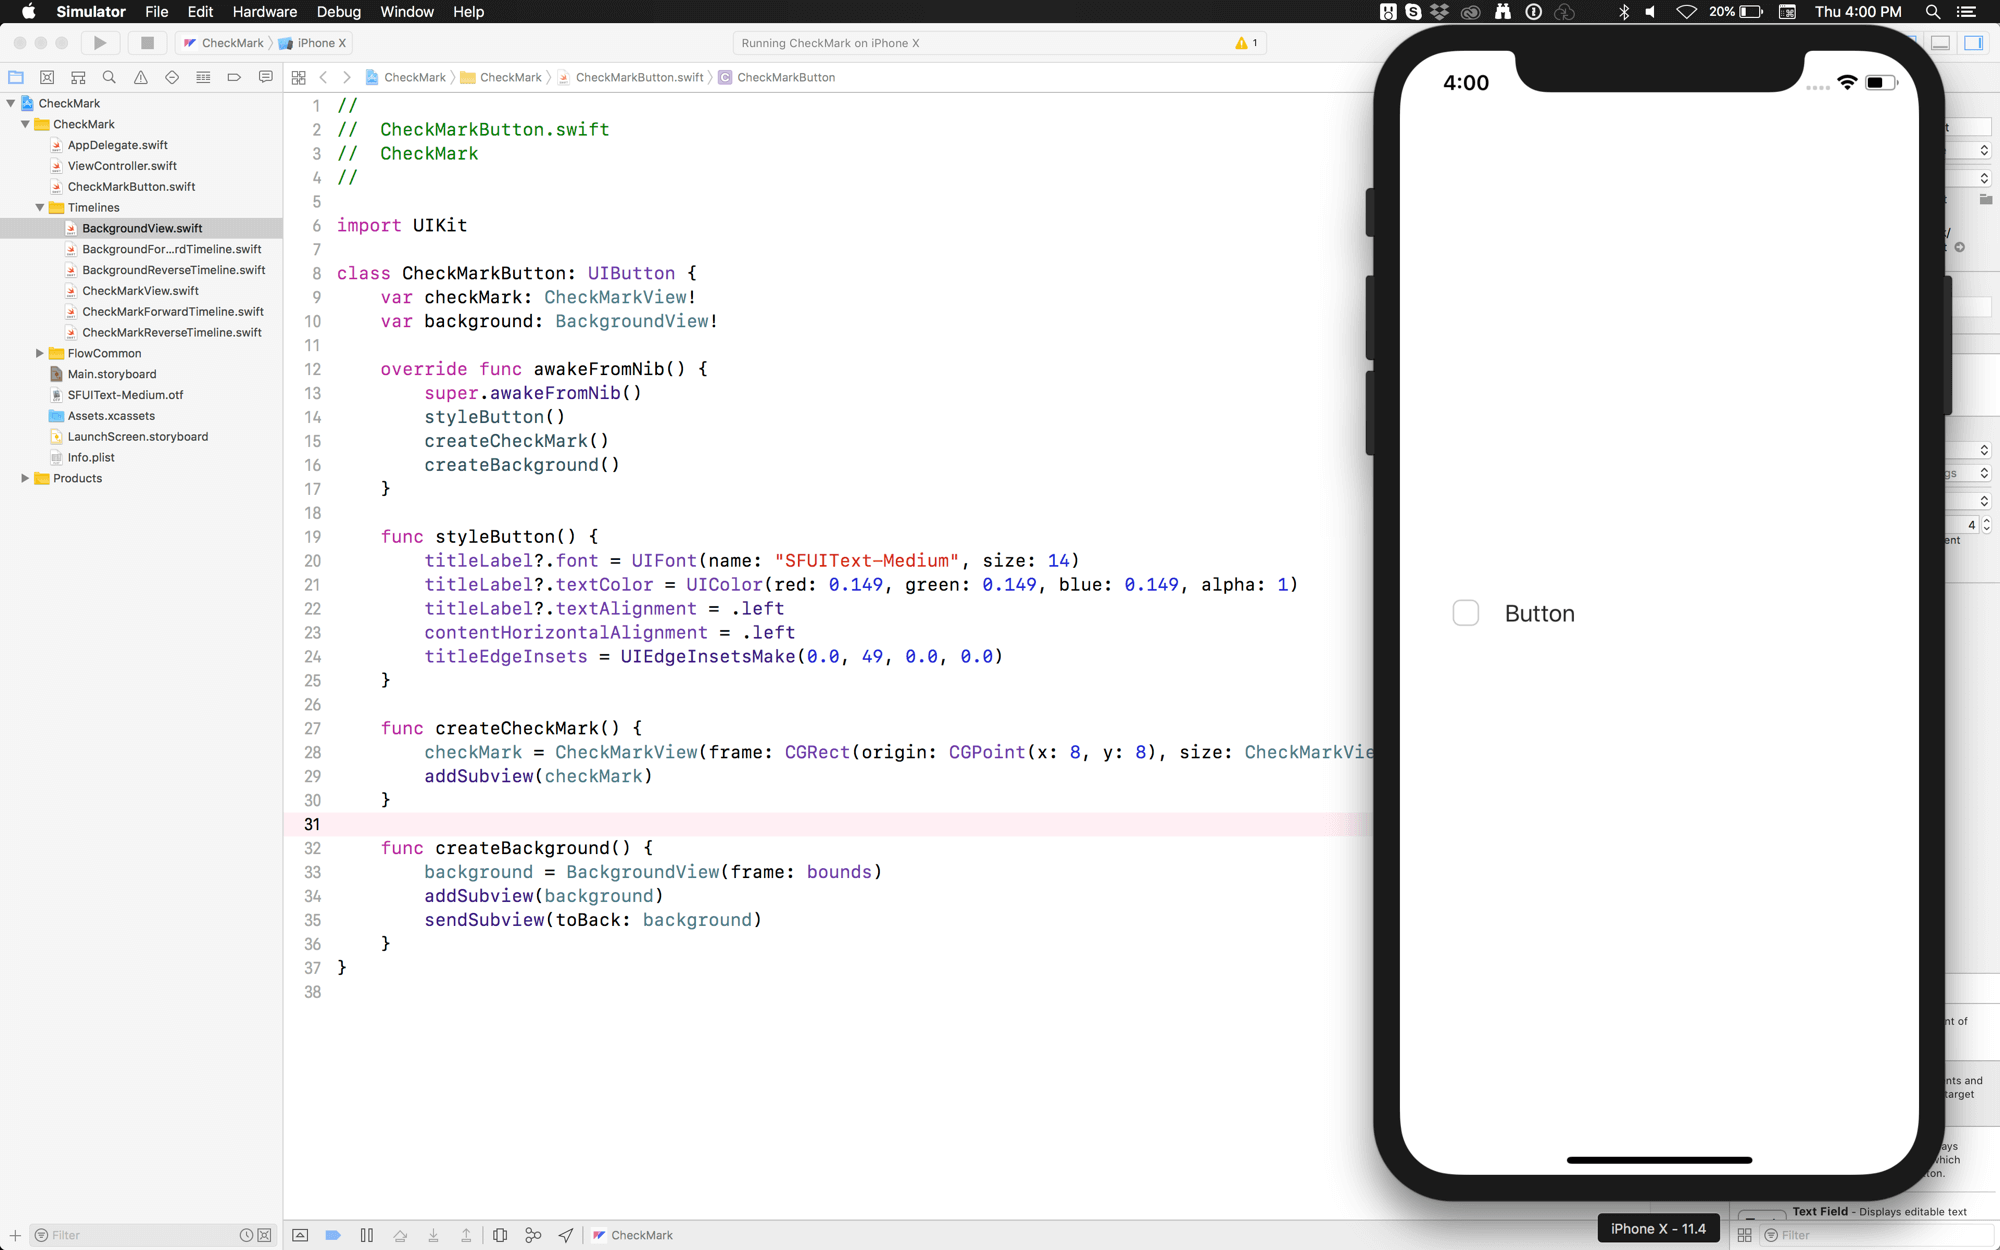
It is important to turn off the interaction behaviour for the background.
Add the Timelines
Here comes the butter.
Add 4 new variables for the timelines like so:
1
2
3
4
var checkMarkForward: CheckMarkForwardTimeline!
var checkMarkReverse: CheckMarkReverseTimeline!
var backgroundForward: BackgroundForwardTimeline!
var backgroundReverse: BackgroundReverseTimeline!
Add a method for creating the timelines:
1
2
3
4
5
6
func createTimelines() {
    checkMarkForward = CheckMarkForwardTimeline(view: checkMark)
    checkMarkReverse = CheckMarkReverseTimeline(view: checkMark)
    backgroundForward = BackgroundForwardTimeline(view: background)
    backgroundReverse = BackgroundReverseTimeline(view: background)
}
When you initialize a Flow timeline, you pass in the view that should handle the animation.
Call that method in
awakeFromNib
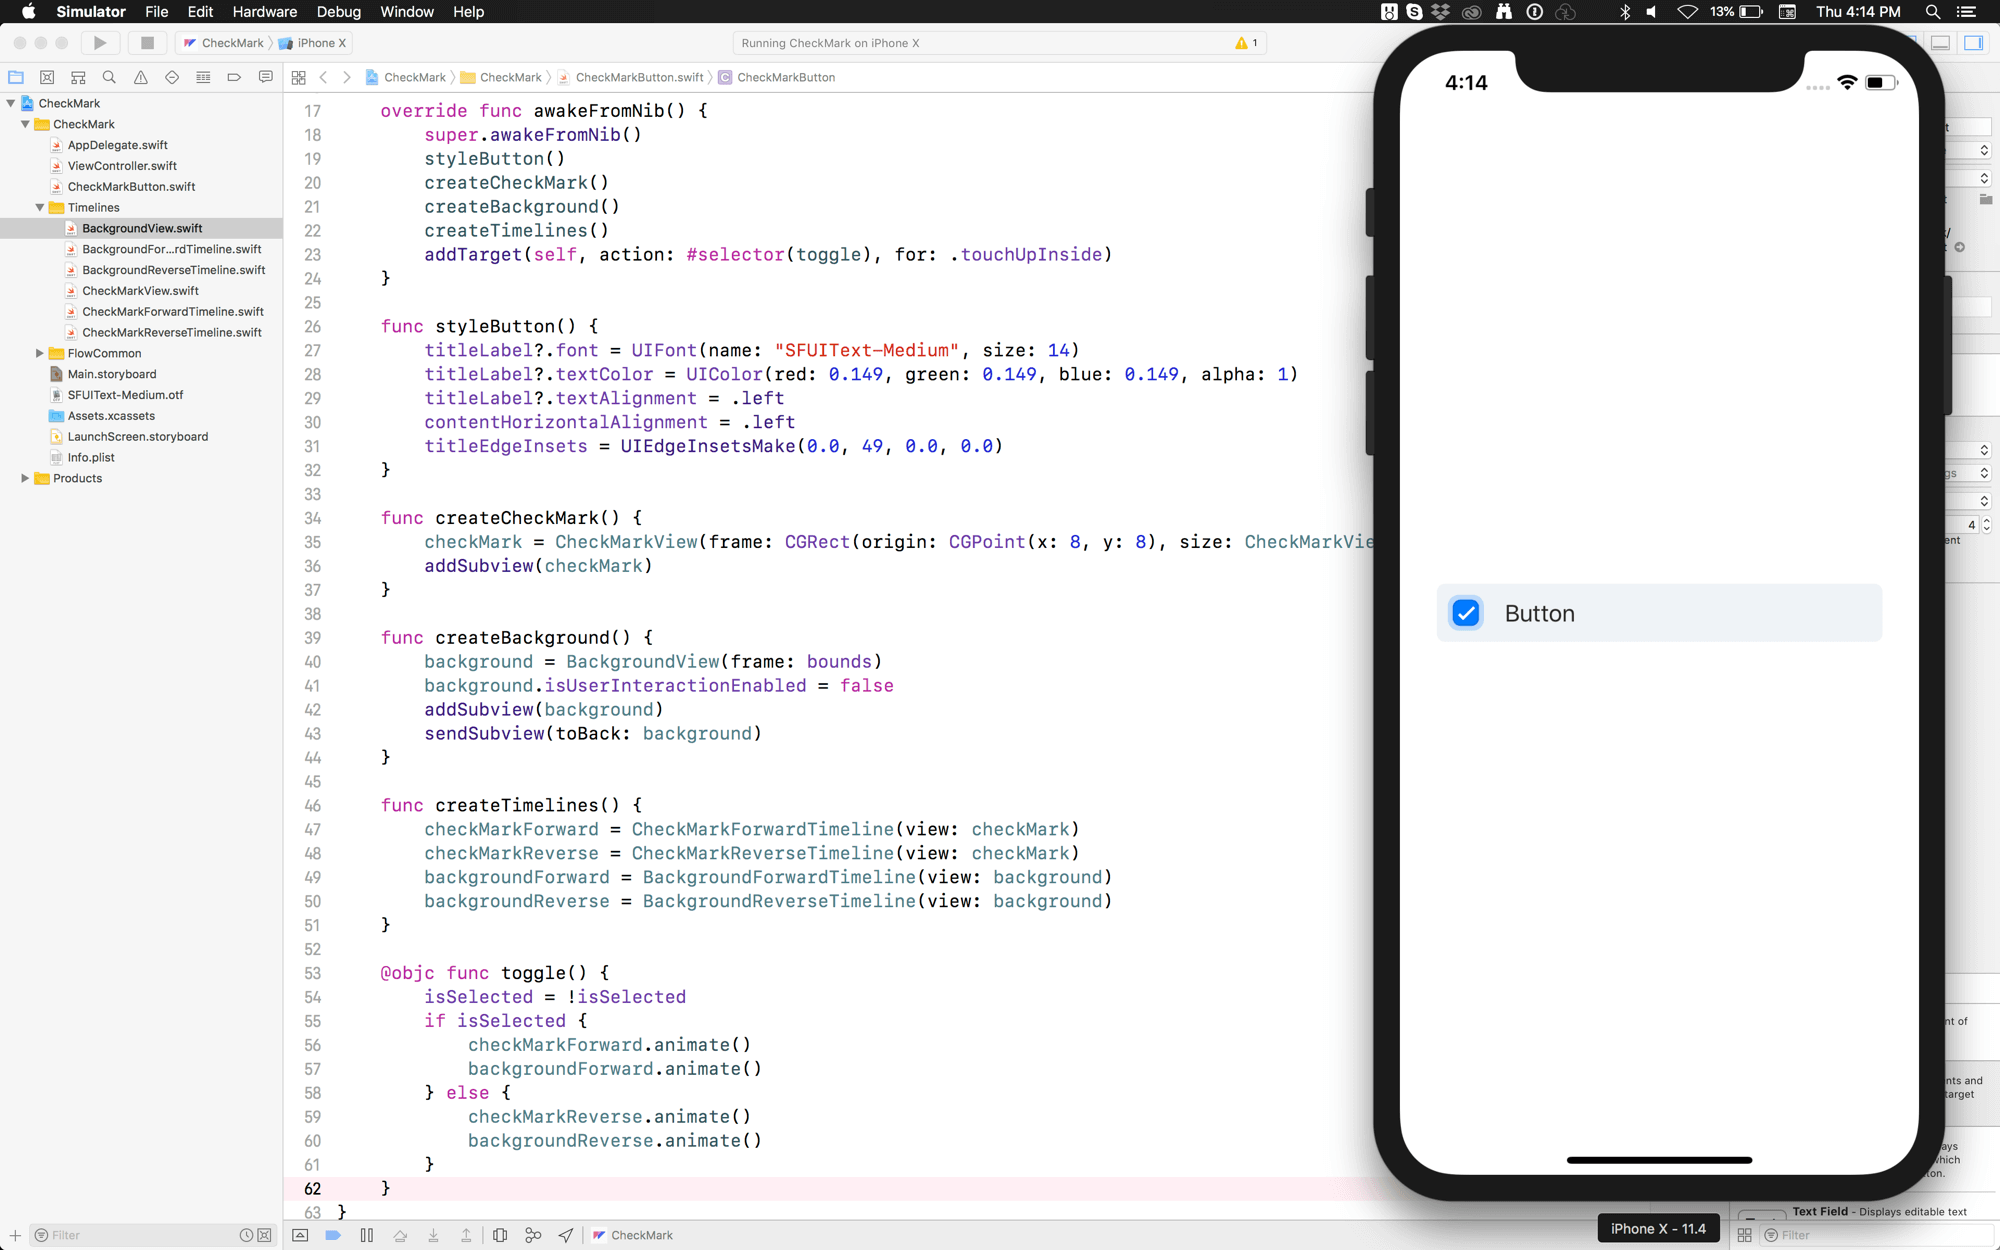
Add Toggle Behaviour
We’re going to create a method that checks the button’s isSelected property, and triggers our animations. We’ll connect this method to the button’s default behaviour by adding it as a target.
Add the following method to your class:
1
2
3
4
5
6
7
8
9
10
@objc func toggle() {
    isSelected = !isSelected
    if isSelected {
        checkBoxForward.animate()
        backgroundViewForward.animate()
    } else {
        checkBoxReverse.animate()
        backgroundViewReverse.animate()
    }
}
Add the following line to
awakeFromNib
1
addTarget(self, action: #selector(toggle), for: .touchUpInside)
We do this in code because Interface Builder doesn't let you connect the button's action to itself for some reason
Get Fancy…
Since our button is a subclass of UIButton we can easily duplicate it in Main.storyboard.
Copy and paste the button 5 times
Space and align all the buttons
Add constraints to preserve the positions of the buttons
Add numbers to the button titles
Run it.
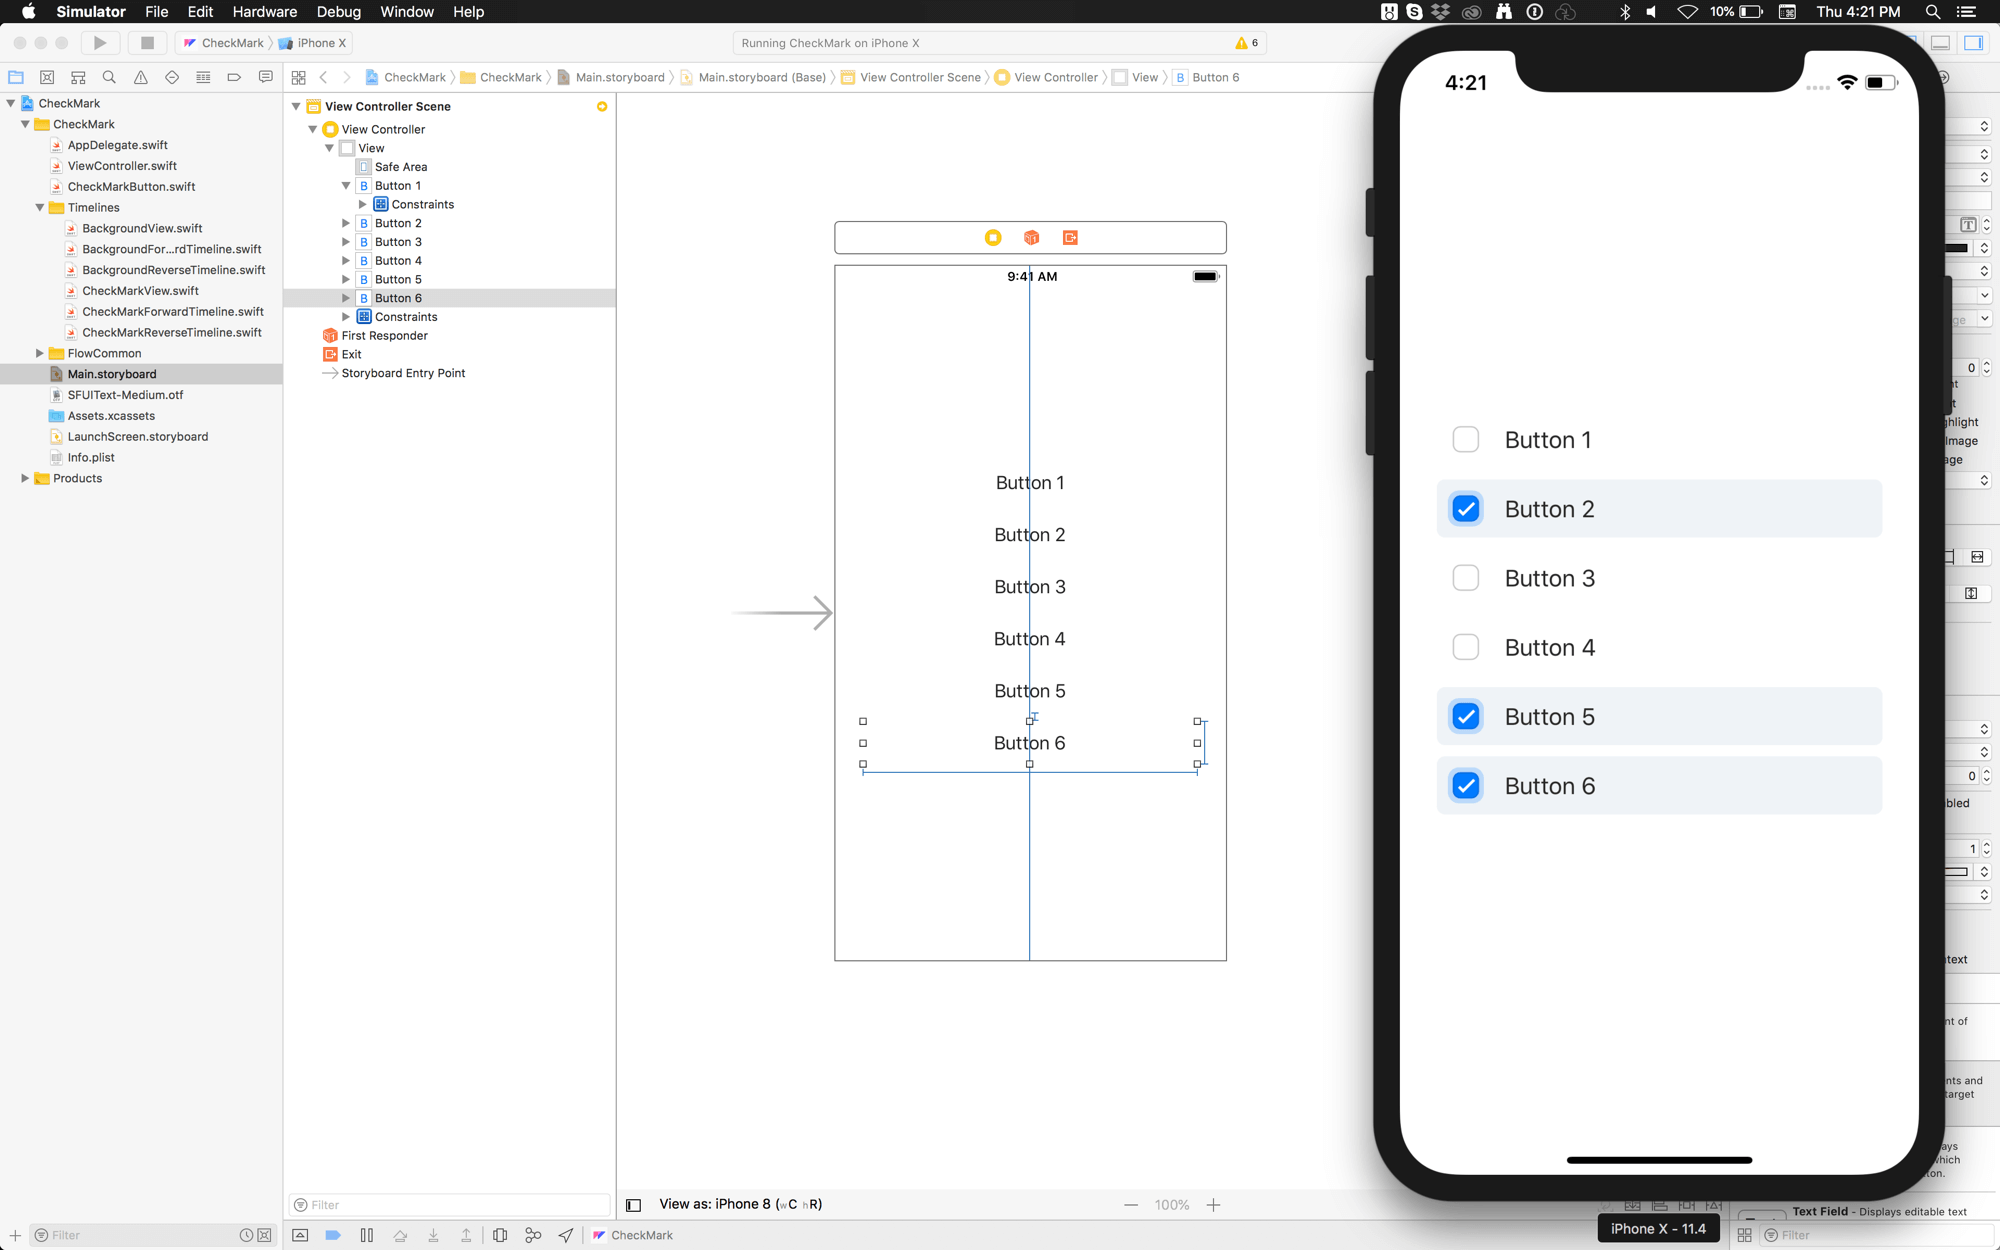
Wham.
❤︎