Animating Your Design | Check Box (2/3)
Learn how to structure your Flow file and create clean timelines that you can import easily into an iOS project.
If you completed the previous tutorial, you should already have a design file to work with. Otherwise…
An Animatable File
In our Sketch file there are 6 artboards, 4 of which we’ll use for animations and one of the other two we will use for helping us with layout.
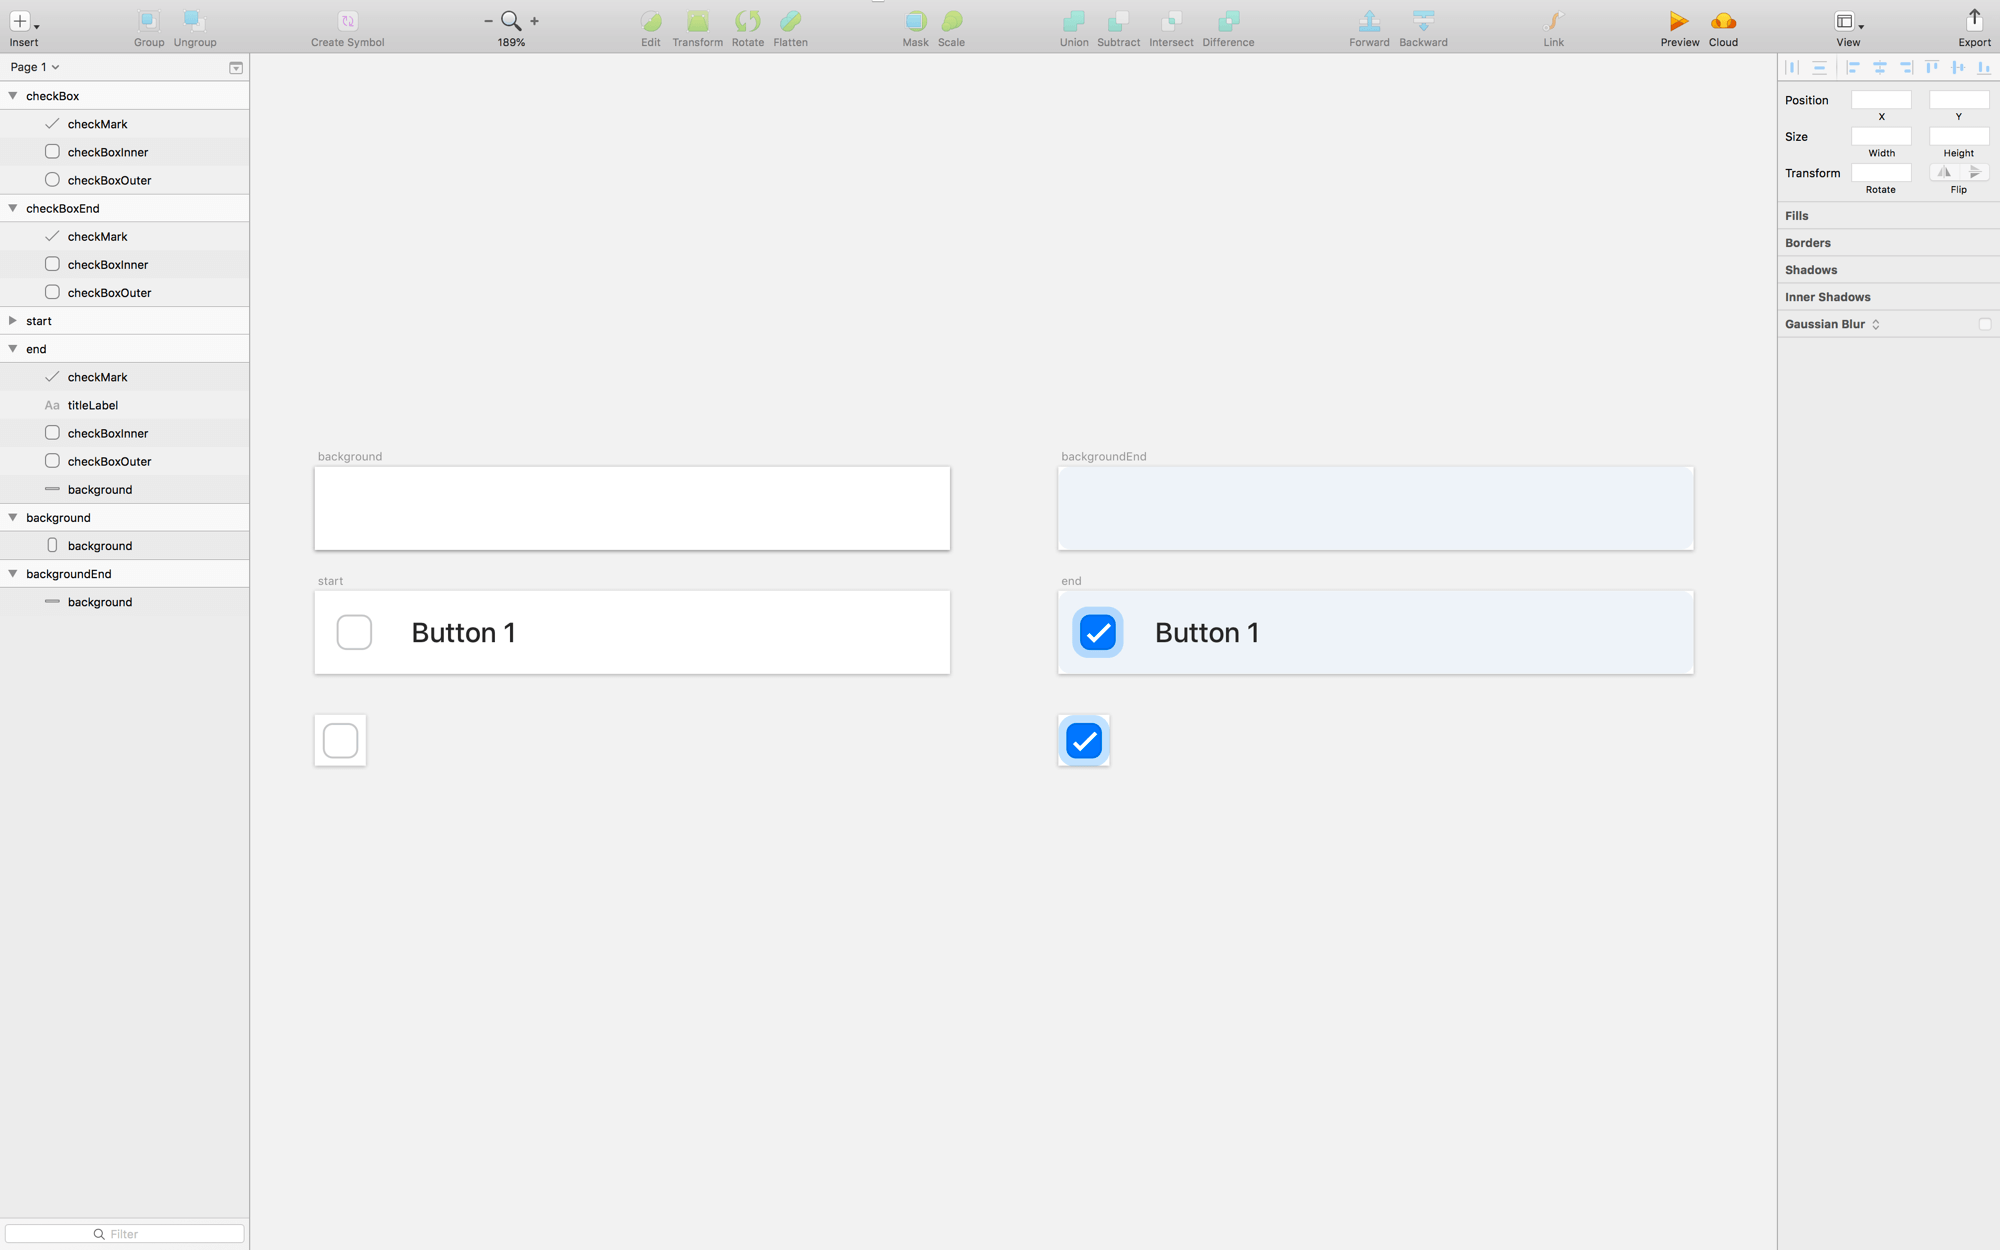
Let’s start with the checkbox.
Check Box Animation
The check box has 3 layers:
- checkmark
- inner box
- outer box
Let’s get to it.
- Create a new Flow file
- Load
checkBoxAnimatable.sketch - Select
checkBoxfor thet0position - Select
checkBoxEndfor thet1position - Rename the new timeline to
checkBoxForward
Hit Play
It’s actually not too bad out of the box… but we can make it better.
Check Mark Animation
We first saw how to use the stroke end property in the CodePen and Dribbble tutorials.
- Move the playhead to
t0 - Select the
checkMarklayer - Set its
stroke endto 0 - Drag the first keyvalue of the newly created track to
0.25s - Change the easing to
Ease Out
Inner / Outer Boxes
For the inner and outer boxes we will change their duraton and easing.
- Drag the first keyvalue of the
checkBoxInnertrack to0.25s> this will move all its child keyvalues. - Drag the last keyvalue of the
checkBoxInnertrack to0.75s - Area-select all of the keyvalues for
checkBoxInneranimations - In the property panel, change the easing to
Ease In - Drag the last keyvalue of the
checkBoxOutertrack to0.5s - Area-select all of the keyvalues for
checkBoxOuteranimations - In the property panel, change the easing to
Ease Out
Scale the Timeline
Finally, this animation is way too long. UI animations should be relatively fast – iOS defaults to 0.25s – so let’s shorten the duration of the timeline.
- Tap the clock icon on the far-right side of the timeline
- Set the value to
0.5s - Tap the
scalebutton
Here is what your timeline should look like:

Hit Play
Duplicate & Reverse
We’ve created the forward animation, now let’s create the reverse (which will get triggered when a user un-checks a button).
- Right-click on the
checkBoxForwardtitle, selectDuplicate - Rename the new timeline to
checkBoxReverse - Right-click on the
checkBoxReversetitle, selectReverse
Hit Play
Background Animation
This step is pretty easy… we’ve already created our assets so that they animate the way we want. We’ll only need to tweak the duration and easing to get a nice effect.
- Create a new timeline by clicking the
+button, or pressing⬆︎⌘N - Select
backgroundfor thet0position - Select
backgroundfor thet1position - Rename the new timeline to
backgroundForward
Tune the Animation
Let’s tighten up the animation.
- Delete the
pathtrack > sometimes this gets added, but we don’t really need it. - Select all the keyvalues for
x,widthandheight - Change their easing values to
Ease In - Drag the last keyvalue for the
opacitytrack to0.75s - Change its easing to
Ease Out - Scale the timeline duration to
0.5s
Here is what your timeline should look like:

Duplicate & Reverse
Same as above, but now for the background…
- Right-click on the
backgroundForwardtitle, selectDuplicate - Rename the new timeline to
backgroundReverse - Right-click on the
backgroundReversetitle, selectReverse
Layout
It’s handy to have a non-animating timeline that you can reference for layout q’s etc.
- Create a new timeline
- Select
endfor thet0ANDt1positions - Rename the timeline to
Layout
Done.
You can export this to an xcode project to reference the layout, fonts, etc.
Ready to Animate
So, now you have a Flow file with 5 timelines in it. This is perfect for handing off to a developer. In the next tutorial we will integrate the 4 main timelines into the standard iOS UIButton.
Walkthrough
Here is a quick vid of all the steps above.
❤︎