Making a Web Export Respond to Mouse Hovers
In this blitz of a doc, we're going to show you how to change the mouse event that triggers an animation exported using Flow's Toggle Button option for the web.
Here’s the Flow file for this doc, grab it and follow along.
Concept
Our web exports are structured so that the scene being exported is contained in its own artboard layer. Then, in exports like our HTML - Toggle Button we wrap the artboard in a <div> that handles interaction. Here’s some pseudocode for how we do this:
<div id="artboardContainer" onclick="doSomething()">
  <div class='artboard'>
    //... your amazing animations go here
  </div>
</div>
This doc willl show you how to change that onclick event, and explain a few details about what’s going on.
Export and Set Yourself Up
The first steps here are dead easy…
This step starts at 0:28
- Download the file above (if you haven’t already)
- Export the main timeline as
HTML - Toggle Button - Open the folder with our export
- Navigate to the
Timelinefolder - Double-click
Timeline.htmlto open the page. - Open the
Timelinefolder in your fav editor.
I use Sublime.
You should now see something like this:
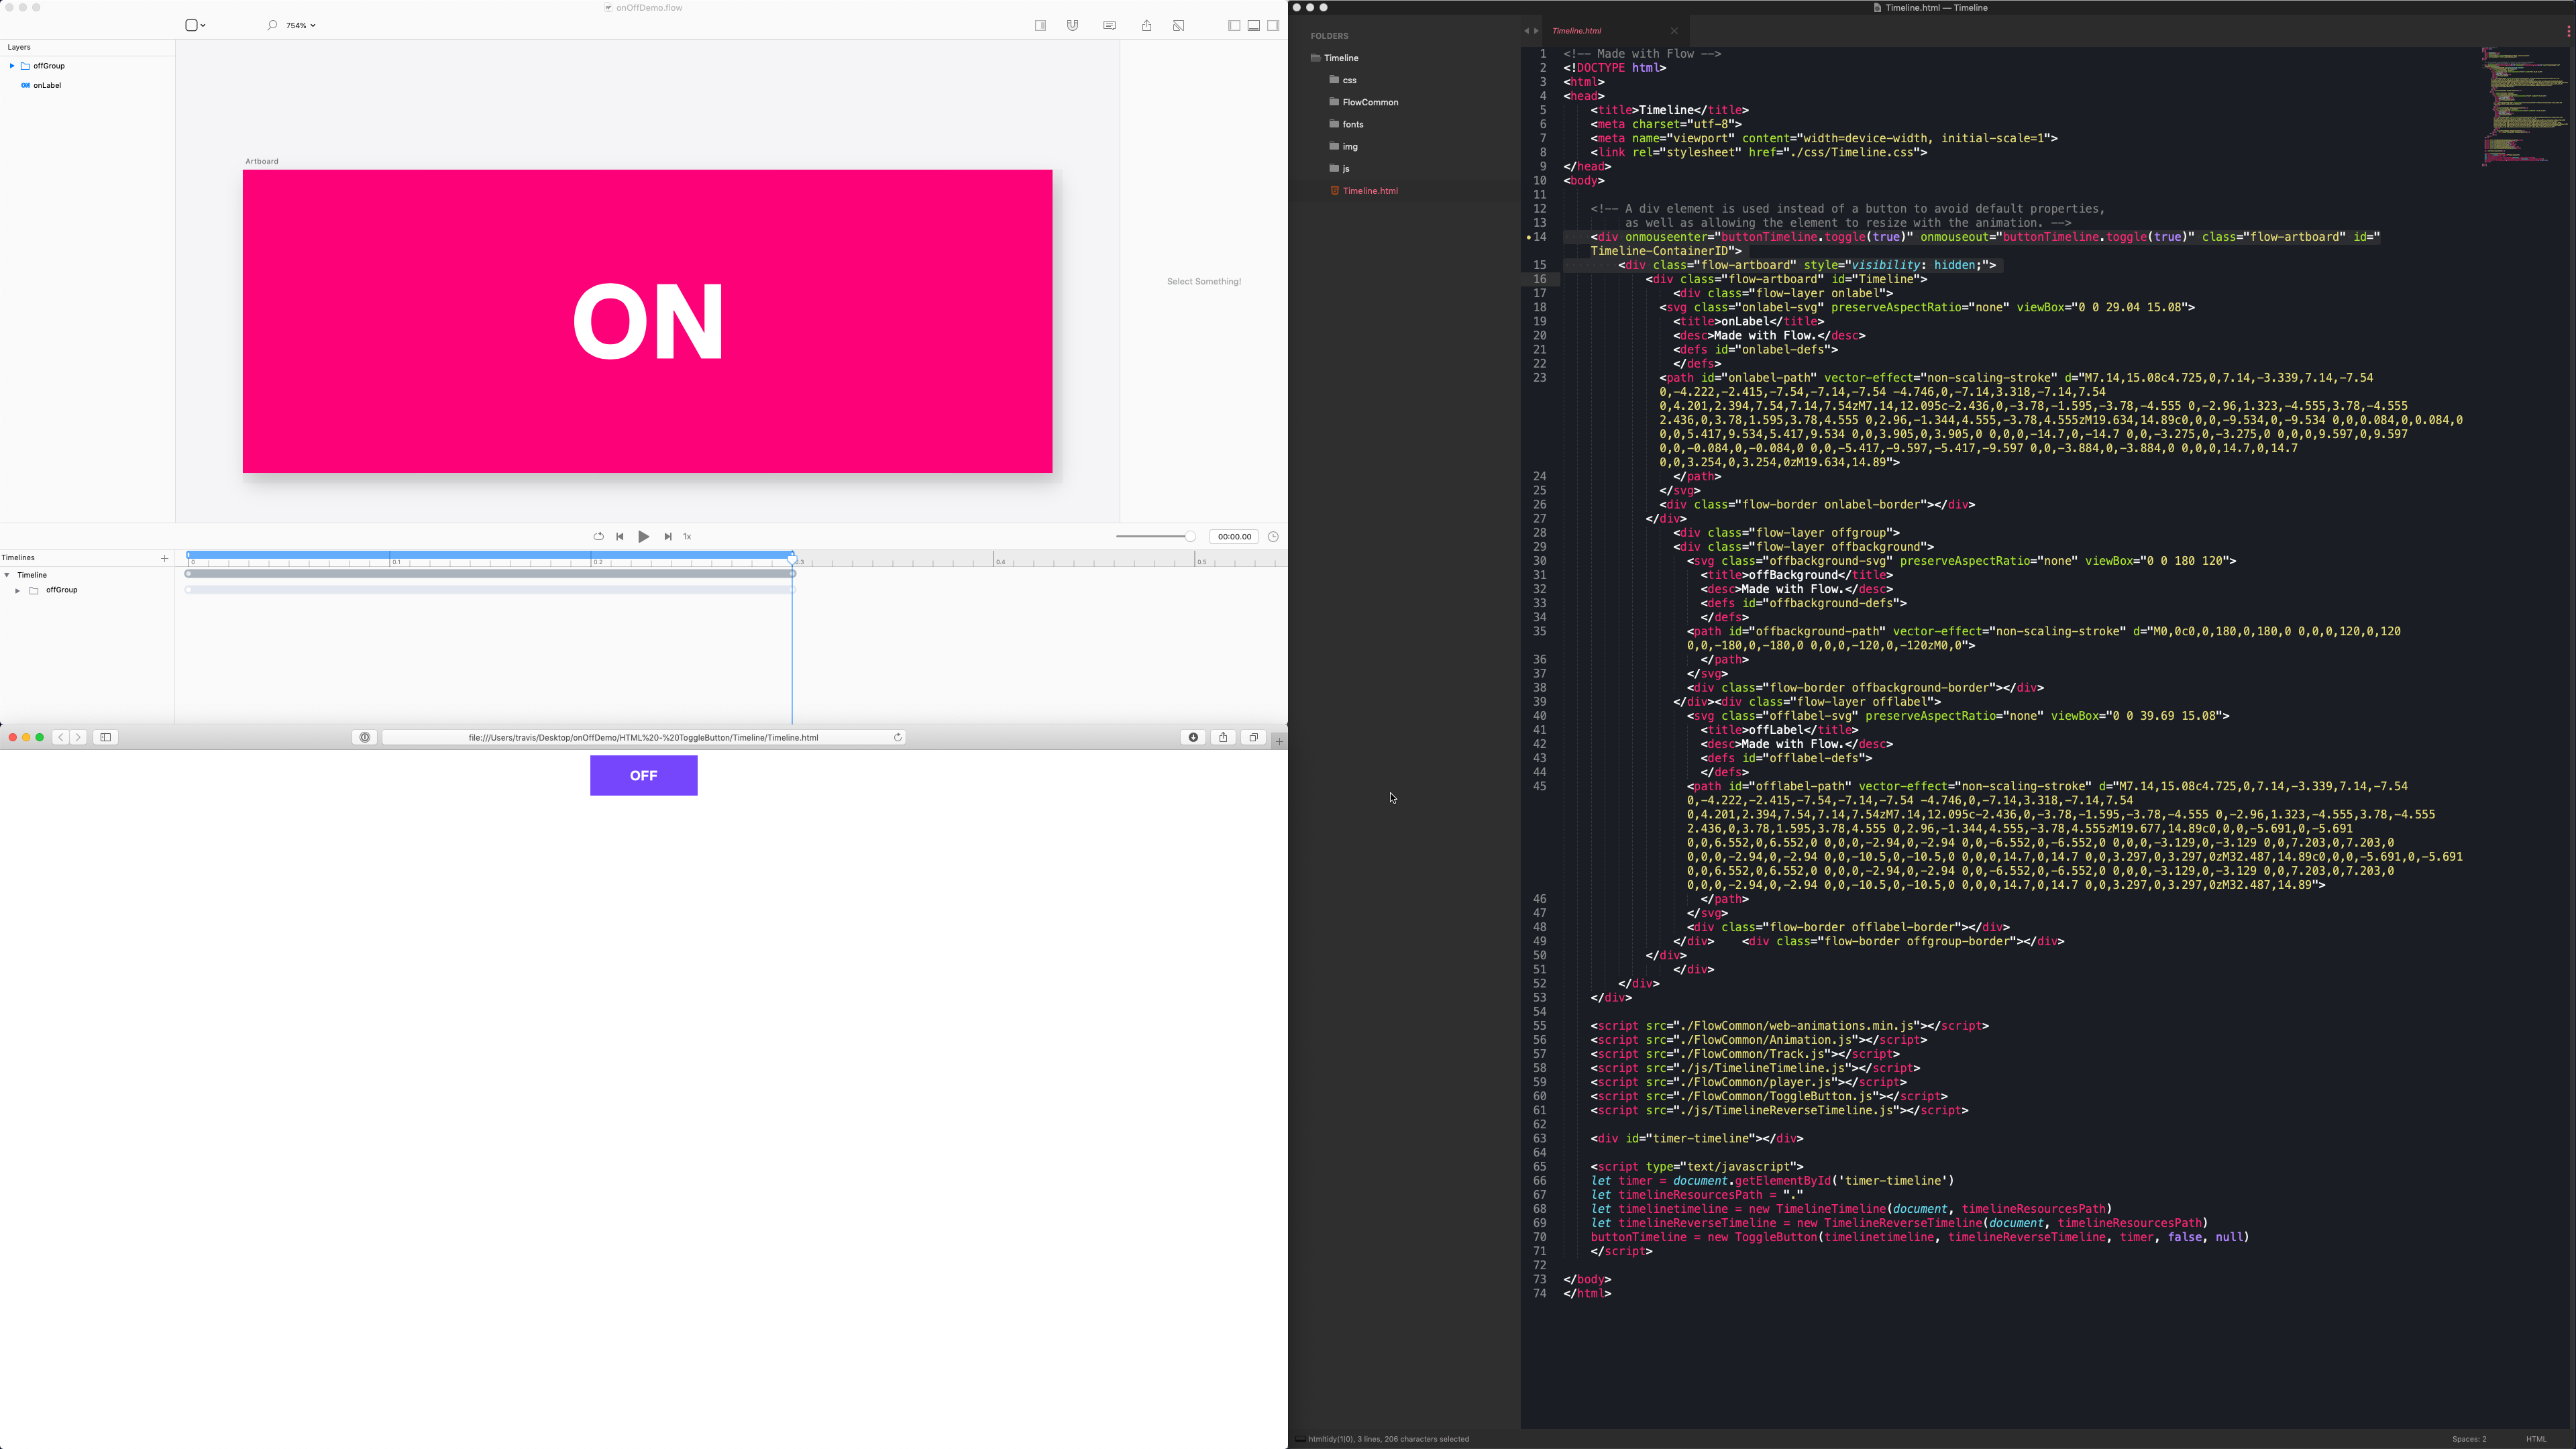
The “Button” Div
Flow exports a <div> element instead of a <button> tag or a special class. So, you’ll notice the exported code looks like this:
<div onclick="buttonTimeline.toggle(true)" class="flow-artboard" id="Timeline-ContainerID">
The main reasons we use a <div> instead of another option like <button> are:
- Browsers render
<button>in strange and fantastically difficult to undo ways. - A custom class might not be fully functional across browsers.
- With the
<div>we can resize the element if needed.
Change The Event
Now, a simple change to th button div will turn this button into a hover area.
This step starts at 2:12
- Replace
onlick=withonmouseenter= - Add
onmouseout="buttonTimeline.toggle(true)" - Save your file.
- Refresh your page and you’re done.
Your div should look like this:
<div onmouseenter="buttonTimeline.toggle(true)" onmouseout="buttonTimeline.toggle(true)" class="flow-artboard" id="Timeline-ContainerID">
Easy!
What’s that .toggle(true)?
Naturally, the onclick triggers a method. But, you might be thinking what the heck is this:
buttonTimeline.toggle(true)
This line is telling your button to toggle it’s state, and by passing true we’re telling it to animate. If you pass false the timeline will skip to its end state.
You’ll find the timeline instance is created at the bottom of the index file:
buttonTimeline = new ToggleButton(...)
Since our button class is a special kind of element that requires 2 timelines, we chose to not use the player class, instead we opted for giving the button its own methods and logic for controlling the playback of its timelines.
Button Naming Convention
The variable name buttonTimeline is constructed from your Flow file. The pattern is:
button{Name of your timeline}
When you create a new timeline in Flow, its default name is Timeline. So, we get:
buttonTimeline
If we’d renamed our timeline to smoething like onOff then button’s instance name would be:
buttonOnOff
Go ahead, try changing the name of the timeline in Flow and re-exporting.
Mailchimp Does It
You can find a nice hover animation on the mailchimp site, just roll over its chimp logo in the header.
This step starts at 2:58