Understanding the Xcode Project for Onboarding Animations
Xcode Project Breakdown for Onboarding Animations
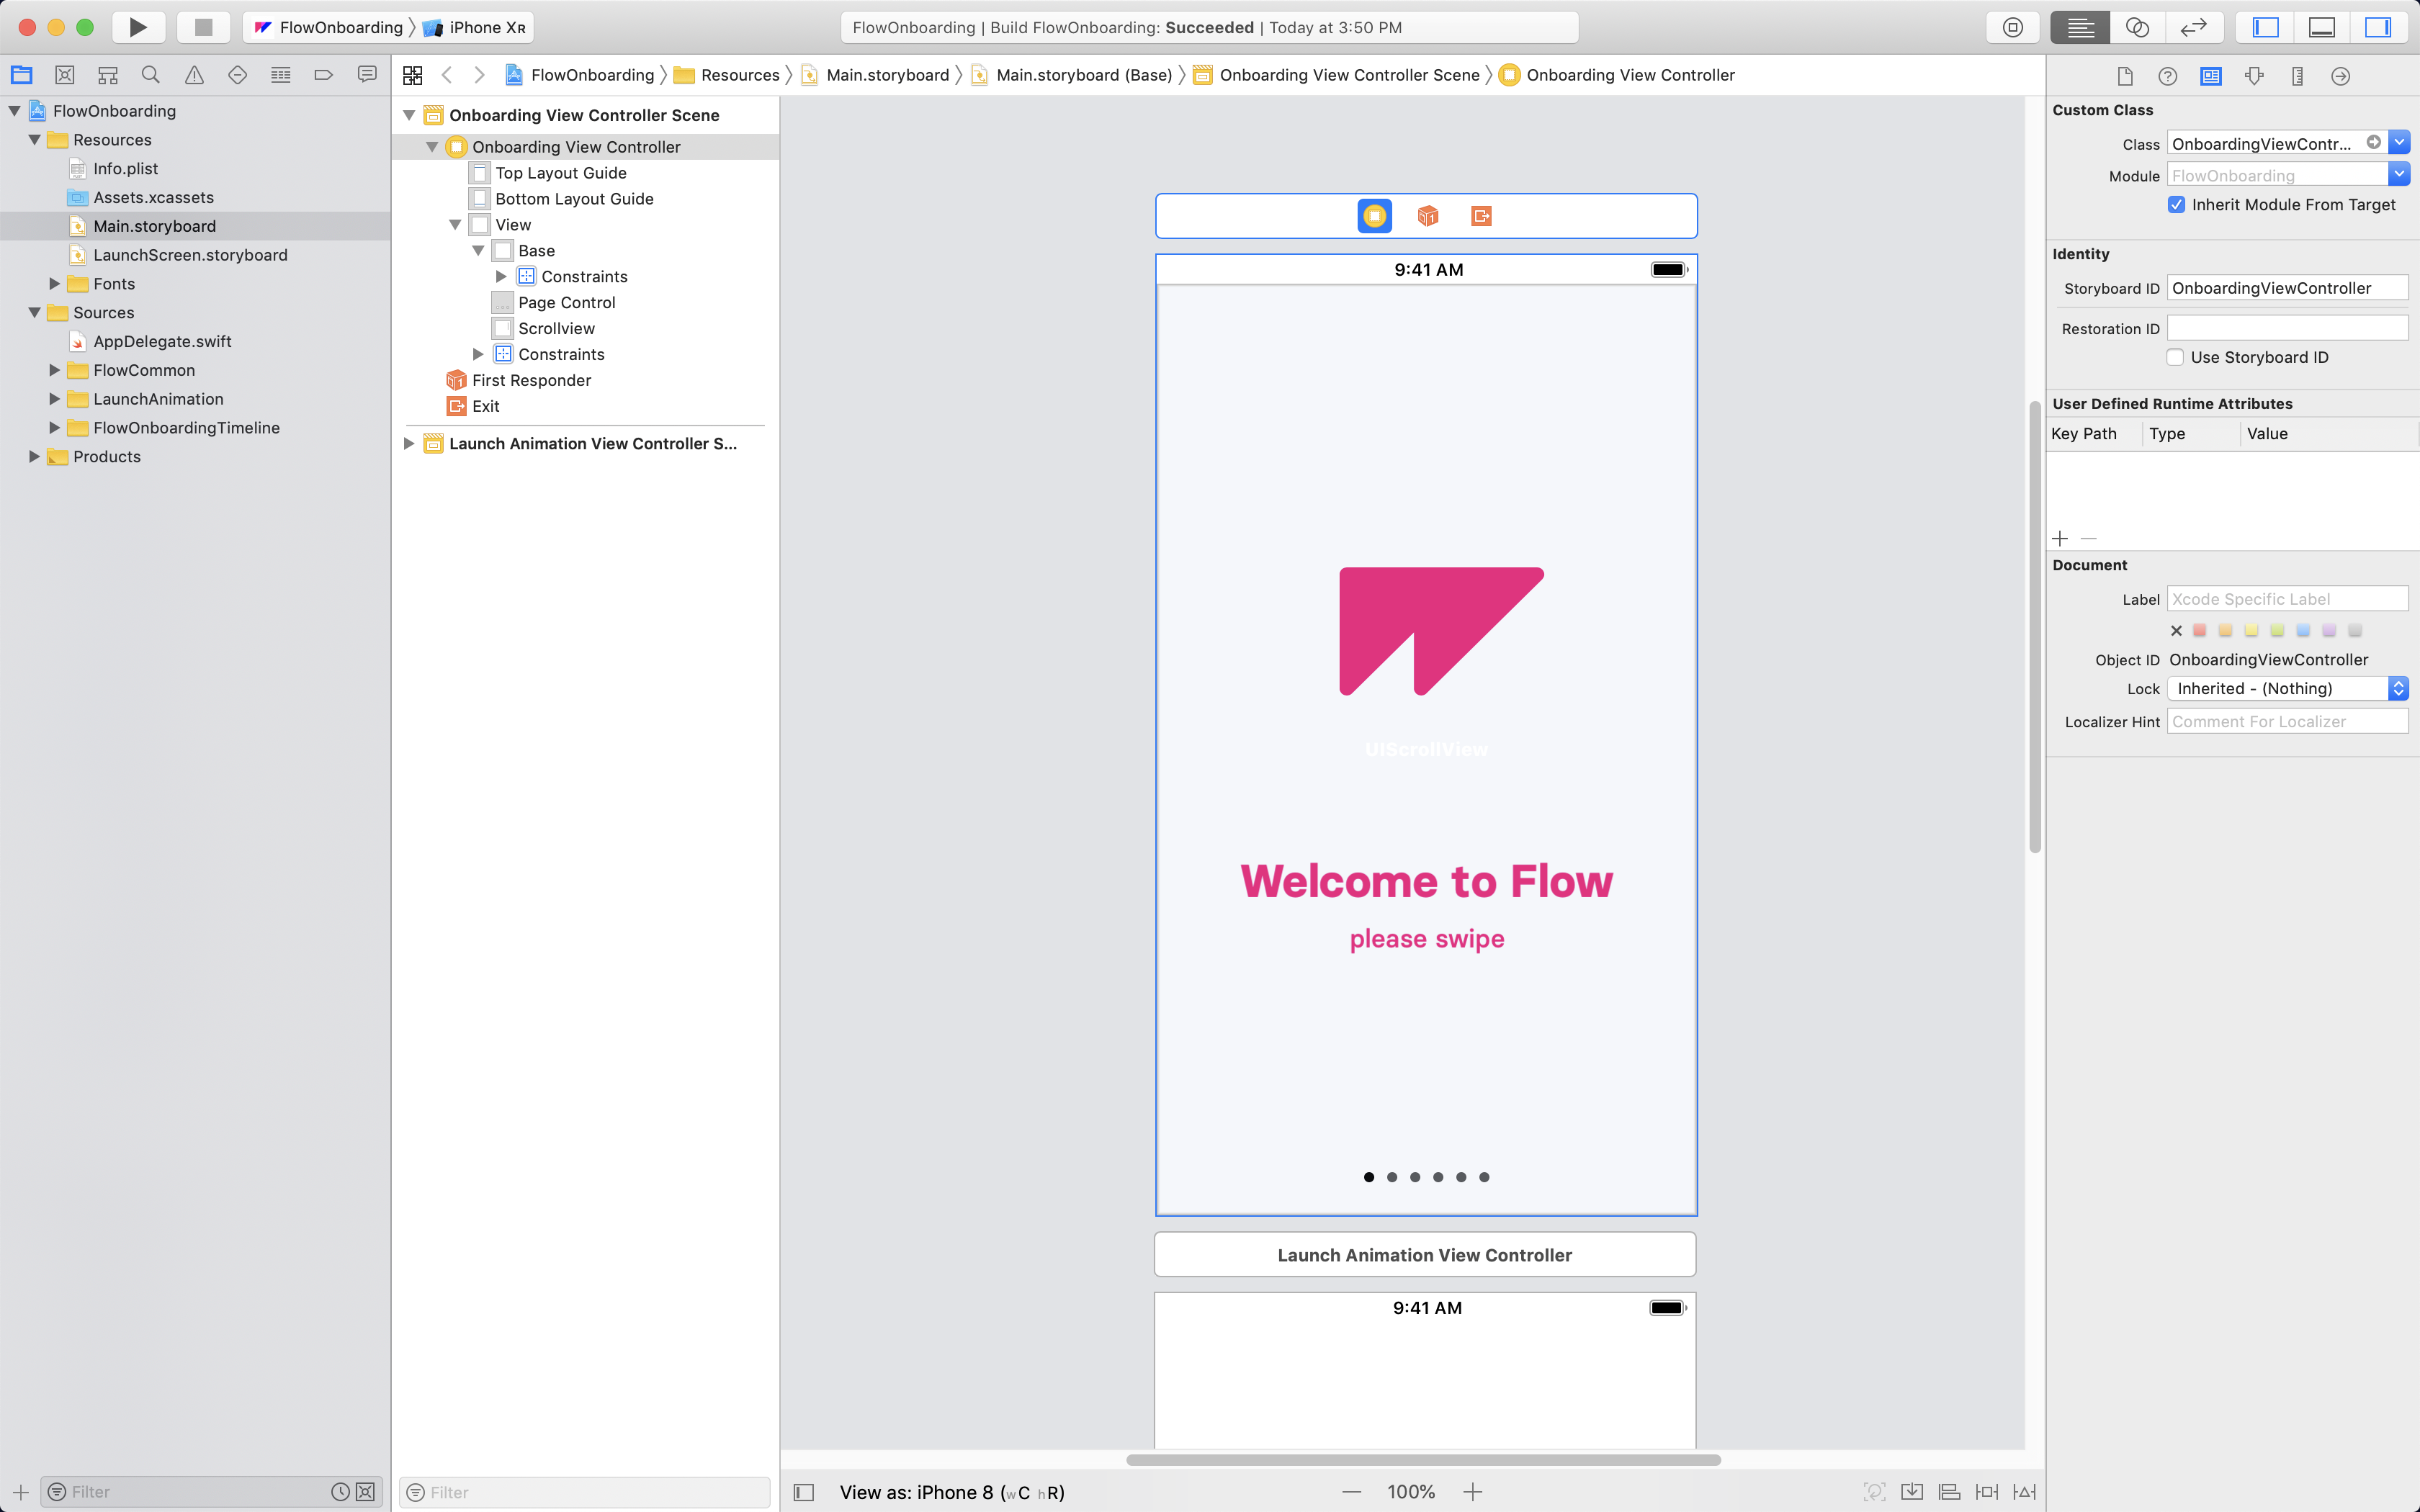
Let’s have a look at how the Xcode project is broken down. The main place to look is the Project navigator, where you’ll see that we’ve separated the project into 2 categories:
- Resources – image assets, storyboards, etc.
- Sources – code.
Resources
This folder contains 3 main things:
/Assets– a directory with all static assets for the project.Main.storyboard– a file that contains the app structure.LaunchScreen.storyboard– a file used when launching the application.
Main.storyboard
This is the main storyboard file for your application. It depicts the first view that the user will see (which is identified with an arrow pointing to it), and contains other subsequent views.
In the onboarding animation’s main storyboard, there are two view controllers:
- Launch Animation – The standard launch animation that comes with most of our exports.
- Onboarding – A structured view controller with your animation underneath a scrollview.

For more on storyboards, check out Apple’s documentation
Source
This folder contains all the source code for running the application. It is further broken down into:
FlowCommon– files required for running Flow projects.LaunchAnimation– files for handling our default launch animation.FlowOnboardingTimeline– files for constructing your animation and linking it to the scrollview.
Onboarding Folder
This folder contains 3 files:
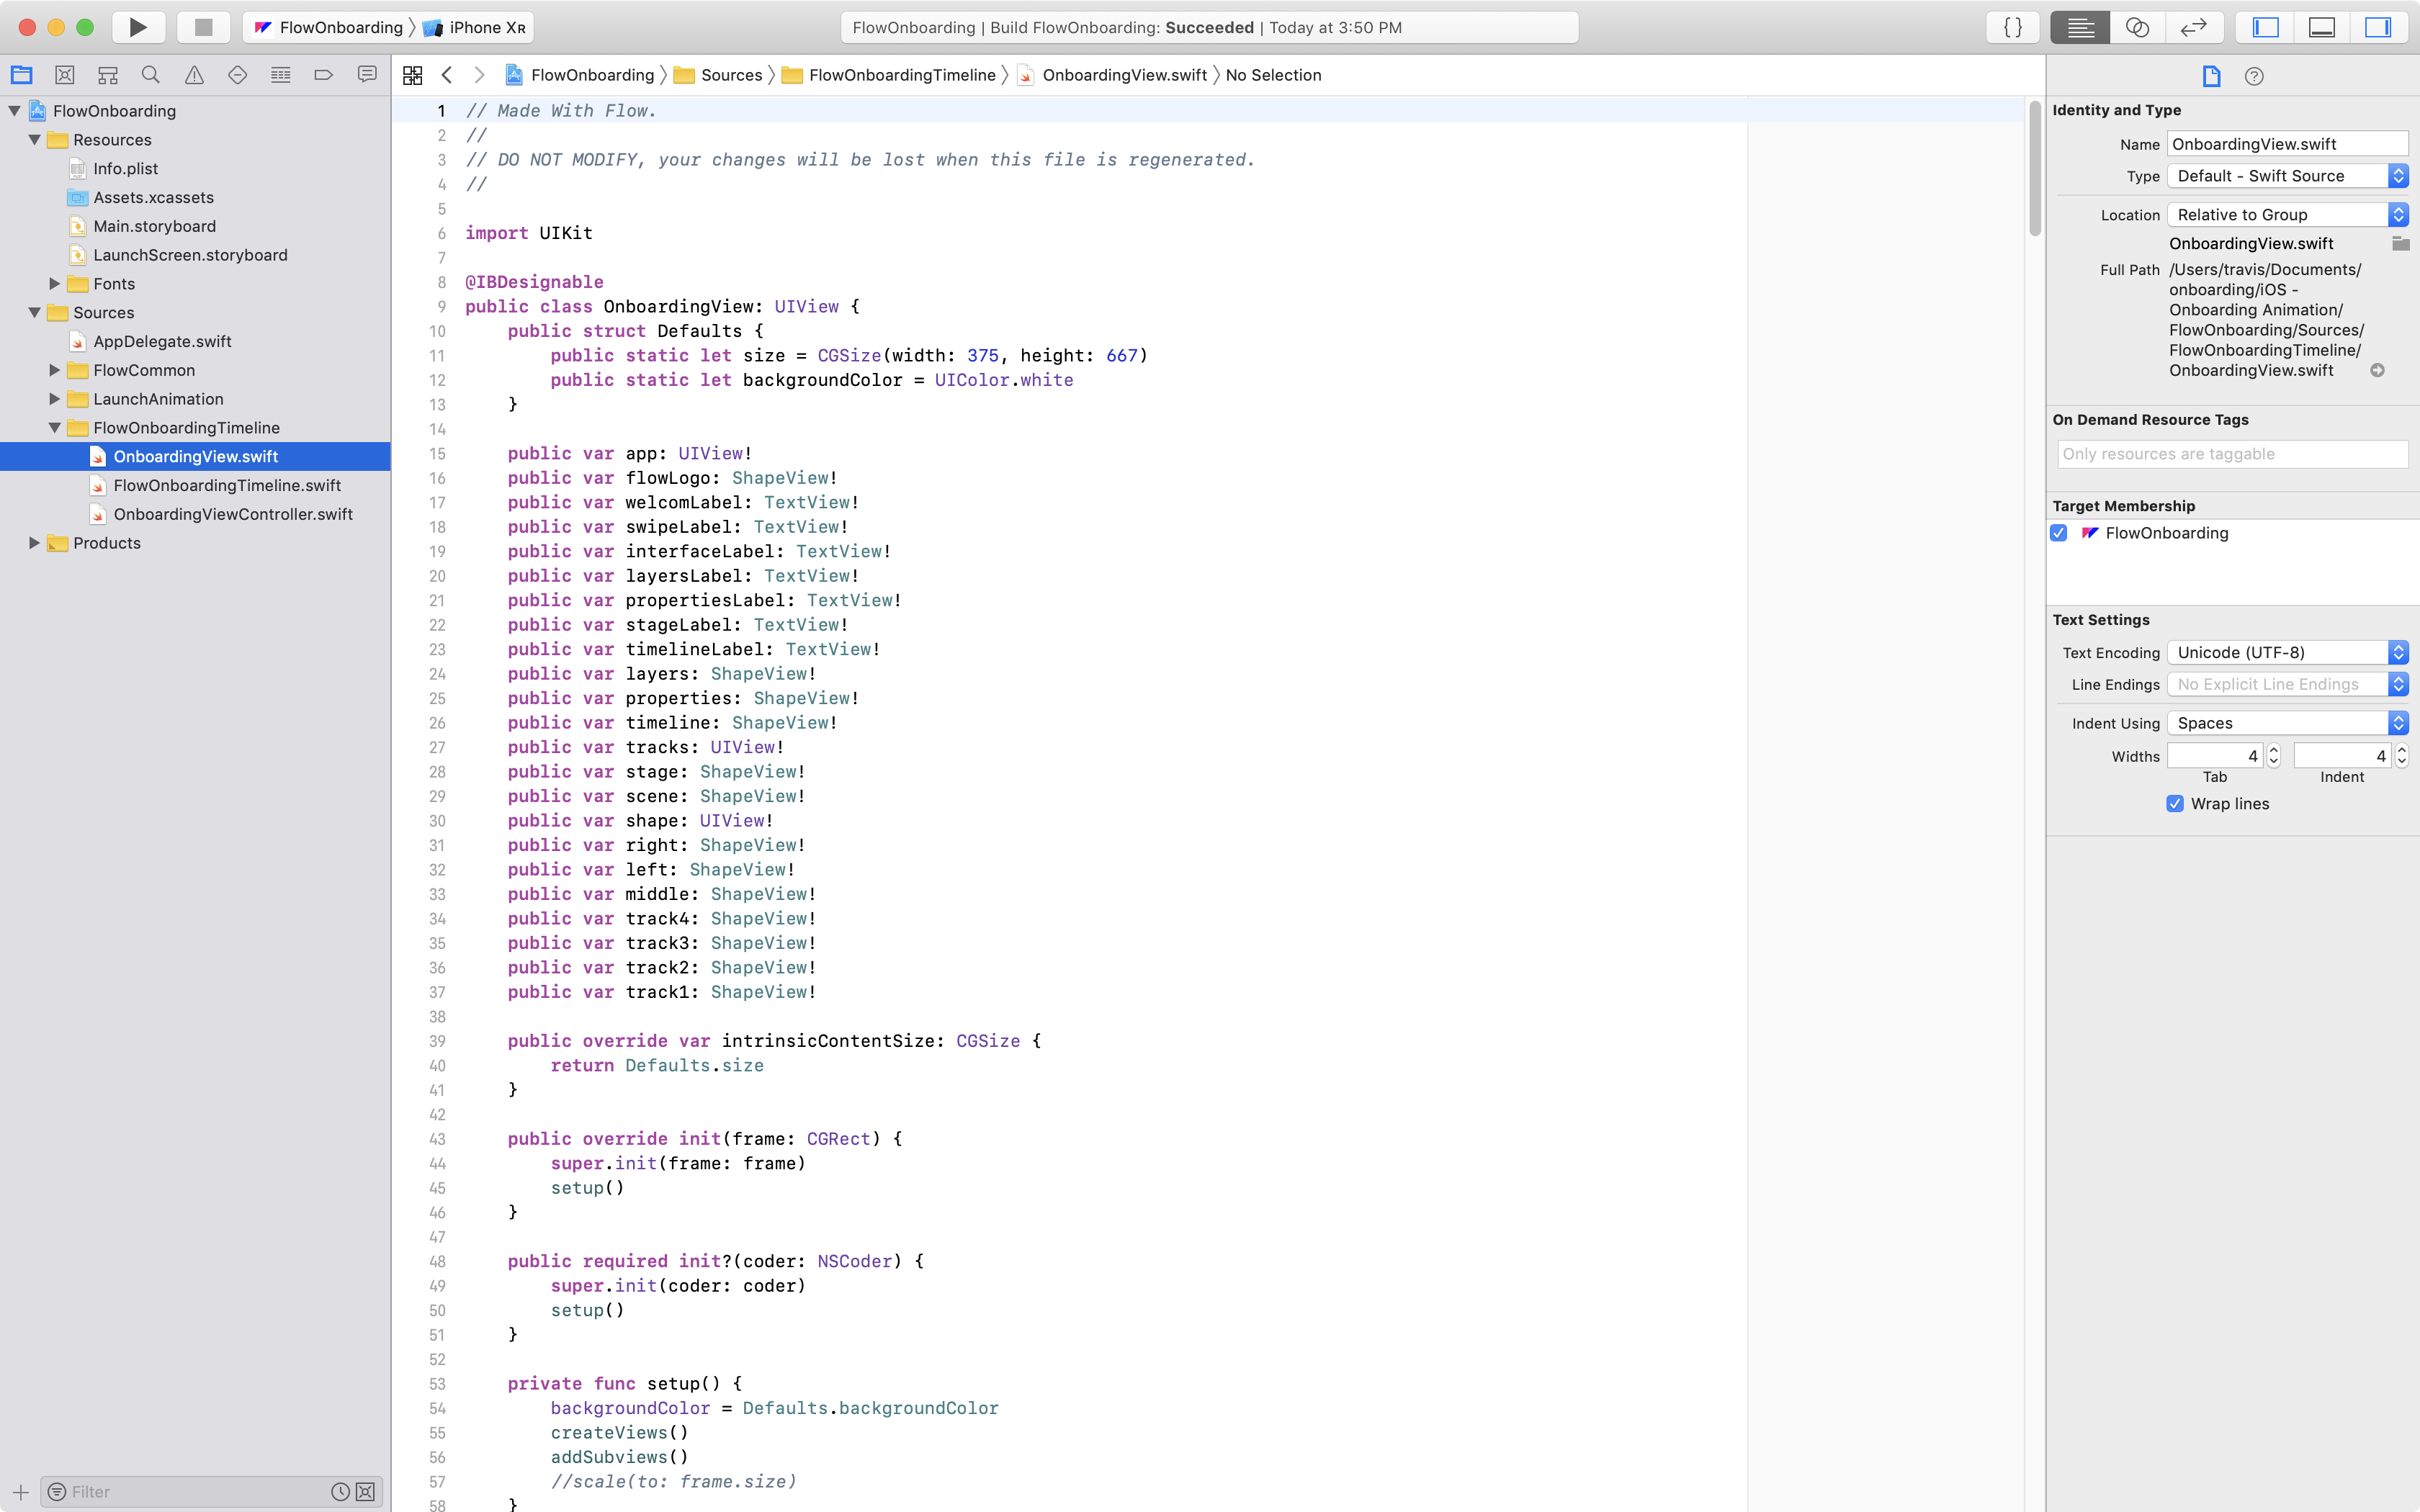
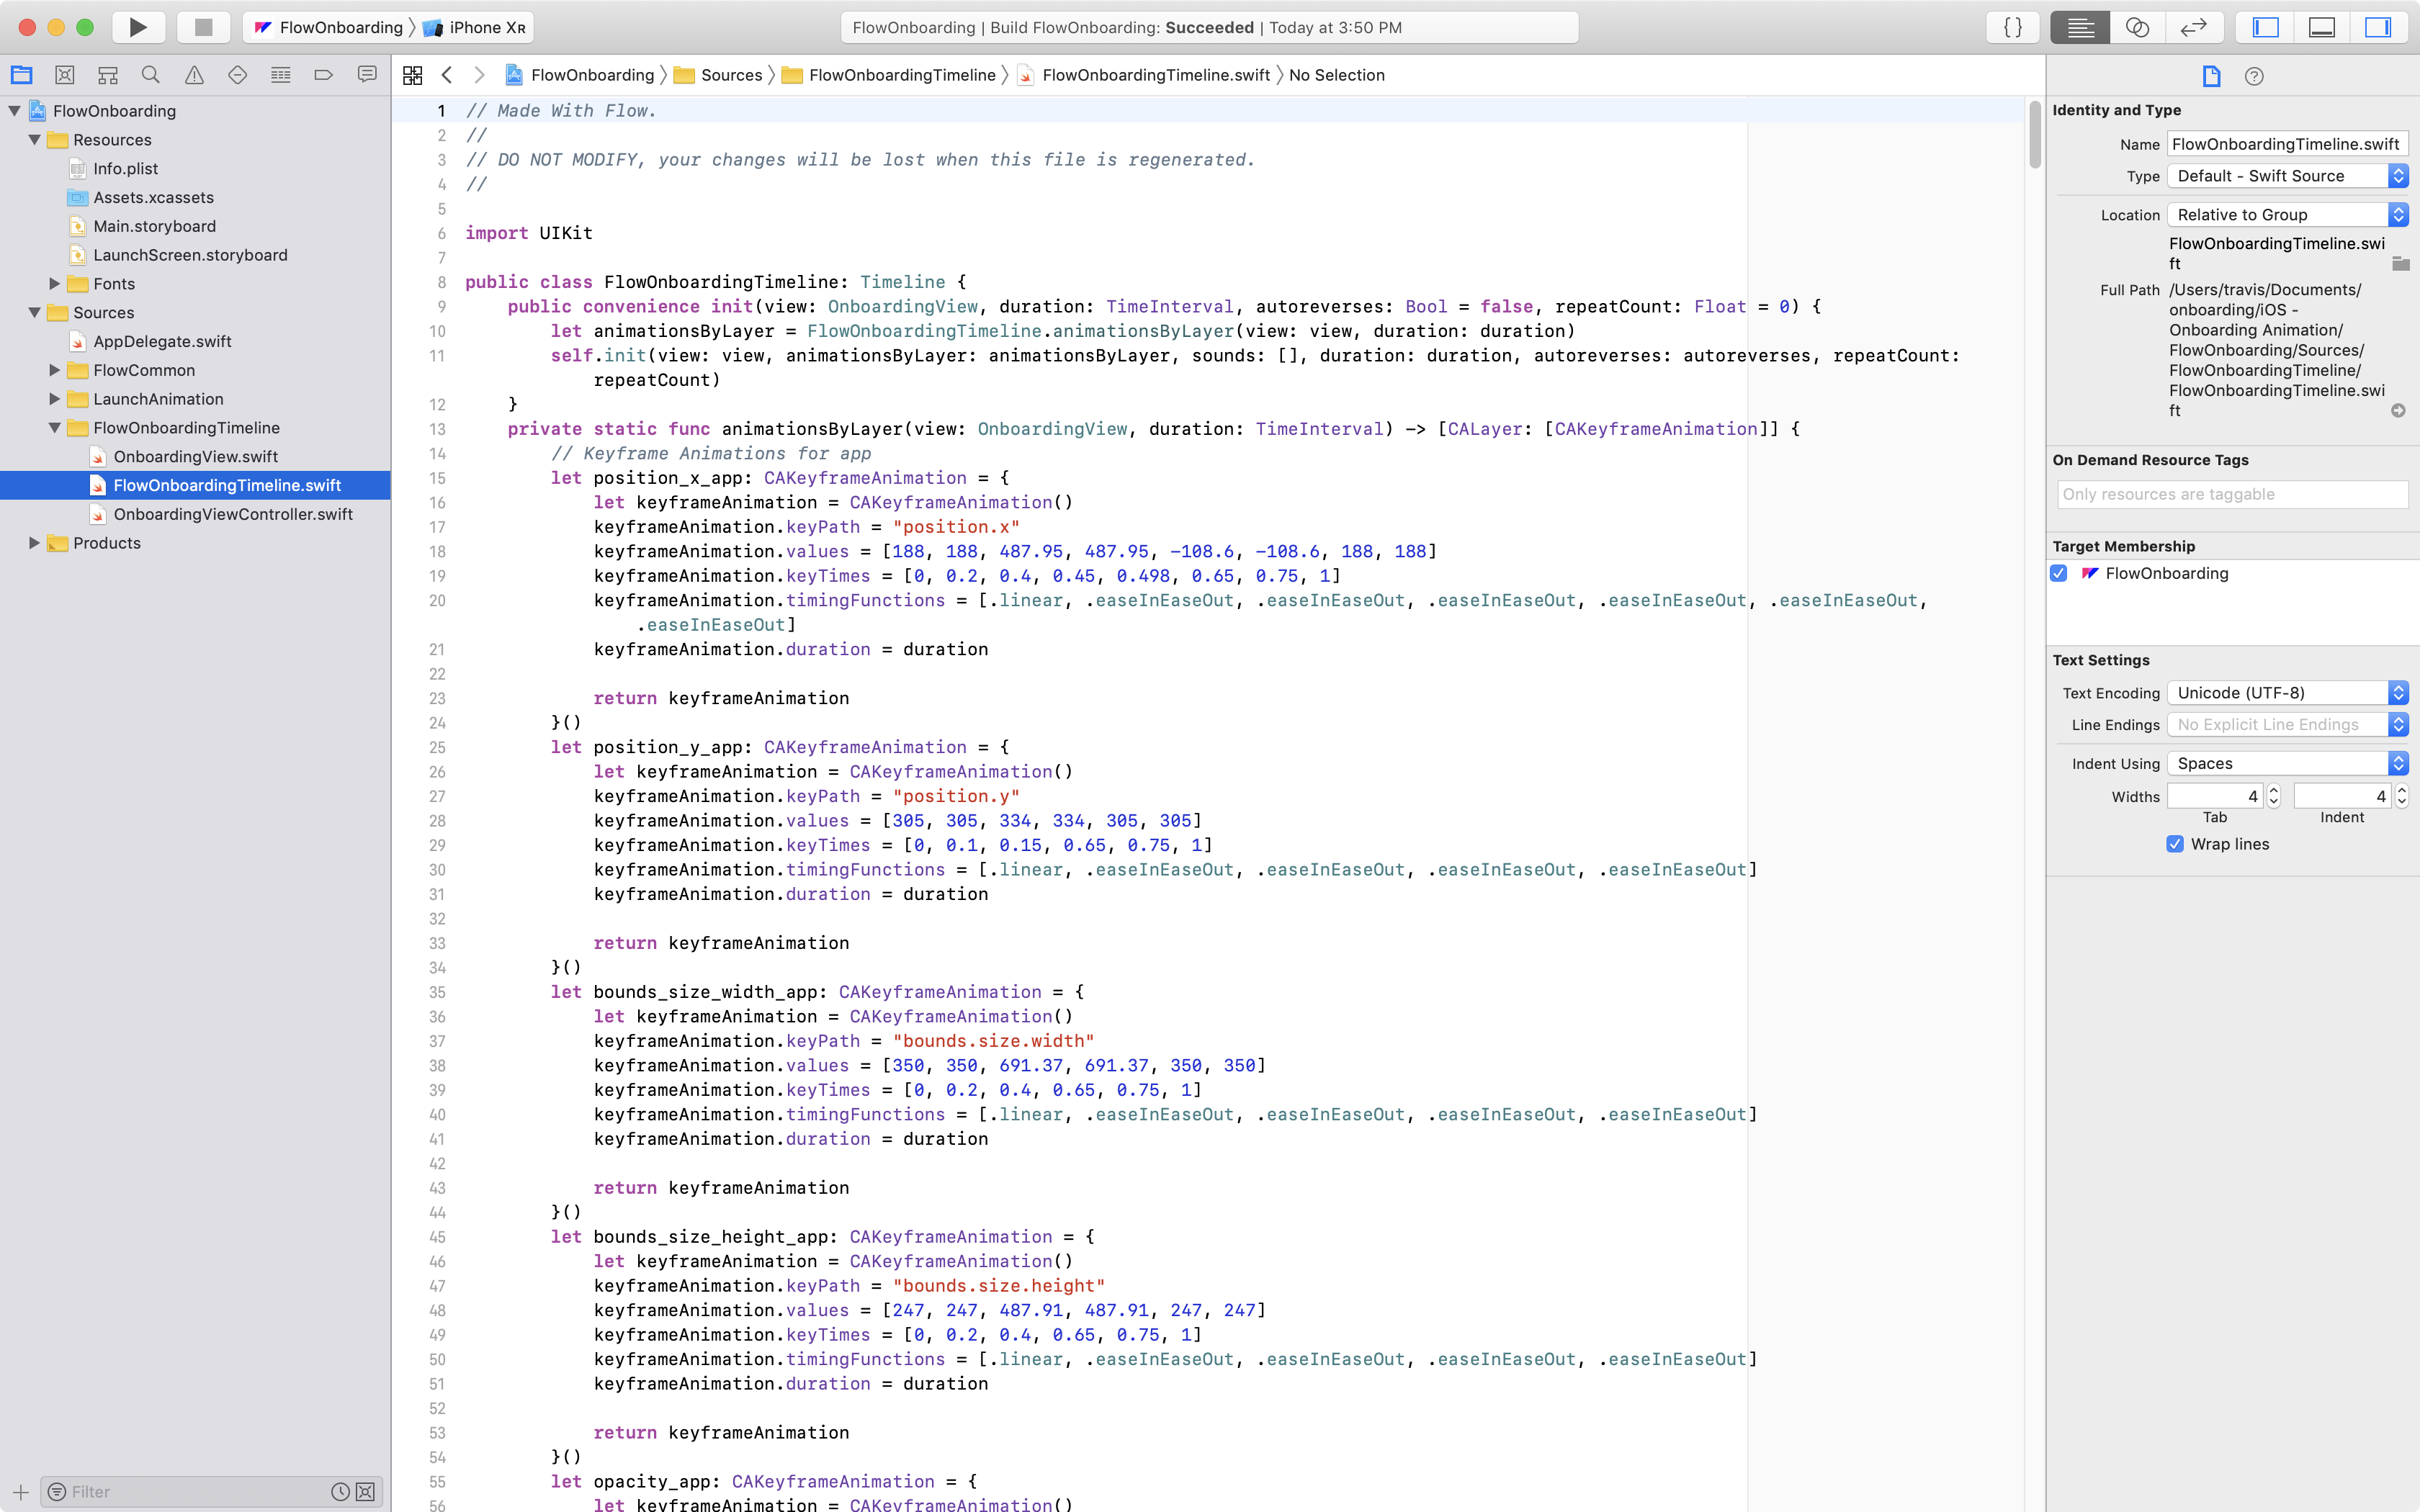
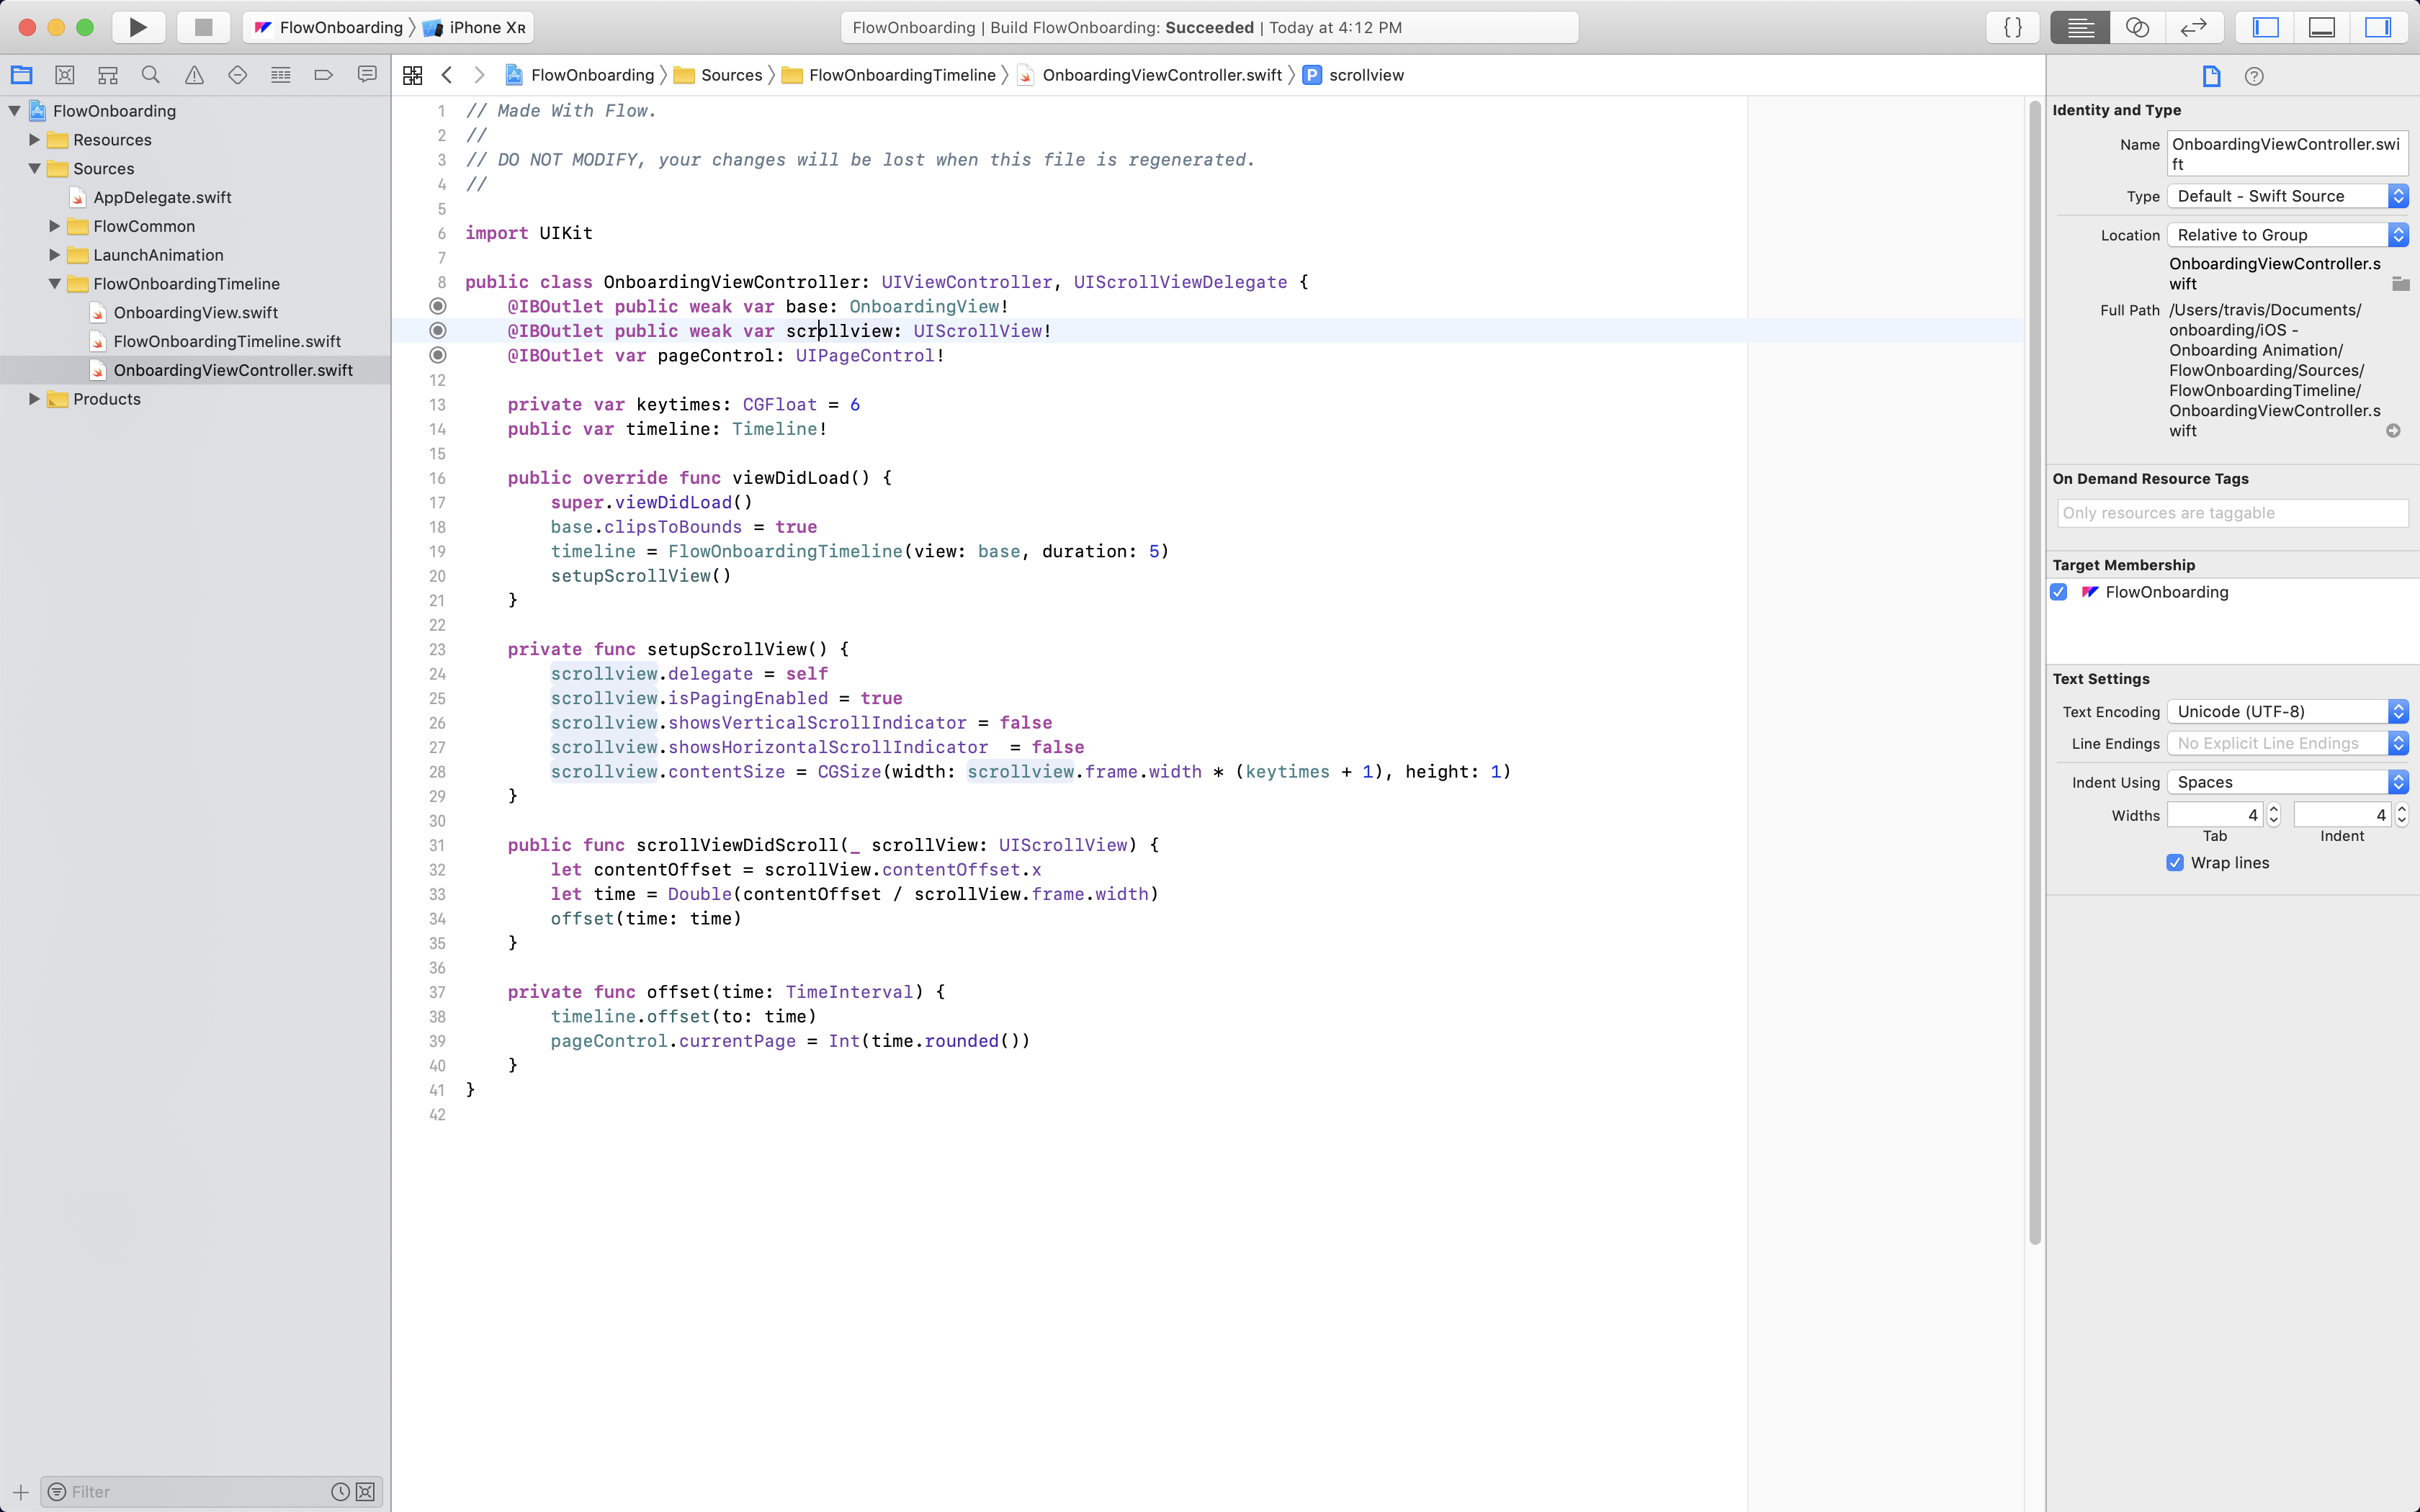
OnboardingView.swift– This file contains all the layout for the onboarding animation’s view.FlowOnboardingTimeline.swift– The timeline for the onboarding animation.OnboardingViewController.swift– The controller responsible for syncing the scrollview with your animation.
View.swift
This file contains all the layout for the onboarding animation’s view.

The file will be named according to the name of the timeline you exported from Flow – in this case: OnboardingView.swift.
There’s not much to this file other than layout code for the first frame of your animation.
Timeline.swift
This file contains all the timing information for the onboarding animation.

The file will be named according to the name of the timeline you exported from Flow – in this case: FlowOnboardingTimeline.swift.
Don’t worry if this file gets quite long, depending on the complexity of your animation there may be a few hundred, or thousands of lines.
OnboardingViewController.swift
This file creates the scrollview that manages the playback of your onboarding animation.
It has 3 main variables:
base- a view that contains your animation.scrollview– the view that a user interacts to swipe through your animation.pageControl- a view that shows the user what stop of the animation they’re currently on.

Setting up the scrollview to interact with your animation is quite simple. First, you need to construct the scrollview:
private func setupScrollView() {
  scrollview.delegate = self
  scrollview.isPagingEnabled = true
  scrollview.showsVerticalScrollIndicator = false
  scrollview.showsHorizontalScrollIndicator  = false
  scrollview.contentSize = CGSize(width: scrollview.frame.width * (keytimes + 1), height: 1)
}
The isPagingEnabled = true sets the scrollview to a snapping behaviour, and the contentSize variable gives the view enough width to scroll through your entire animation.
When the user scrolls, the following method gets triggered:
public func scrollViewDidScroll(_ scrollView: UIScrollView) {
  let contentOffset = scrollView.contentOffset.x
  let time = Double(contentOffset / scrollView.frame.width)
  offset(time: time)
}
This calculates the current time at which your animation should be, depending on how far the user has currently scrolled.
The following method sets the current time and page number:
private func offset(time: TimeInterval) {
  timeline.offset(to: time)
  pageControl.currentPage = Int(time.rounded())
}