
Import and Animate Sketch Files
Flow makes it dead-easy to animate your Sketch files. You can load a single artboard, or if you’ve set things up carefully, you can choose 2 artboards and we’ll automagically create an animation between the two of them.
SKETCH RECENTLY UPDATED THEIR FILE STRUCTURES, SO FLOW 1.1+ WILL ONLY WORK WITH FILES GENERATED FROM SKETCH 52+.
Grab our intro File
We’ve got a simple file to help you get started.
This is the same file we used to generate the intro.flow file that you may have already had a look at.
Create a New Project
The easiest way to get started is to hit CMD+N. This creates a new project and automatically opens a drop-down so you can choose a Sketch file to animate.
- Select
intro.sketchfrom or drag it onto the drop-down, - Hit
enterto link the sketch file.
Choose an Artboard
After linking a file you’ll automatically be presented with the Artboard picker window. There are two parts, the preview and the artboard selection panels.
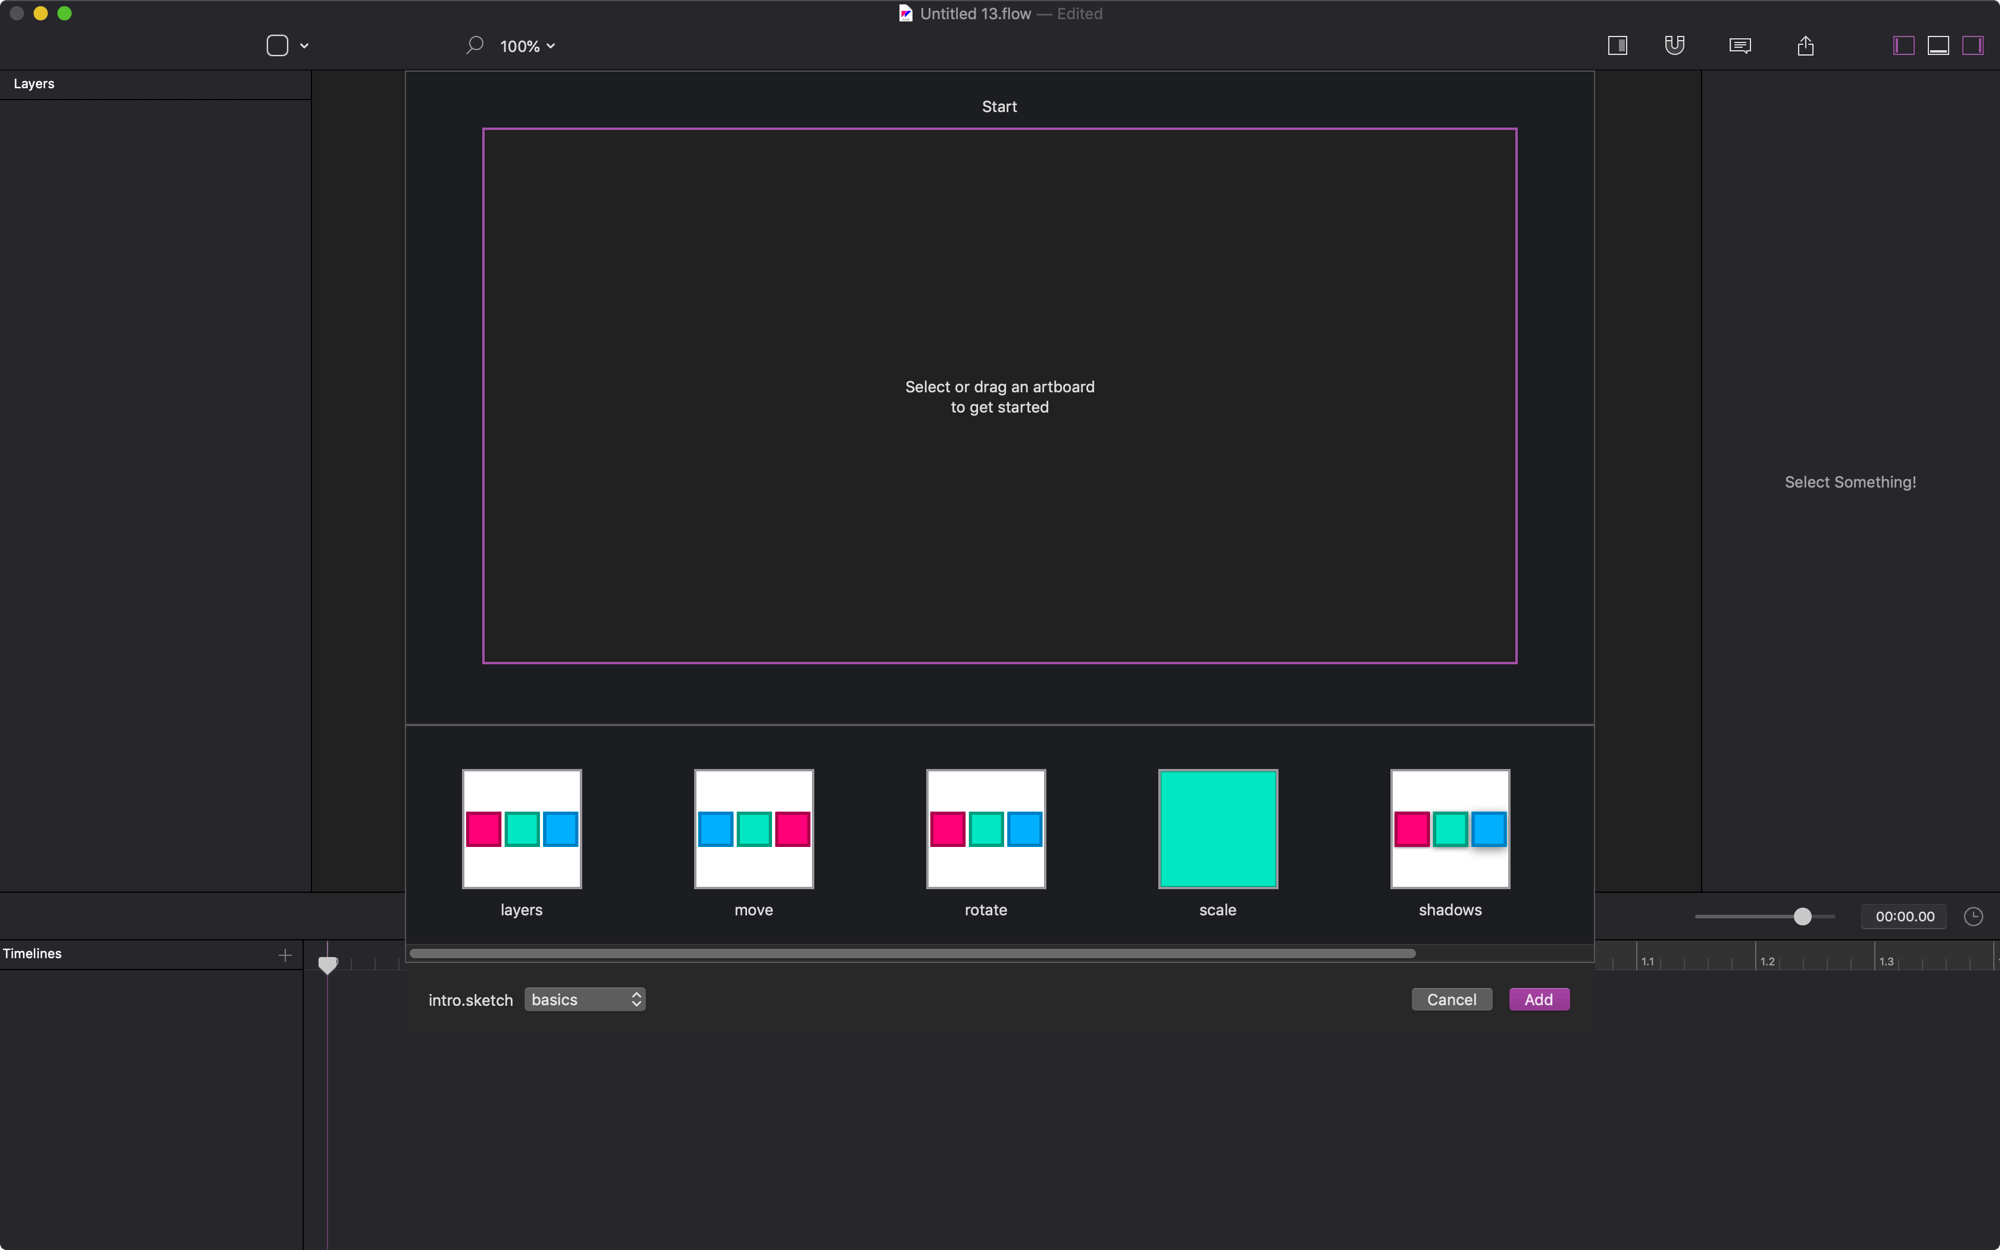
- Double-click on an artboard in the selection panel or,
- Drag an artboard onto the preview area.
When you’ve selected an artboard you’ll notice a second preview area, let’s leave it empty for now and…
Hit the
addbutton.
The Stage
Before you start animating, there’s a few things to note:
- Flow automatically creates a 1-second timeline.
- From a single artboard there are no default animations.
- The playhead is at the beginning of the timeline.
Start moving things around and then hit play.
It animated BACK to the beginning state…
If you didn’t hit play before editing on the stage you may think that Flow animated back to the beginning state. Really, though, the playhead was at the beginning of the timeline so you were editing the first frame…
If you want your edits to happen at the end of the timeline instead, simply reverse the timeline.
Choose 2 Artboards
Let’s level up and create a 2-artboard animation.
- Create a new timeline by hitting CMD+SHIFT+N, or tapping the + symbol right above the timeline hierarchy.
- Select your first artboard.
- Select a second artboard.
- Hit enter to create the timeline.
- Hit PLAY.
Wham. Flow just animated everything that was different between the two artboards you chose.
Grey Artboards??
Are you wondering why you see some greyed out artboards? Probably because they need a bit of HEART before they can be animated. To help you with this, check out these two articles:
- Matching Hierarchies
- Structuring your Design Files
Choose a Different Page
If you have multiple pages in your design file you can easily switch between them by tapping on the drop-down menu at the bottom of the picker.
- Select a different page.
- Create an animation from two artboards.
Save & Rename
Now, save your file and rename your timelines.
The Same Artboard 2x
If you happen to create a timeline by using the same artboard, you’ll notice that the timeline will be empty. This is because there’s technically no change between the start and end artboards, therefore there’s nothing to animate. ate a timeline with the same artboard 2x
Updating Your Sketch File
Edits to your Sketch file will show up in the artboard picker. So, if you forgot to make a change, or wanted to edit something in Sketch, all you have to do is open the picker again and the artboard will be updated.
❤︎