
Understanding the Xcode Project for Launch Animations
Let’s have a look at how the Xcode project is broken down. The main place to look is the Project navigator, where you’ll see that we’ve separated the project into 2 categories:
- Resources – image assets, storyboards, etc.
- Sources – code.
Resources
This folder contains 3 main things:
/Assets– a directory with all static assets for the project.Main.storyboard– a file that contains the app structure.LaunchScreen.storyboard– a file used when launching the application.
LaunchScreen.storyboard
This is the screen that shows during the transition between tapping an app icon and the app taking over the full screen.
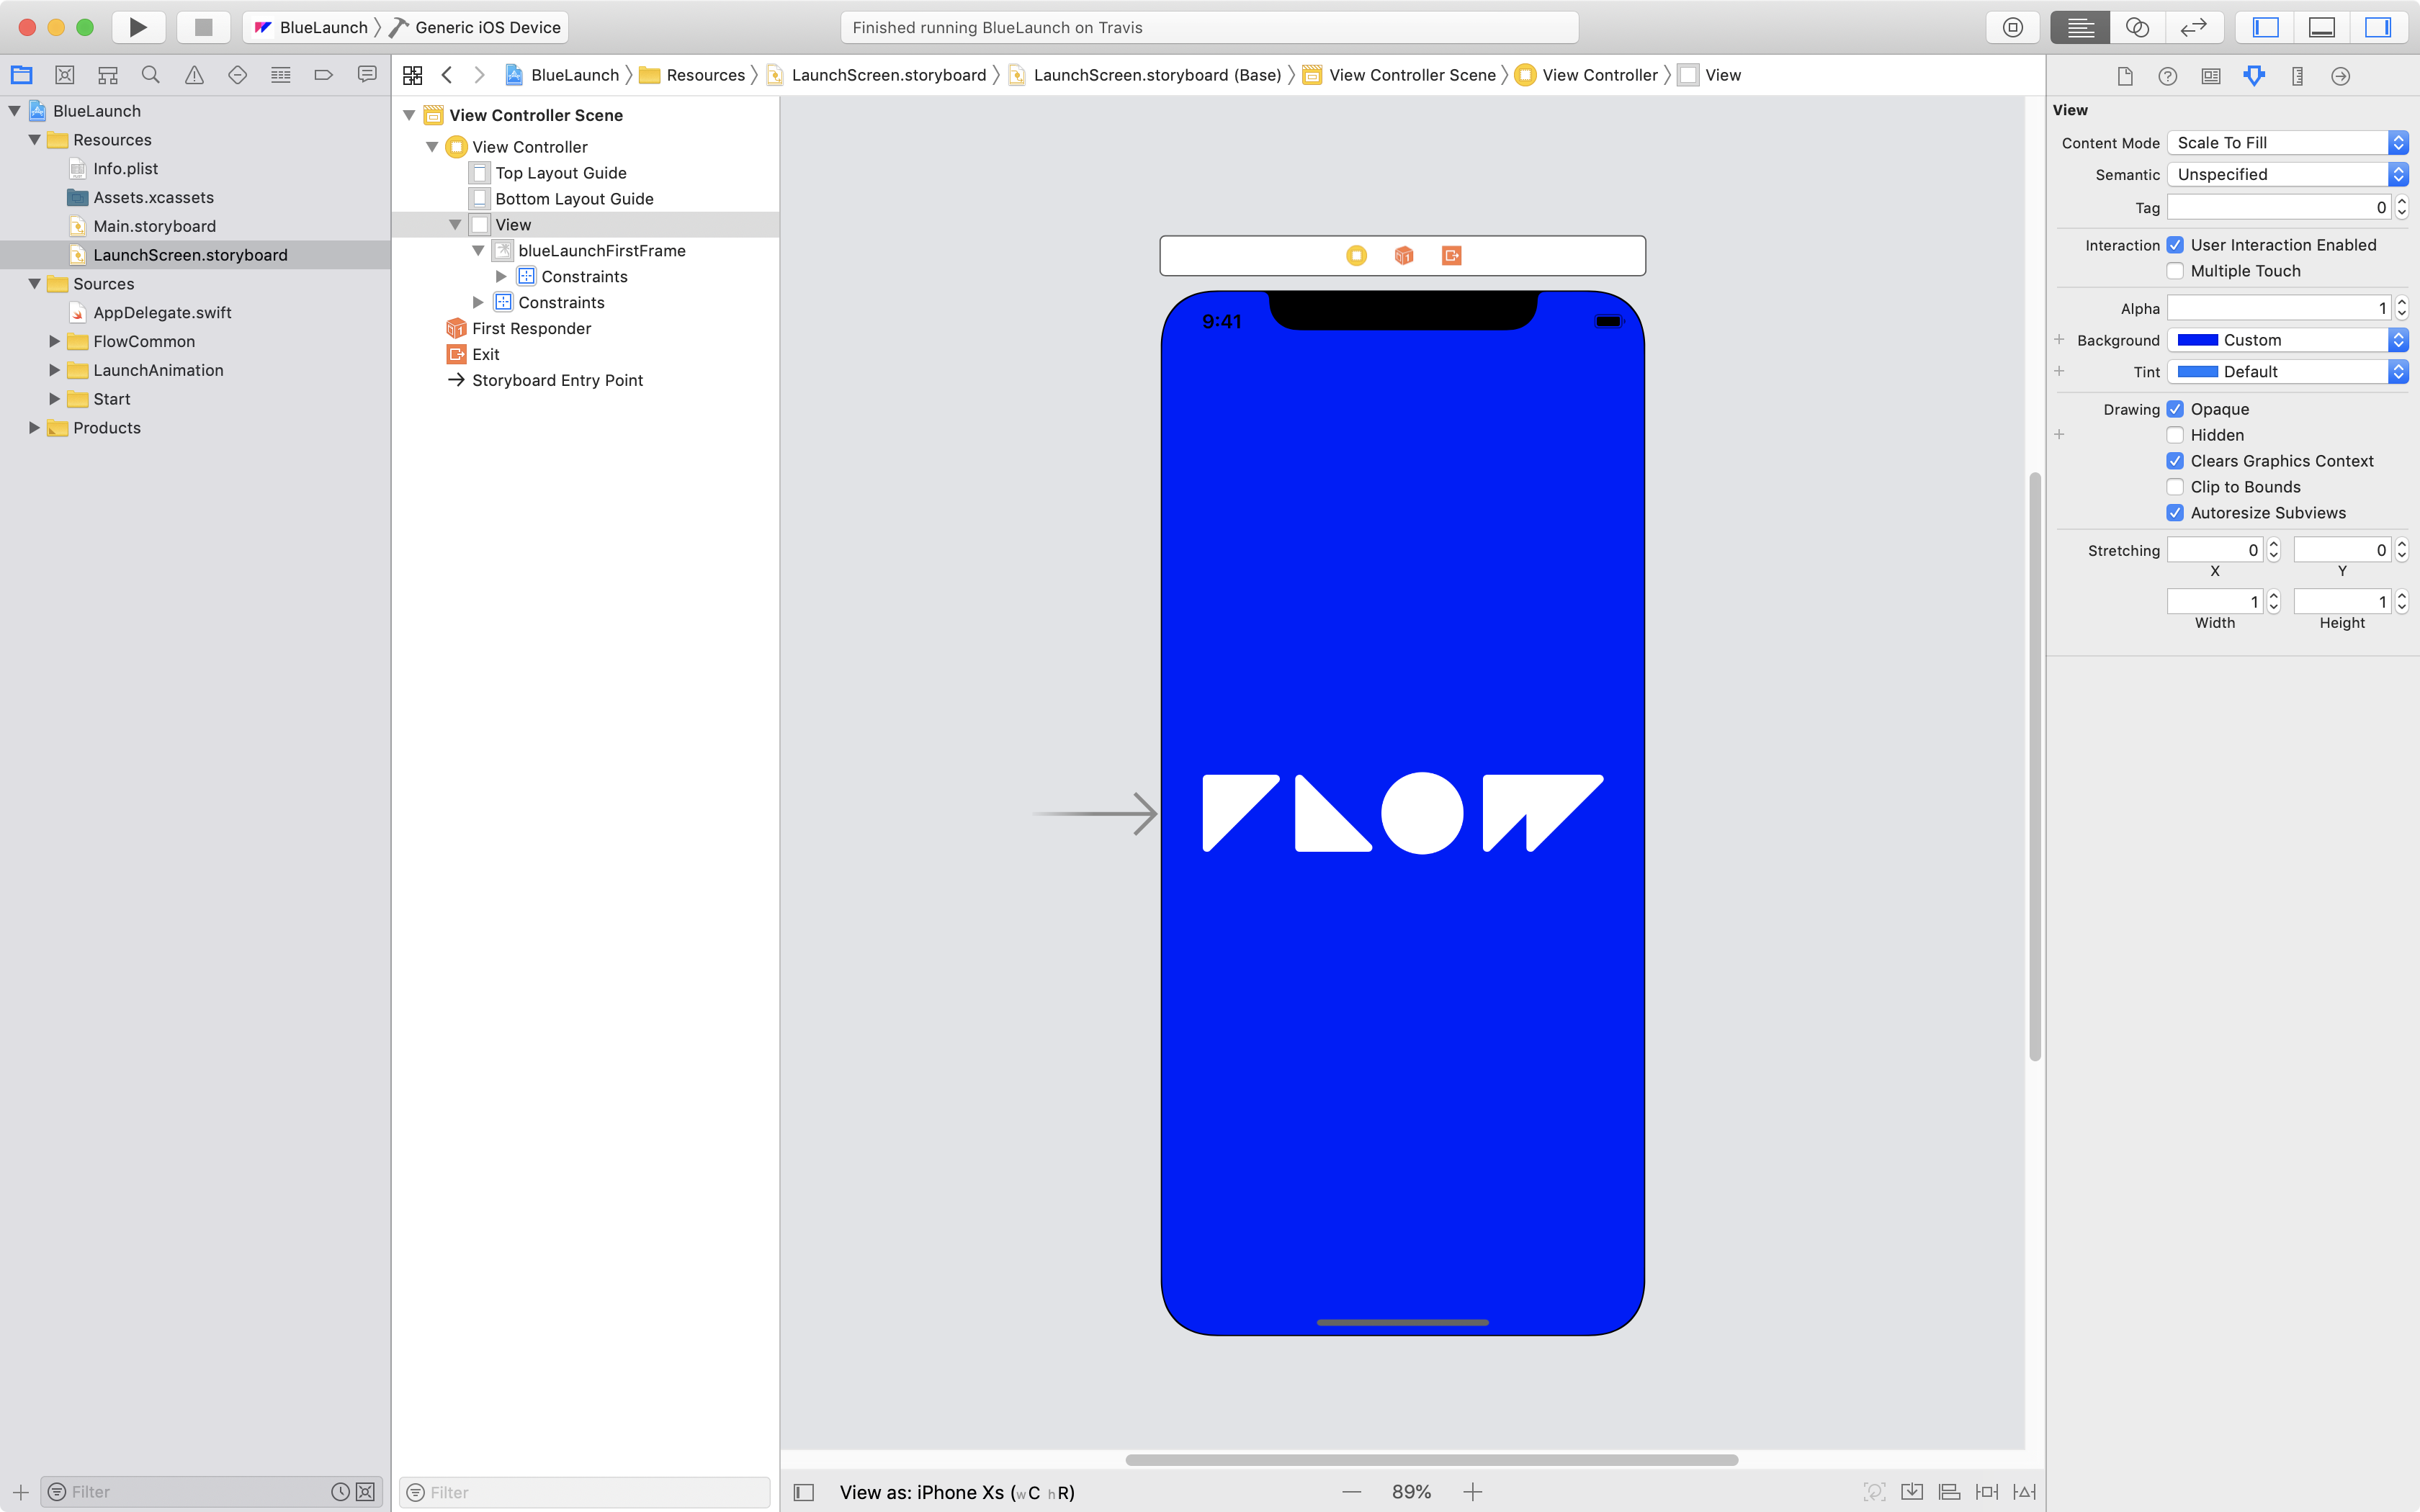
Every iOS app has a one.
For the full rundown, check out Apple’s documentation
Key takeaway:
Design a launch screen that’s nearly identical to the first screen of your app [or launch animation].
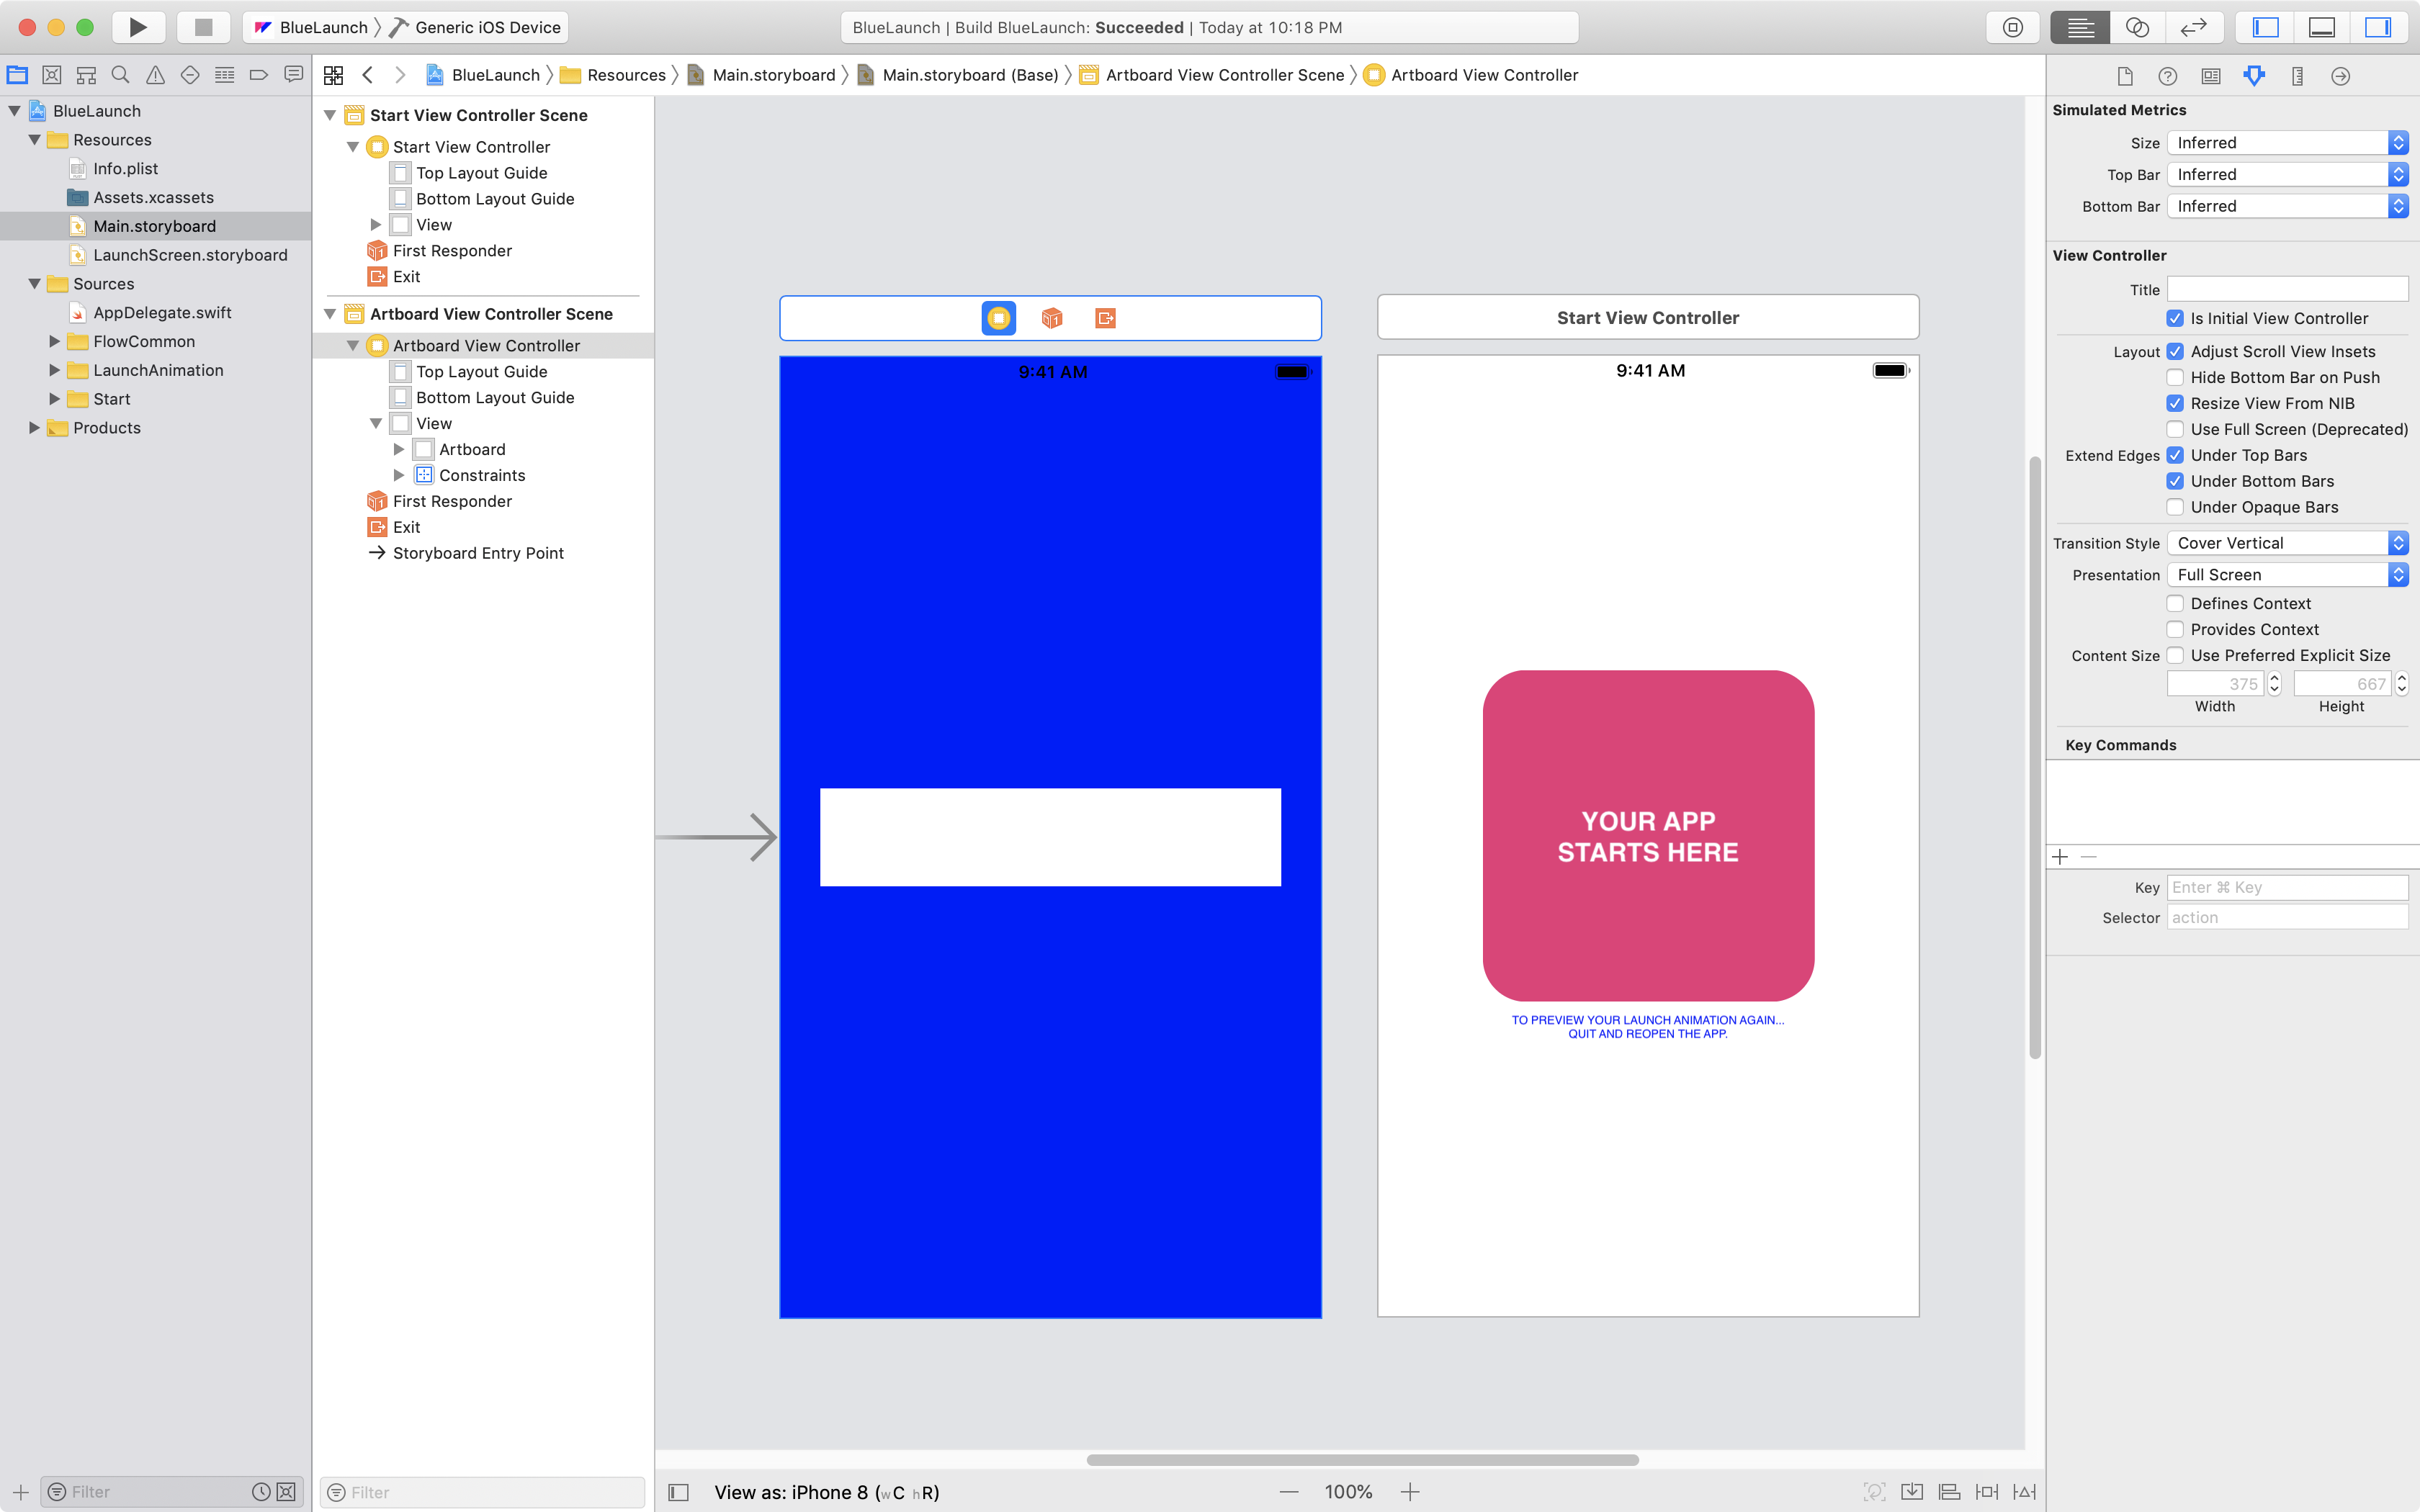
Main.storyboard
This is the main storyboard file for your application. It depicts the first view that the user will see (which is identified with an arrow pointing to it), and contains other subsequent views.
In the launch animation’s main storyboard, there are two view controllers:
- Launch Animation – Responsible for the launch animation (has an arrow pointing to it).
- Start – A simple placeholder for main view of an actual app.
For more on storyboards, check out Apple’s documentation
Source
This folder contains all the source code for running the application. It is further broken down into:
FlowCommon– files required for running Flow projects.LaunchAnimation– files for handling the launch animation.Start– files for simulating the first view of an app.
LaunchAnimation
These are the main files for your launch animation, and the ones that will be copied into an existing project.
ArtboardViewController.swift
This file is the main view controller for the launch animation. It is simple, and handles the creation of the animation, initiates playback, then triggers the transition to the first view of the app.
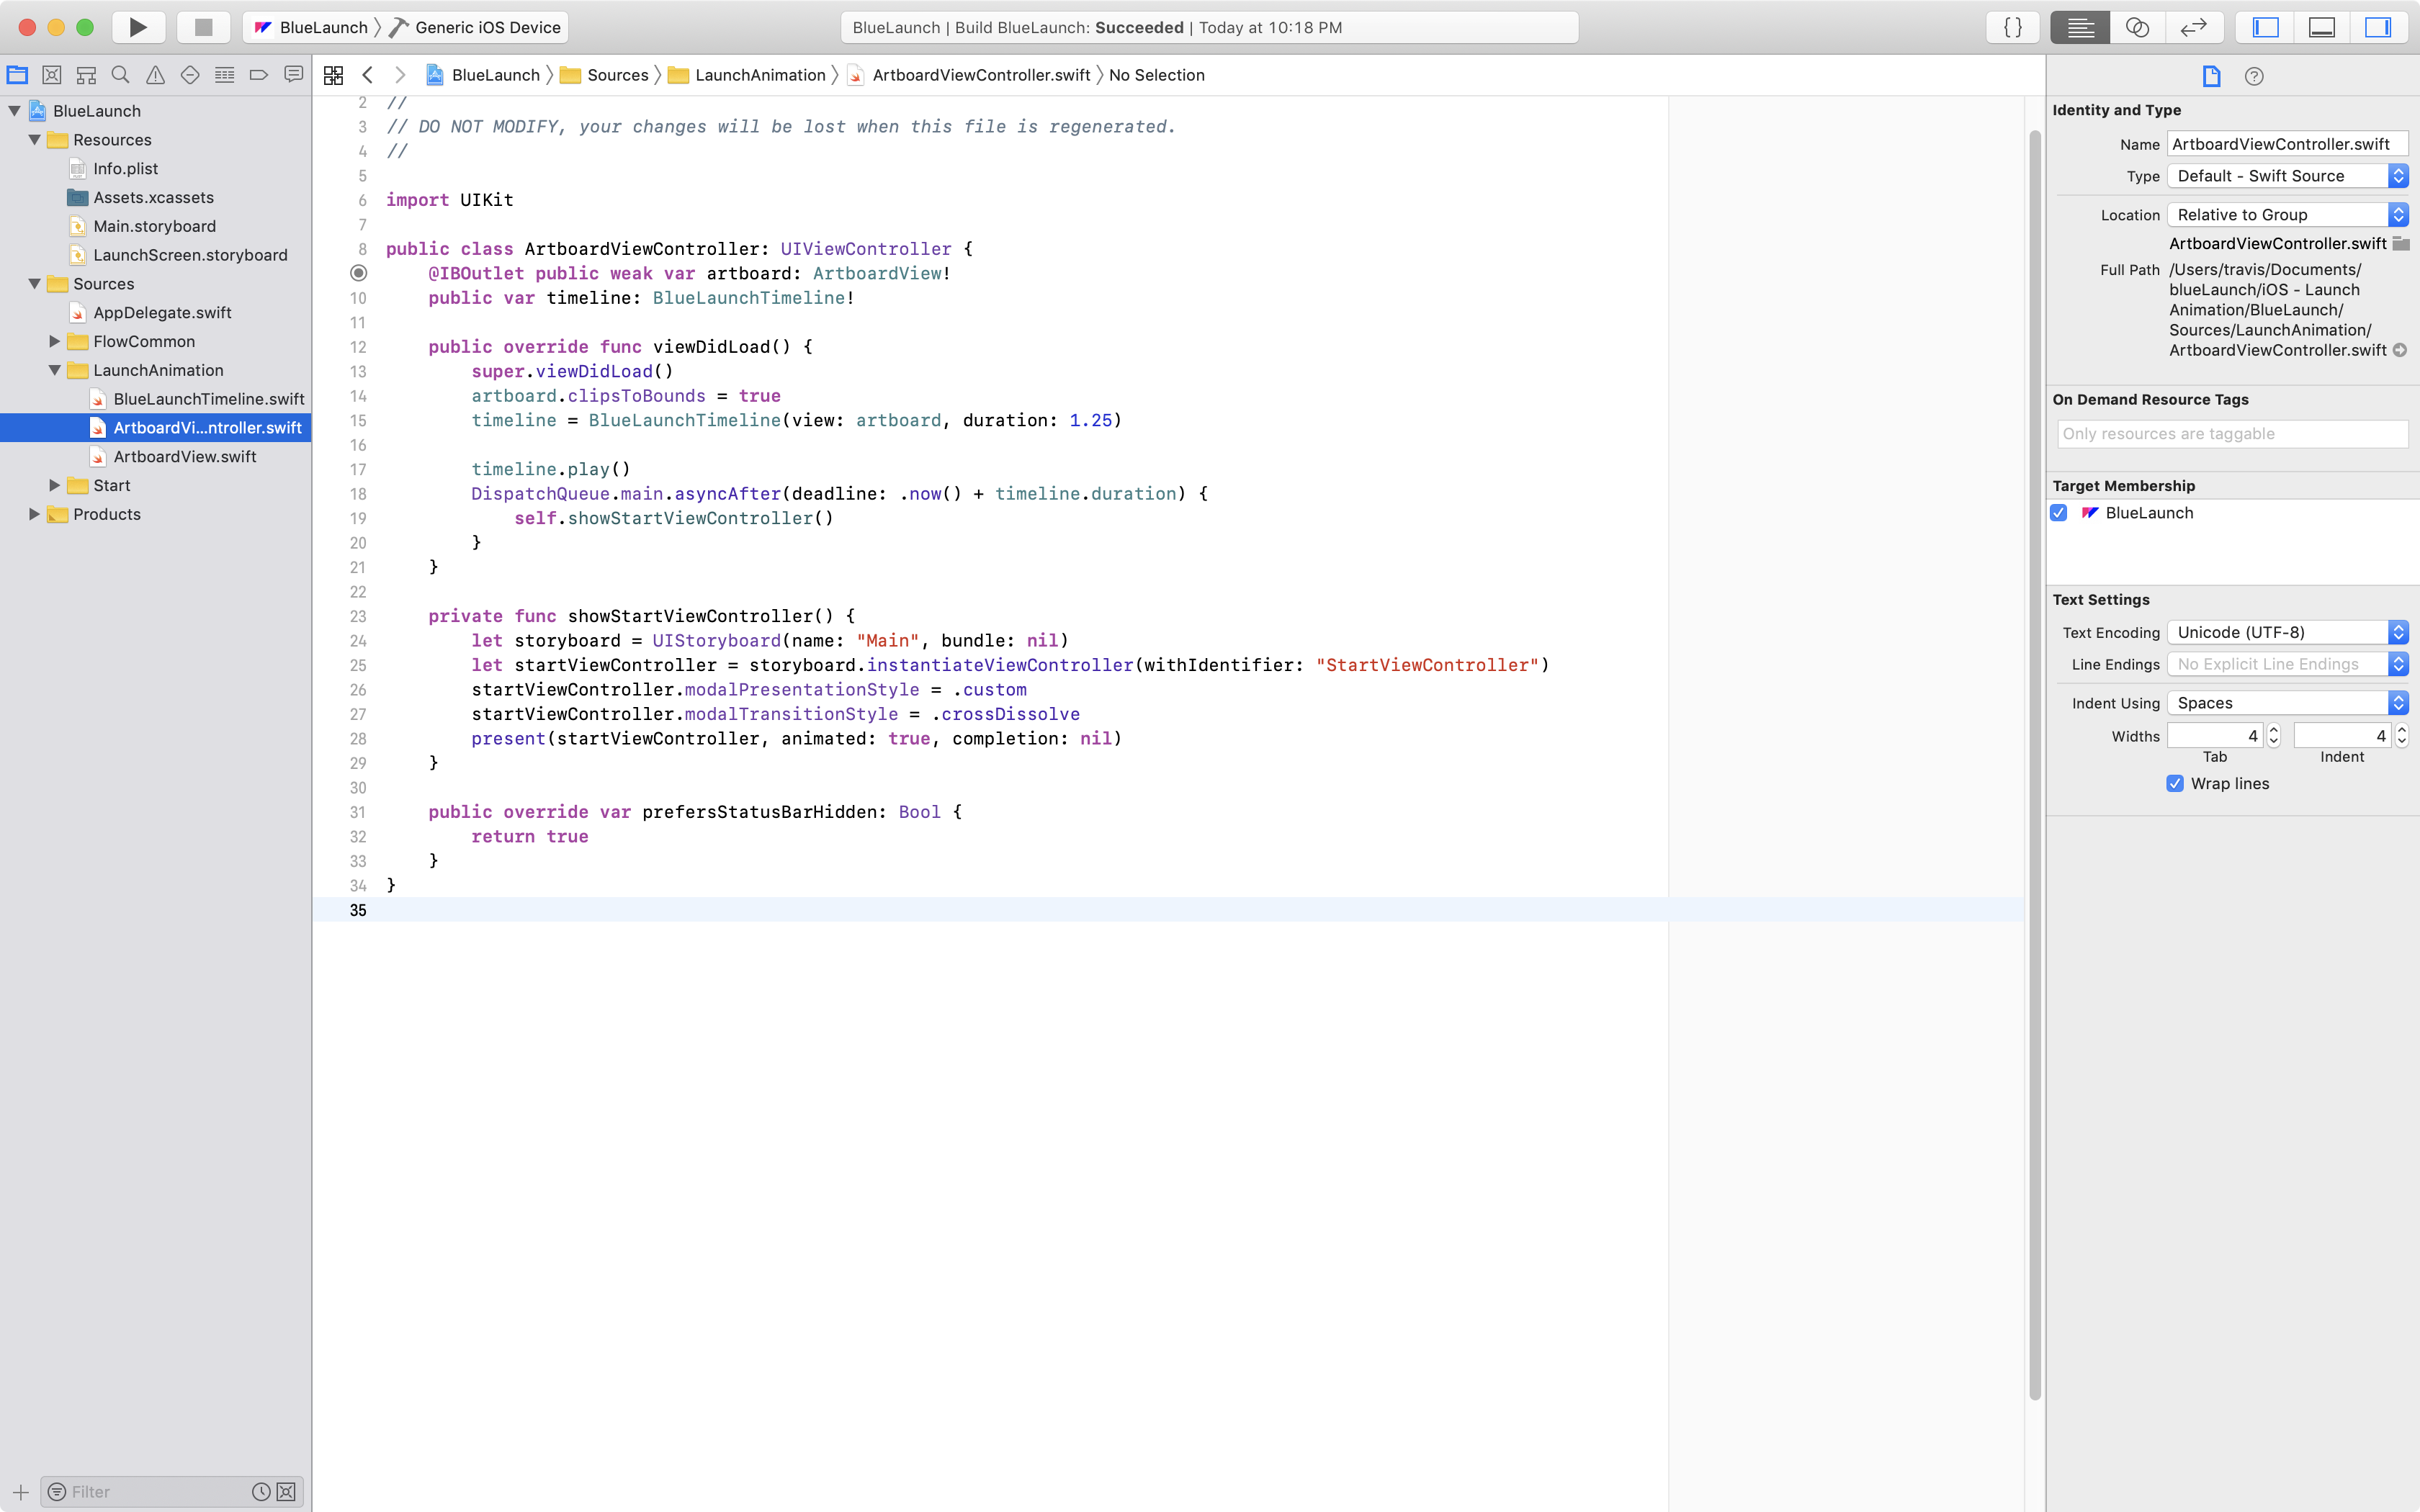
The following two lines trigger the launch animation:
timeline = BlueLaunchTimeline(view: artboard, duration: 1.25)
timeline.play()
This block triggers the transition method:
DispatchQueue.main.asyncAfter(deadline: .now() + timeline.duration) {
  self.showStartViewController()
}
And, this method handles transitioning to the first view of the app:
private func showStartViewController() {
  let storyboard = UIStoryboard(name: "Main", bundle: nil)
  let startViewController = storyboard.instantiateViewController(withIdentifier: "StartViewController")
  startViewController.modalPresentationStyle = .custom
  startViewController.modalTransitionStyle = .crossDissolve
  present(startViewController, animated: true, completion: nil)
}
When this is added to an existing project, the last method needs to have the identifier customized. For example, "StartViewController" will change to something like "ApplicationInitialViewController"
ArtboardView.swift
This file contains all the layout for the launch animation’s view.
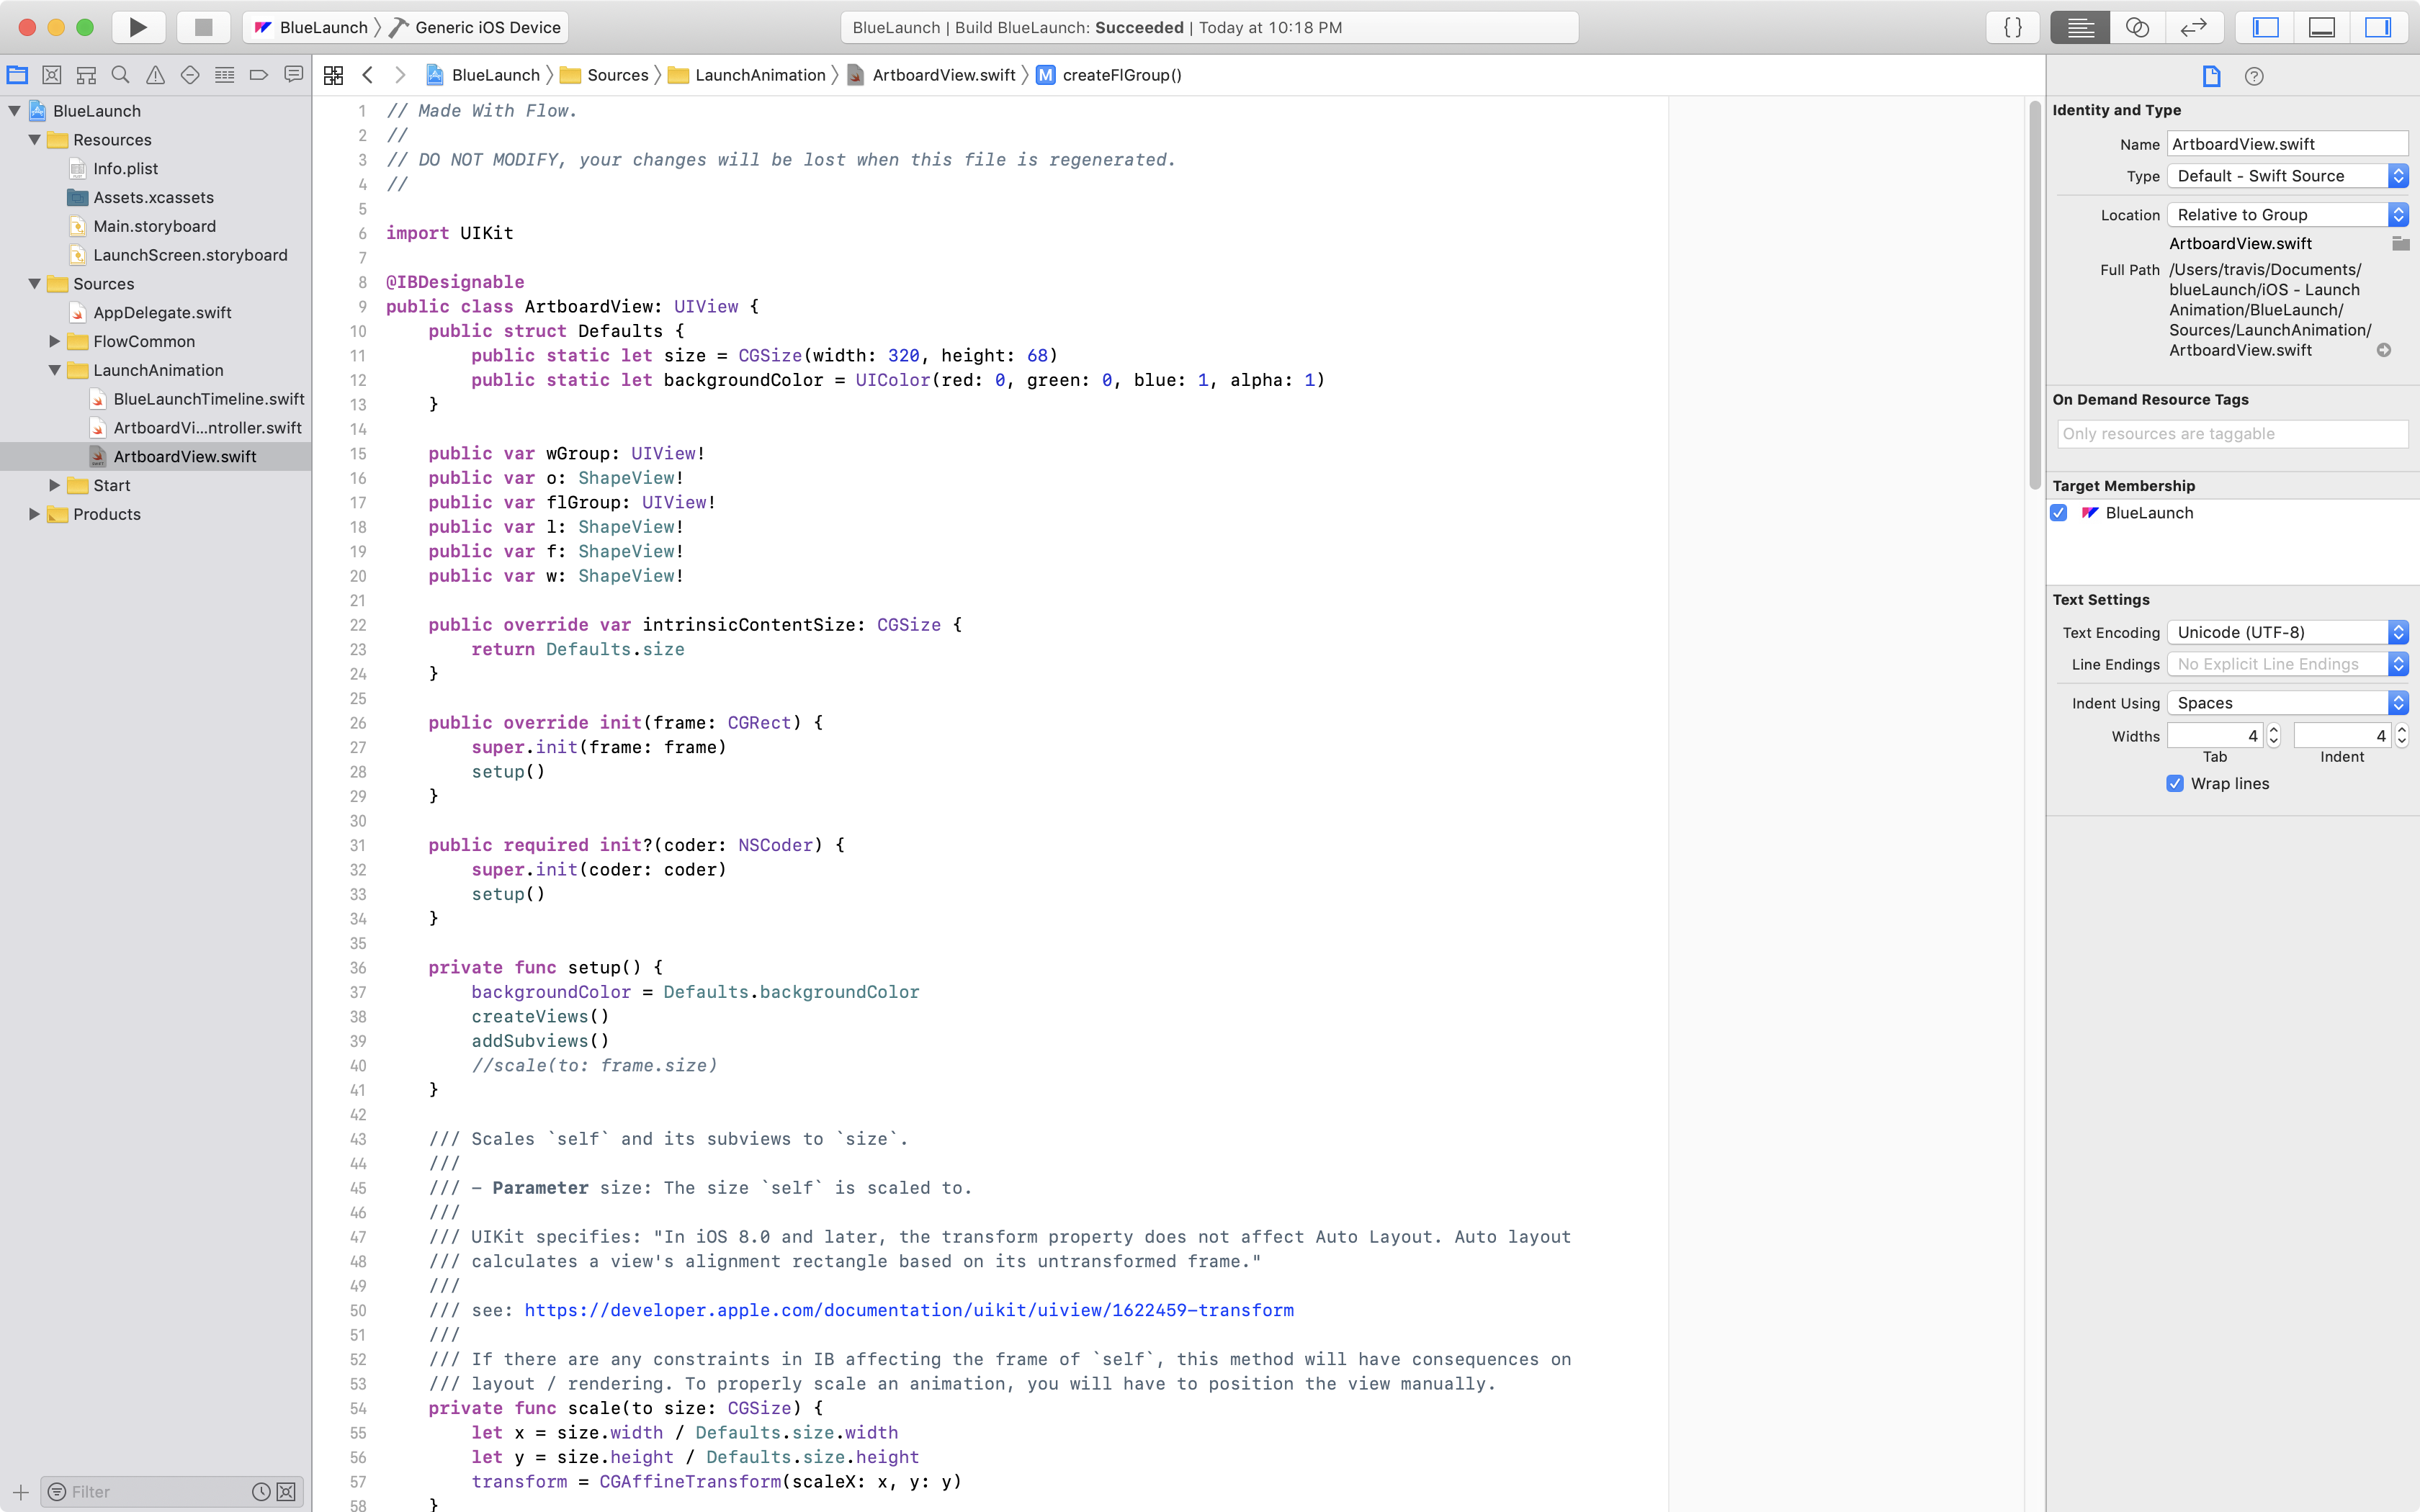
For example, you’ll see that the file contains variables for the layers that already exist in the Flow file used to generate this project:
public var wGroup: UIView!
public var o: ShapeView!
public var flGroup: UIView!
public var l: ShapeView!
public var f: ShapeView!
public var w: ShapeView!
There are also various methods, like the following, that create and style each of the layers in your animation:
private func createL() {
  l = ShapeView(frame: CGRect(x: 102, y: 30, width: 60, height: 60))
  l.backgroundColor = UIColor.clear
  l.layer.shadowOffset = CGSize(width: 0, height: 0)
  l.layer.shadowColor = UIColor.clear.cgColor
  l.layer.shadowOpacity = 1
  l.layer.position = CGPoint(x: 102, y: 30)
  l.layer.bounds = CGRect(x: 0, y: 0, width: 60, height: 60)
  l.layer.masksToBounds = false
  l.shapeLayer.fillRule = CAShapeLayerFillRule.evenOdd
  l.shapeLayer.fillColor = UIColor.white.cgColor
  l.shapeLayer.lineDashPattern = []
  l.shapeLayer.lineDashPhase = 0
  l.shapeLayer.lineWidth = 0
  l.shapeLayer.path = CGPathCreateWithSVGString("M56.682,60s0,0,0,0c0,0,-53.36,0,-53.36,0 -1.822,0,-3.322,-1.5,-3.322,-3.322l0,-53.36c0,-3,3.536,-4.393,5.679,-2.357l53.36,53.36c2.036,2.143,0.643,5.679,-2.357,5.679")!
}
Timeline.swift
This file contains the code that specifies the timing and property changes in your animations.
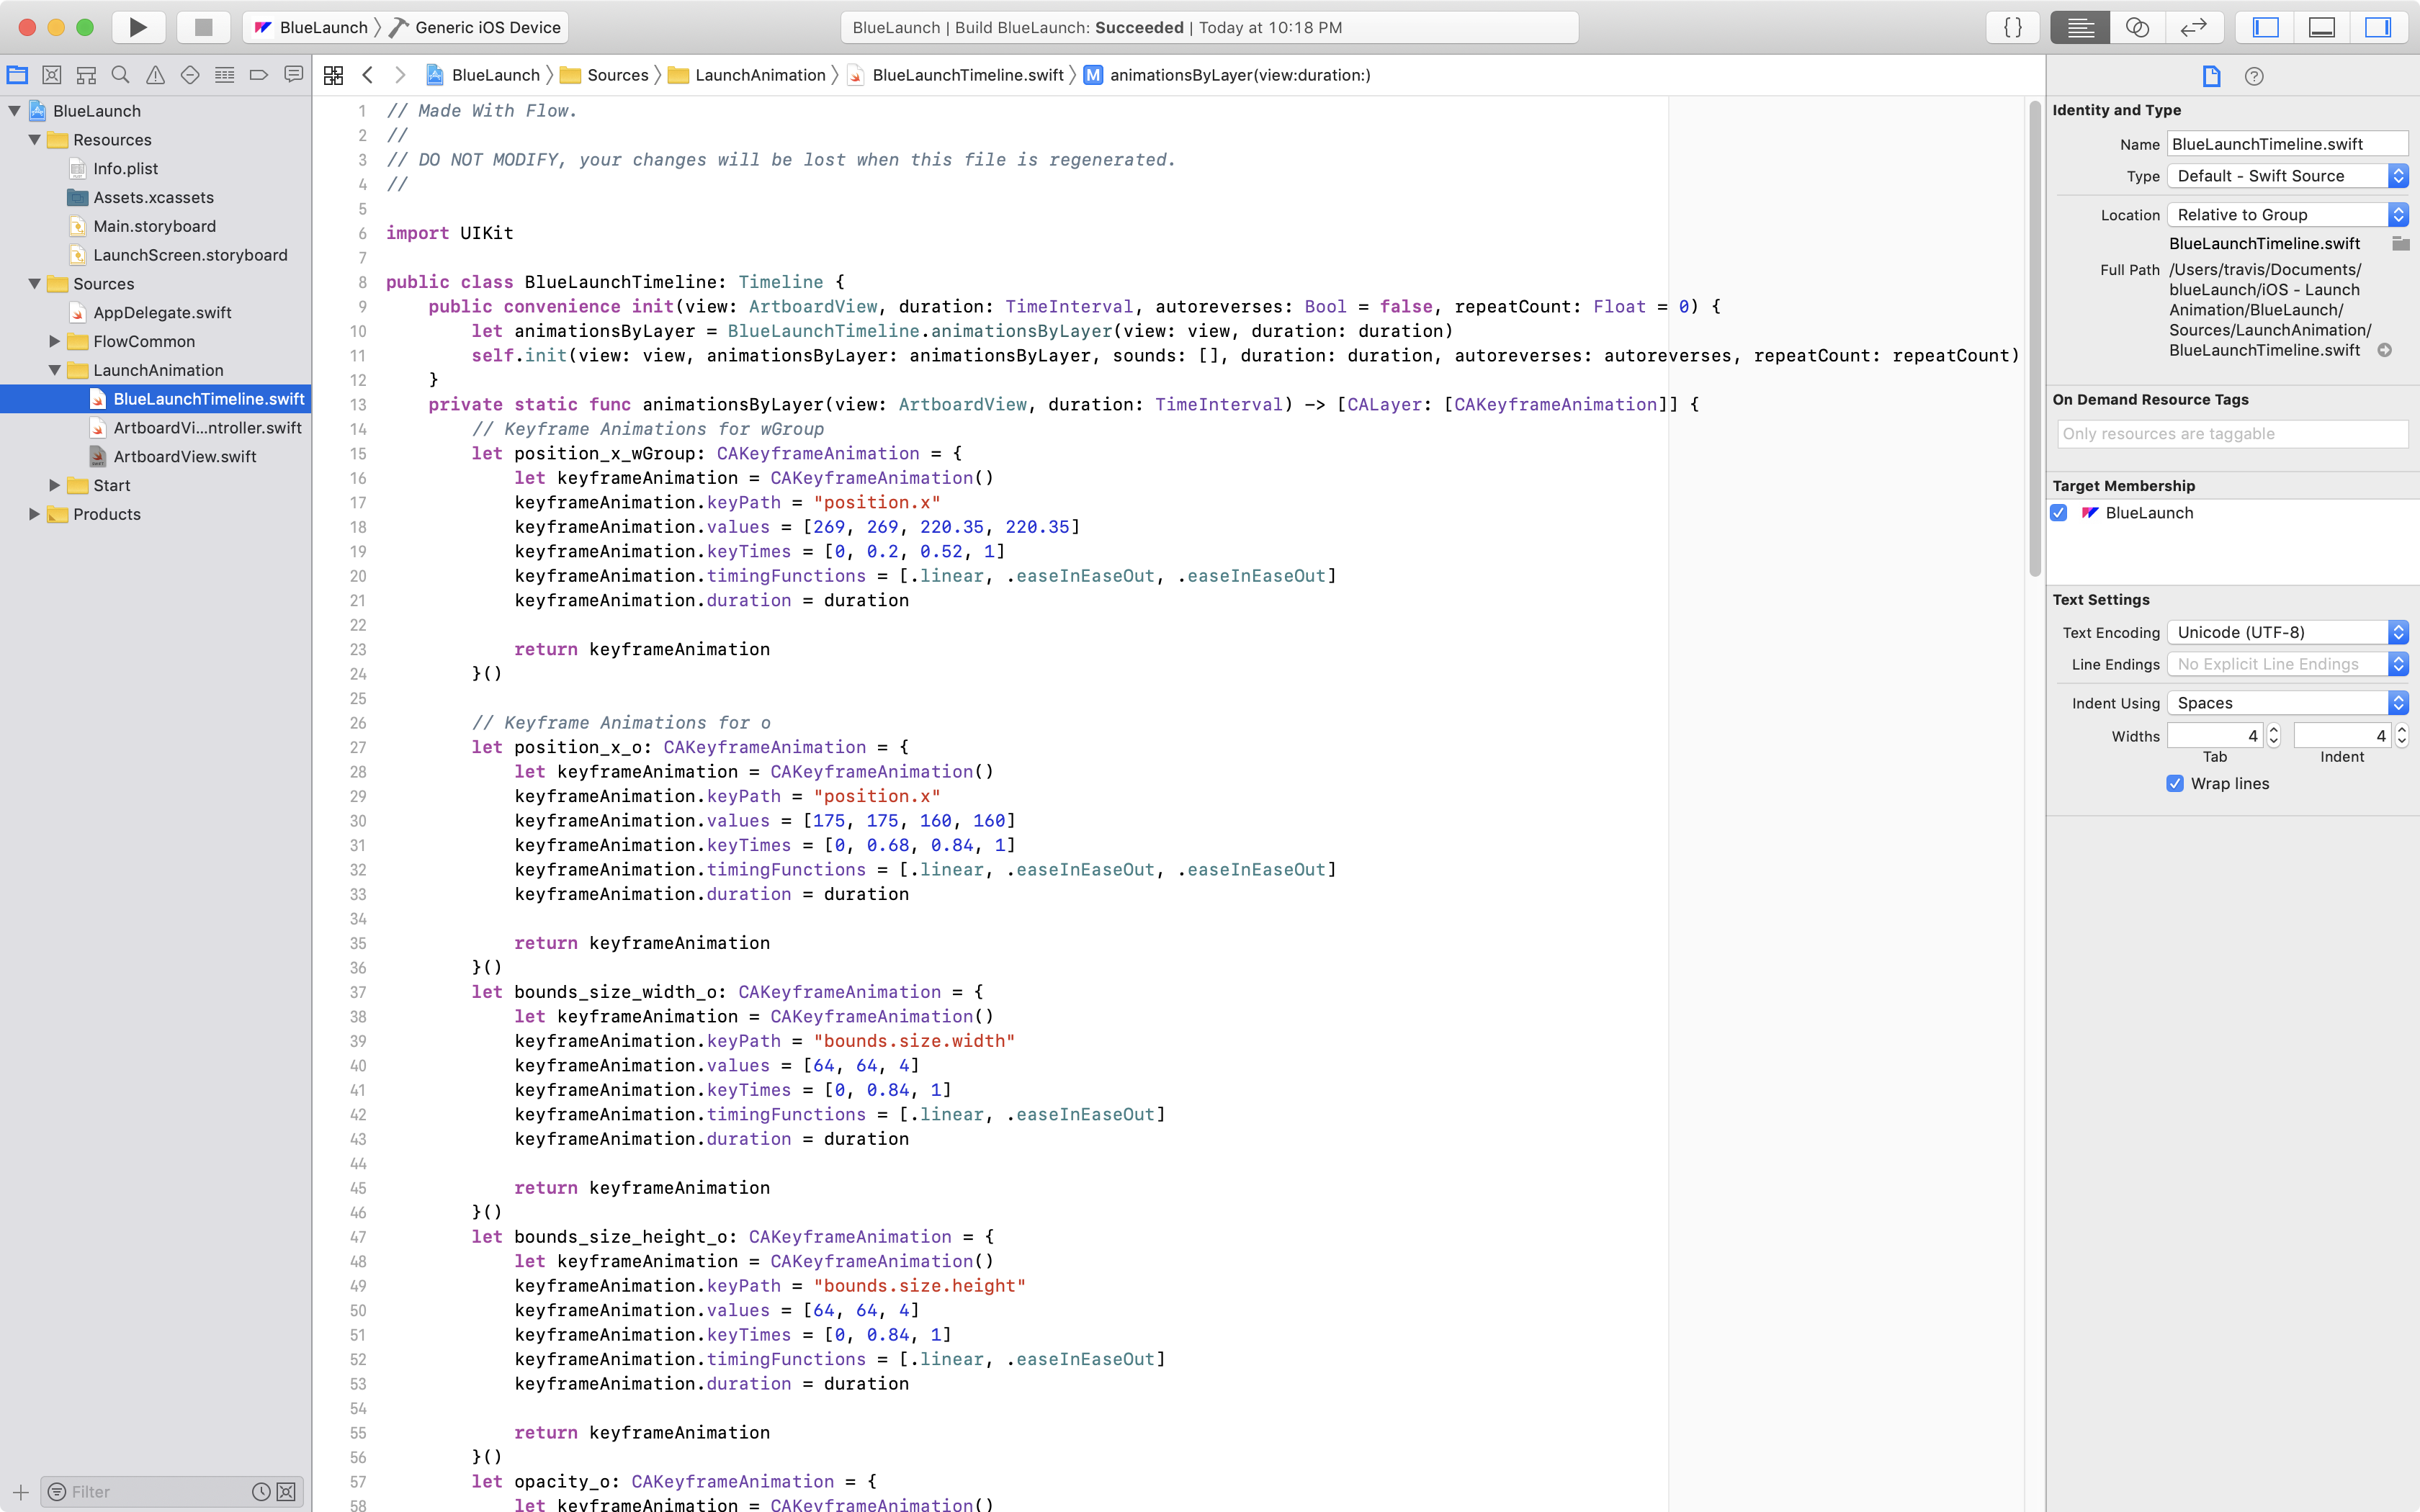
The file will be named according to the name of the timeline you exported from Flow – in this case: BlueLaunchTimeline.swift.
For example, you’ll see that the file contains a method for each property that is animated – i.e. there should be one for every track in your Flow file.
A method from the timeline looks like this:
let opacity_o: CAKeyframeAnimation = {
  let keyframeAnimation = CAKeyframeAnimation()
  keyframeAnimation.keyPath = "opacity"
  keyframeAnimation.values = [1, 1, 0]
  keyframeAnimation.keyTimes = [0, 0.84, 1]
  keyframeAnimation.timingFunctions = [.linear, .easeInEaseOut]
  keyframeAnimation.duration = duration

  return keyframeAnimation
}()
Start
The files in the start folder can be forgotten about when integrating this into another project. These files are solely here fo the layout and design of the simulated “first view” of an app.